Have you seen this trend? Stripping furniture with oven cleaner? I admit. I thought it sounded a bit odd; I mean, oven cleaner is supposed to clean your oven, right? Who even thought to try stripping furniture with it? I saw this idea while scrolling through my Instagram feed and every time, the results were incredible. I had to give it a try… and luckily, I had the perfect piece to test it on. Take a look…
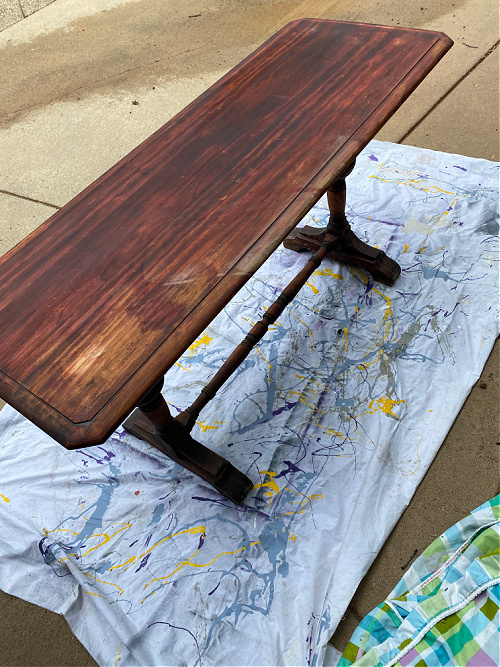
About a year ago, my husband found an old wood table on Facebook Marketplace. It was free, so he brought it home to see if I could restore it in some way. (Why I never took a picture of it in its original state is beyond me, but it was in very rough shape.) The sealer was peeling off and it was discolored… but the shape was absolutely gorgeous! The first thing I did was try stripping it with a conventional paint stripper. I honestly thought that was all I was going to need to do. Wrong! It was a total disaster. It removed some of the peeling sealer, but the table had a deep red stain and it looked bad. So, I put it back into the garage and it sat for the next year.
Fast forward to present day. I started seeing post after post about stripping furniture with oven cleaner. I had to give it a try. After all, what did I have to lose?
What You Need to Strip Furniture with Oven Cleaner
Affiliate links may be used. Please see our advertising disclosure for more information.
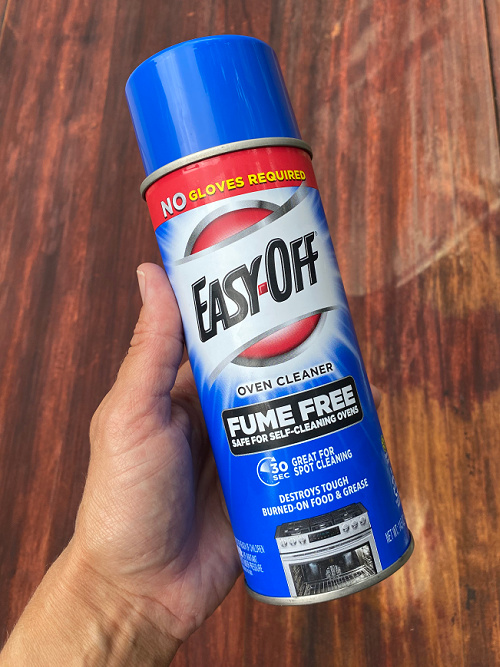
- Easy Off Oven Cleaner– This is the only brand I tried, but after researching a bit, it seems other oven cleaners don’t work as well, so I’d stick with this one.
- Dish Soap
- Scrubber Brush
- Hose– I would highly recommend using a spray nozzle for a more concentrated spray
- Clean Towels– Old, worn ones you don’t care about 🙂
- Magic Eraser– You may need to use a Magic Eraser for touch-ups. More on that below.
- High Grit Sandpaper– I used 320 grit, but I think anything 220+ would be fine.
- Dusting Mitt
How to Strip Furniture with Oven Cleaner
Before You Start
Make Sure The Piece is Right for This Method
First thing’s first: Make sure the piece you want to strip is right for this method. (See the FAQ section of this post for more information.) Once you have ensured your piece is a good fit for stripping with oven cleaner, get set up outside.
Protect The Surface
There is a possibility the stain coming off your piece will stain whatever is underneath it, so I recommend setting the piece in an area that won’t hold stain. We put ours on an old sheet while spraying with the oven cleaner, and then moved it to a gravel area of our driveway to rinse everything off.
Protect Yourself
You also need to protect yourself while working on your piece. Please wear a mask, gloves, and safety glasses for this project.
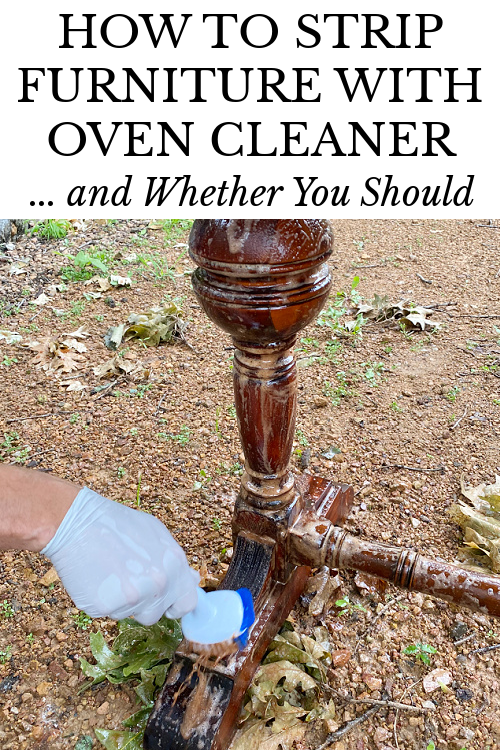
Step 1: Spray Piece with Oven Cleaner
Once you have all your protections in place, spray a nice thick coat of oven cleaner on your piece. Remember to spray into all the nooks and crannies as well.
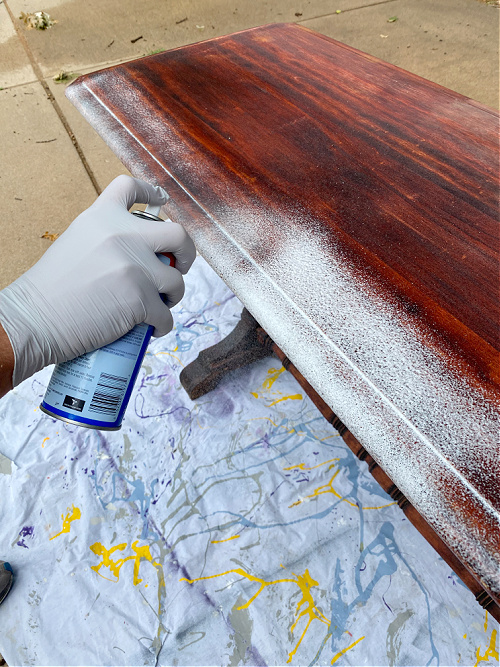
Initially you may see some bubbling, but it tends to die down after a minute or two.
After the entire piece is covered in oven cleaner, allow it to sit for 20 minutes. If you are working in the sun, move your piece to the shade to avoid the oven cleaner drying out during this period.
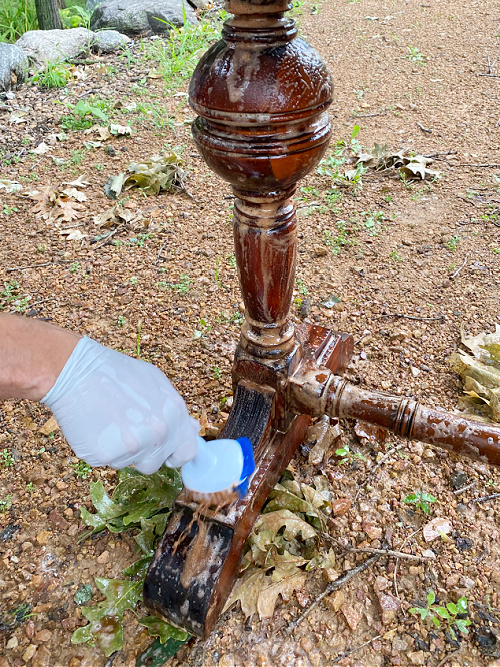
Step 2: Scrub Piece with Warm Water & Dish Soap
Once your 20 minutes is up, grab a gallon bucket (I used an ice cream bucket) and fill it 1/2-3/4 of the way with warm water and a little dish soap.
Using a scrubber brush, go over the entire piece, making sure everything gets thoroughly scrubbed.
Step 3: Rinse Piece with A Hose
After everything has been scrubbed with the soapy water, rinse your piece with a hose. As mentioned, I would highly suggest using a spray nozzle for added water pressure.
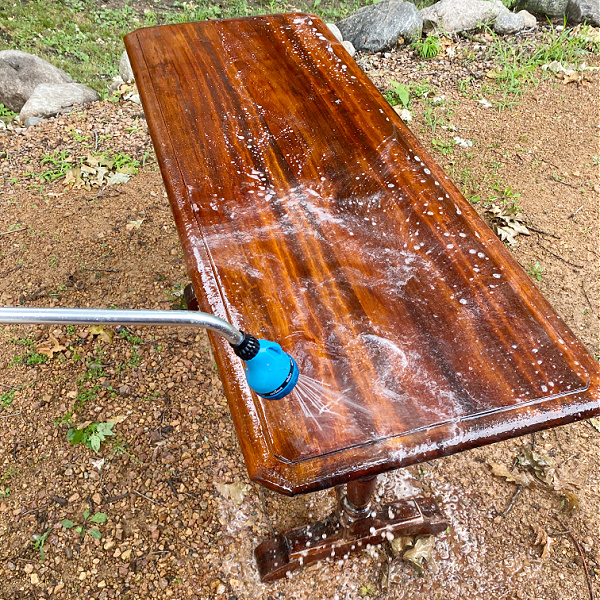
Continue rinsing until the water runs clear. This ensures no oven cleaner or dish soap residue is left on the piece.
Do not worry about the color at this point. It’s bound to be quite dark. The process of drying is where the magic happens.
Step 4: Allow Piece to Thoroughly Dry
After rinsing, use a clean towel (one that’s old and you don’t care about) to wipe down the piece. You do not need to get the piece completely dry; the towel is simply used to remove standing water from the surface.
After going over it with a towel, allow the piece to completely dry. We happened to be working on a cloudy, humid day, so we brought the table inside to dry, but if you’re working on a sunny day, you can allow it to dry outside.
Allow the piece to dry for at least 24 hours before continuing.
Step 5: Repeat Process If Necessary
Depending on how your piece turns out after the initial application, you may need to repeat the previous steps to remove more stain. That’s what we did… while the table had definitely lightened up, there was still a noticeable red tint to it, so we repeated everything once more. You may not need to do this if you were able to achieve the look you want after one application.
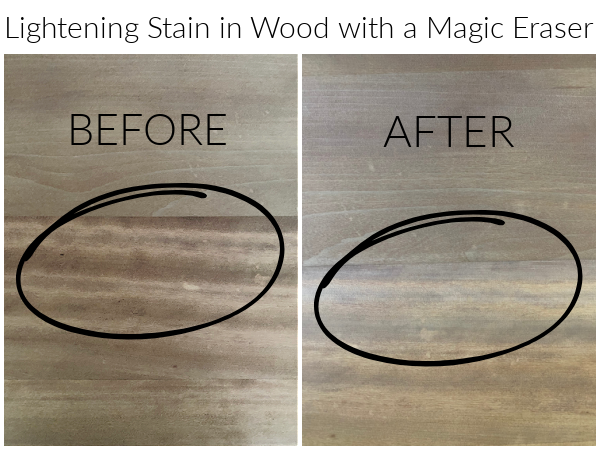
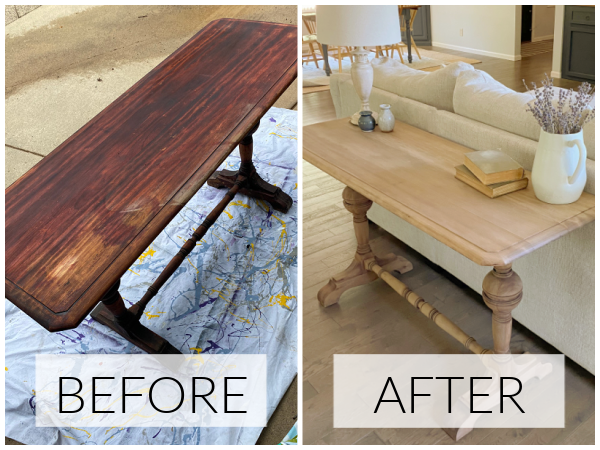
Just so you can see the difference.

Step 6: Touch Up with A Magic Eraser
After the second go ’round, the table was looking amazing, however, there were a few areas on the top of the table that were still holding onto some of the red stain. I didn’t want to repeat the whole process a third time, so I grabbed a Magic Eraser (after receiving a little tip on Instagram) and scrubbed the areas that still needed a little lightening.
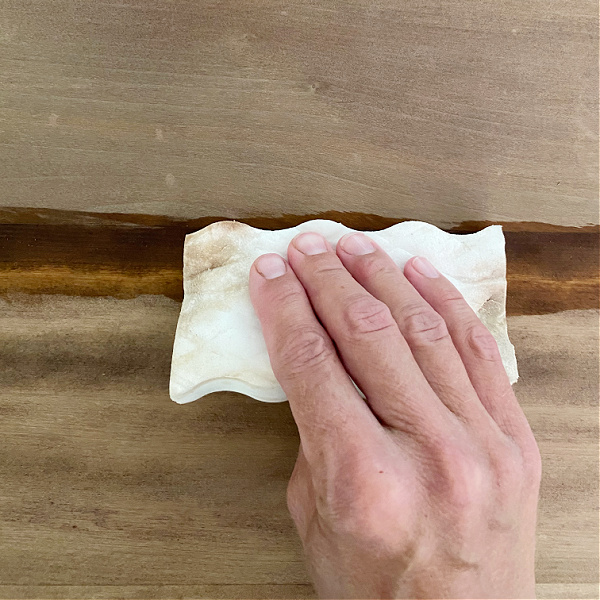
You can see just how much stain the Magic Eraser pulled out.
I used a hair dryer to quickly dry the areas, but you could also let it air-dry.
Step 7: Sand with A High Grit Sandpaper
The last step is to go over the piece with a high grit sandpaper. This will smooth out any imperfections. I did this by hand. No need to get out the sander.

After sanding, remove any dust with a dusting mitt.
Here’s the end result!
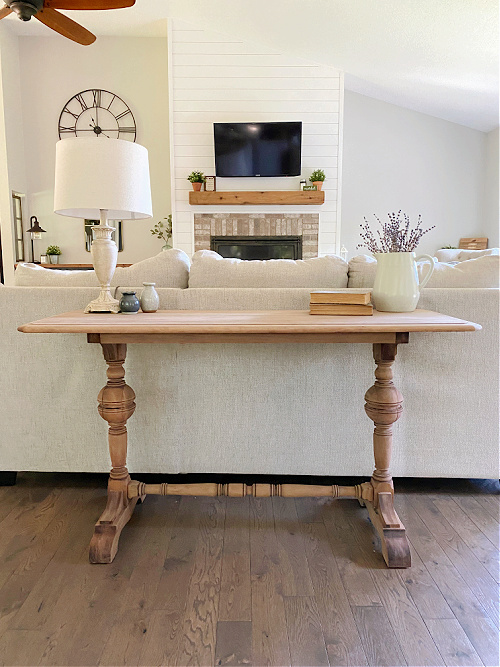
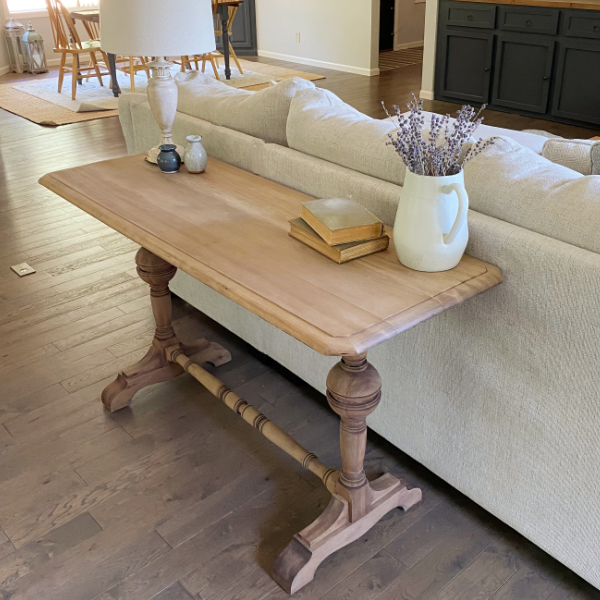
Before & After of Furniture Stripped with Oven Cleaner
Common Question About Stripping with Oven Cleaner
What Are the Benefits of Stripping Furniture with Oven Cleaner?
Why choose oven cleaner over regular paint strippers? Here’s what I found to be true for me.
- Easy– This method involves hardly any work. Even the scrubbing was easy. No elbow-grease required.
- Cleaner– I have used paint stripper and it is a messy process. (Remember, I tried paint stripper first). Regular paint stripper needs to be scrapped off with a putty knife… and it’s a goopy mess.
- Works When Dealing with Surfaces that Are Not Flat– Because I simply had to spray oven cleaner on my piece and rinse with a hose, it easily worked in all the nooks and crannies, as well as the rounded spindles.
- Cheap– We ended up using 2 bottles of oven cleaner (one for each application). At less than $5/can, we stripped this table for about $10.
Can I Strip Paint with Oven Cleaner?
No. While I have not tried this method, the consensus seems to be that oven cleaner does not strip paint from furniture, just stain. If you have a painted piece, it is best to work with a conventional paint stripper like CitriStrip.
Can I Use Oven Cleaner on Veneer?
No. Wood veneer is a very thin piece of wood applied over another material, like plywood or particle board. Because veneer is so thin, the process of rinsing your piece with a hose could cause the veneer to bubble and peel. Therefore, oven cleaner should only be used to strip solid wood pieces.
Can I Use Oven Cleaner to Strip Antique Pieces?
It depends. While stripping with oven cleaner can have amazing results, that’s not always the case. If you would be devastated if the piece you’re working on got ruined, I would definitely not suggest this method. If, however, you have a piece that you tried stripping and it didn’t work (like me), or you are willing to paint it if this stripping method doesn’t work out, then go for it.
Can I Use A Sealer After Stripping Furniture with Oven Cleaner?
My initial idea was to seal the table with Polycrylic, however, after doing a little research, I found that adding a sealer could bring out the red all over again, so I opted to keep it raw wood. If you are using this method on a high-use piece, I have read that you can use a white wash and then add a sealer.
We think you might also love these ideas!
Five Ways to Paint Furniture | How to Hide Wood Grain When Painting Oak | Shiplap on A Budget

Love it? Pin it!
Glad it worked out well!
What’s the benefit of using oven cleaner over regular stripper?
Does it work on polyurethane or would I have to sand first before using oven cleaner?
I absolutely love this idea. I I have an old writing bureau that I’m going to try this on! 8 thanks 😊
Your table is beautifully done.