Paint. It’s the easiest way to change the feel of a room without spending a lot of money. Over the years I have discovered a few tips and tricks for choosing paint colors for your space.

Have you ever thought you were buying the perfect paint color only to have it look awful once applied to the walls? I have been there. And it is so frustrating… Do you start over with a different color? Do you just live with a color you hate? Ugh.
I have painted a whole lot of rooms in my life, and in that time I have discovered a few tricks to choosing paint colors that will actually work in your space.
How to Choose Paint Colors for Your Home
Grab A Lot of Paint Swatches and Look at the Undertones
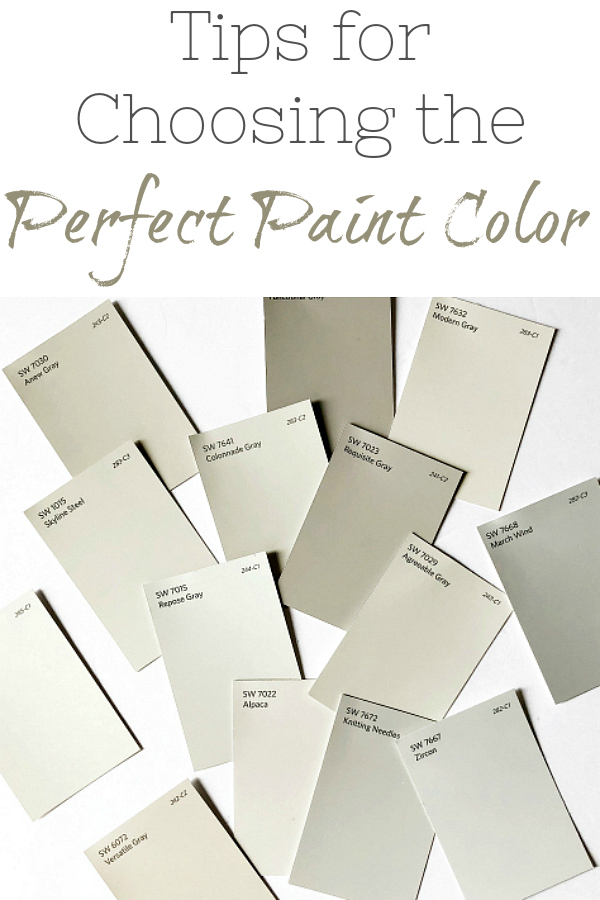
Looking at paint samples in the store can be overwhelming, to say the least. Don’t overthink it. Just grab a ton of swatches in the color tone you are looking for, whether grays, creams, blues or greens. Who cares if you get it home and hate it… that’s what samples are for. Also remember that what you see in the store is not what you’ll see in your home. Paint samples are often lit up by bright halogen lighting with no natural light in sight; unless you’re painting in a similar situation, that color is going to change.
Be aware of undertones. It is incredible to me that there are so many shades of gray, black, white, and beige in this world. Often, the difference is in the undertones; some shades appear warmer as they have a yellow undertone, while others are cool, with blue undertones. When you put the color samples next to each other, you will definitely be able to see the difference.
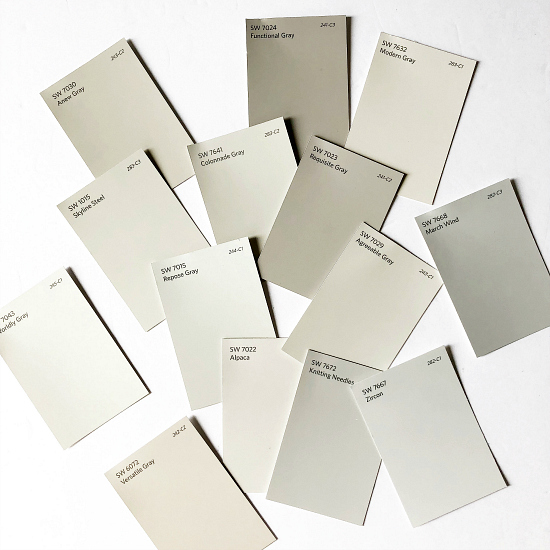
Helpful hint when shopping grays: if you want cooler undertones, look for samples that appear “true gray” on the swatch (often the name of the paint will give you a hint with words like silver or steel). If you want a warmer gray, look for samples that have gray in the name, but appear beige on the sample.
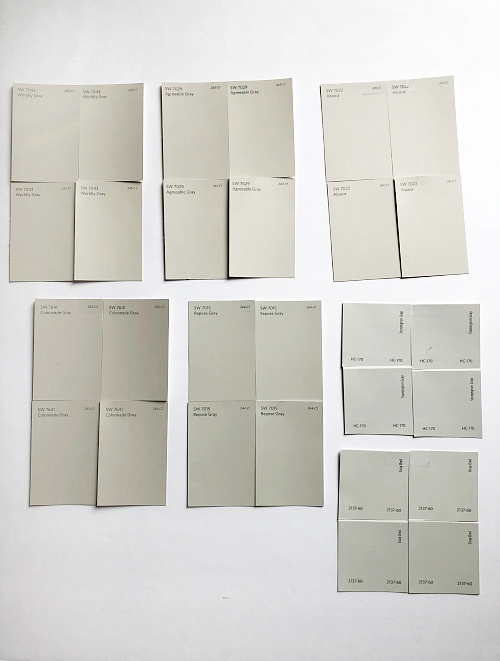
Grab at Least 4 Paint Samples in Every Color You Like…
I have no idea how anyone is supposed to see what a color is going to look like based on a 2″ square, but hey, that’s what they give us, so that’s what we take… that is, until I was at a friend’s house and she had taped 4-6 swatches of the same color together in order to see the color a bit bigger on the wall. Brilliant. So I stole her idea, and now I’m sharing it with you so you can do the same.
Be Patient: Hang Those Paint Samples and Let Them Sit in the Room
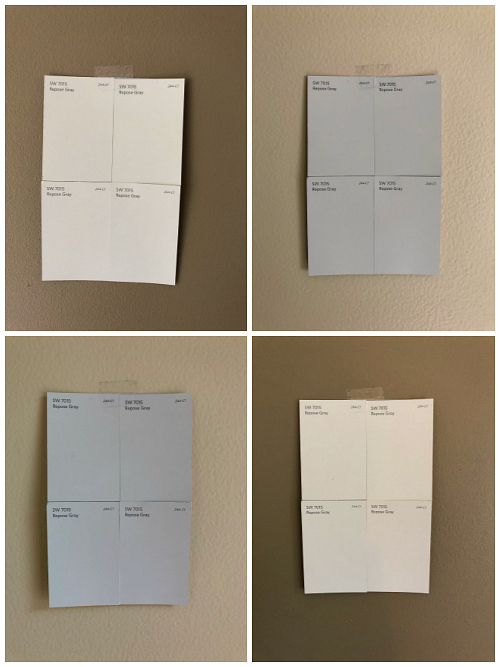
Admittedly, once I decide I want to paint, I tend to quickly choose a color and get started, but this has gotten me into trouble, because the way a paint sample looks on a bright sunny day is very different than what you’ll see on a cloudy day. What you see in natural light is different from what you’ll see in the evening with a lamp turned on. What you see in one part of the room is different from another part of the room. Hang the samples in different places and look at them on sunny days, cloudy days, in natural light, and in evening light. As you change positions and lighting, you’ll be able to narrow down your choices rather quickly because certain lighting will make you realize which colors are not going to work.
See the images below? They are all the exact same paint color and each image is taken within seconds of the others. The difference? Where the sample is placed in the room. Crazy, right? (I did absolutely no editing to the images so you could capture the true difference in appearance.)
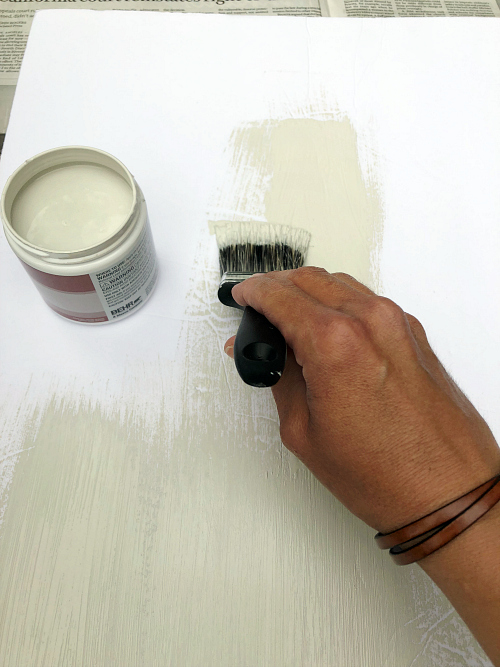
Buy a Sample and Paint Some Foam Board
Once you have your paint narrowed down to one or two colors, grab a sample of paint. Paint samples generally run $3-8 depending on the brand of paint you choose. I know what you’re thinking, you’re going to slap that sample up on the wall, but don’t. Instead grab a piece of white foam board (you can also find them at the dollar store) and paint that instead. Why? Because now you can move that foam board around the room. You can put it above your bed, stand back, and have a look: Does it look amazing with that new comforter? Does it work with that fabulous headboard? Then, you can move it over to your dresser, and make sure it looks just as good. The added bonus is that you are painting the sample onto a white background vs. painting a small area over your current wall color (which could create the wrong impression unless you do 2-3 coats). Also… no weird splotch of paint on your wall until you finally get around to painting 🙂
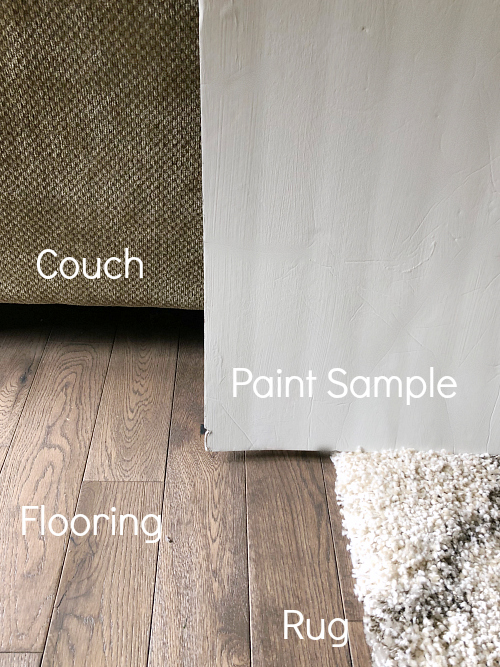
Don’t Forget About Your Trim, Flooring, and Furnishings
Make sure to put the paint sample against your trim. While white trim works with almost anything (aside from, perhaps, another white), wood trim can create some problems, so make sure your color looks good against it. Make sure you test that sample with your flooring and any furnishings as well. Hold it up to your couches, cabinets, bedding, etc. to make sure it doesn’t clash.
Hopefully you found a few tips to help you out when choosing paint colors for your next room.
Love it? Pin it!
Wish I had those tips two weeks ago when I was selecting colors for my kitchen remodel. I wound up happy with my choices (for the most part) but I was in a quandary for WEEKS trying to make a choice. Very good advice. Thank you.
Such smart tips!! Pinned and shared 🙂
Thank you SO much Shannon!!! I truly appreciate it!