Tis the season! Time for a quick tutorial on making your own DIY Christmas scroll from a roll of Kraft paper!
Are you on Instagram? If so, then perhaps you have seen all the gorgeous scrolls containing Christmas music, lyrics, and quotes. I find them to be absolutely stunning.

The one pictured above caught my eye, and I would absolutely pay the $30 price tag for the 15″ version… but I actually want to hang one outside, and I’m a little afraid our winter weather might ruin it. So, I thought I’d try my hand at a DIY version. That way, if it doesn’t make it through the season, I won’t be in tears about it.
What You Need to Make A DIY Scroll

Affiliate links may be used. Please see our advertising disclosure for more information.
- Roll of Kraft Brown Paper– I actually had a roll of wrapping paper I bought for $1 at Target last year. I haven’t seen it this year, but you could certainly look. Be sure to check the sizing for the width and length you want.
- Black Vinyl– I used a matte finish, however, you could go with glossy if that’s your preference.
- Vinyl Cutting Machine
- Transfer Tape– I actually ran out of transfer tape, so I used masking tape instead, and it worked just fine
If you don’t have a vinyl cutter, you can find tons of vinyl Christmas decals here that you can use instead 🙂
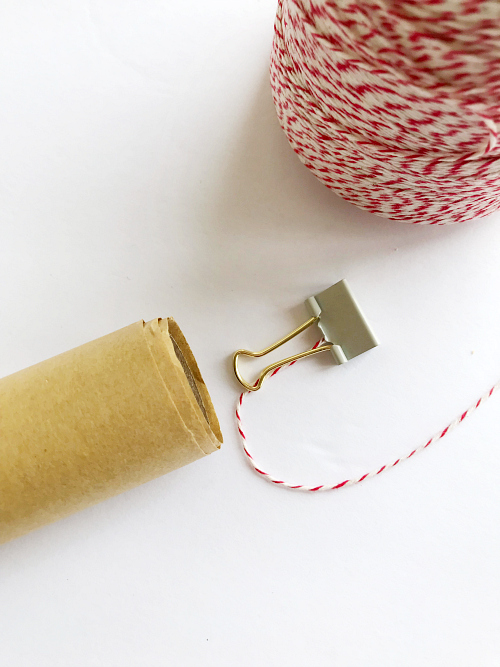
- Baker’s Twine– Regular twine would work as well, but being that this is a “Christmas Scroll”, I went with the red and white baker’s twine.
- Paper Clips
- Black Permanent Marker– You may not need this, but it comes in handy if using a script font. (More on this in the tutorial below.)
How to Make A DIY Christmas Scroll
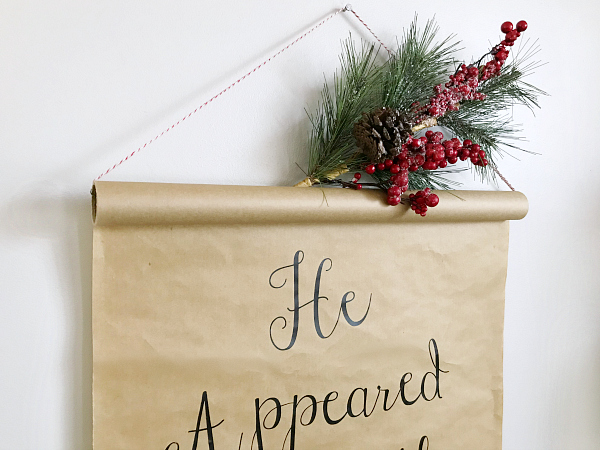
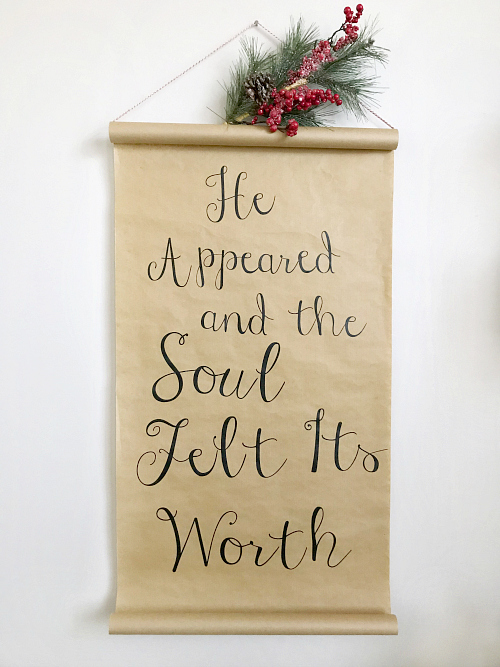
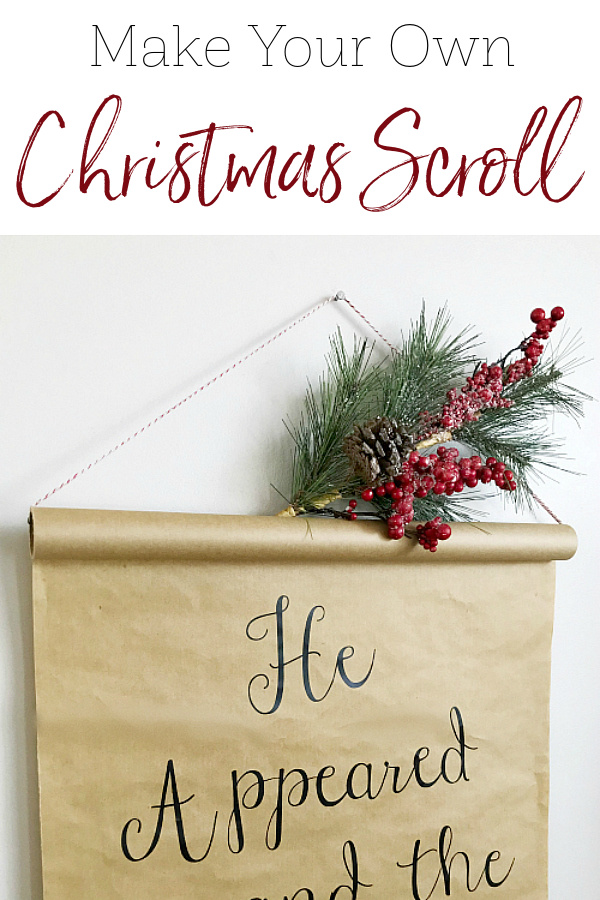
Have you ever listened to a song a hundred times, and one day the lyrics just hit you, and you hear the song in a whole new way? That happened with this Christmas carol two years ago: “He appeared and the soul felt its worth” … and the soul felt its worth. Powerful. So, that was the phrase I chose to use for this scroll, however, you do you and choose something that speaks to you… It doesn’t even have to be related to Christmas: a line from a poem, a sentence from your favorite book, a quote, or another song lyric.
Once you know what you’d like on your scroll, find a font you love and create your cut file in the program that came with your vinyl cutting machine.
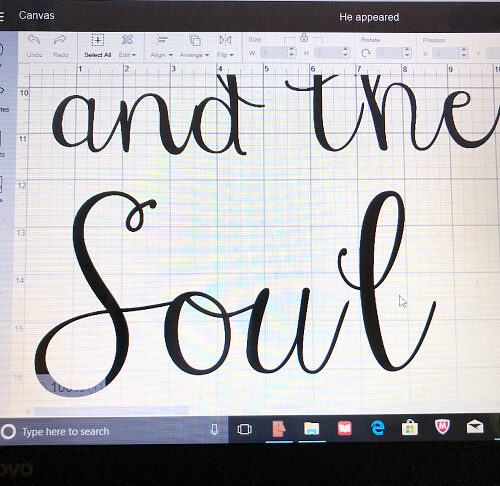
For reference, I used the Janda Stylish Script font (which you can download here for personal use). Remember that you can do cuts on multiple pieces of vinyl, so if your scroll is (for example) 30″ wide, you don’t have to limit yourself to the 12″ sheet of vinyl. You can also break up a word if you need it in a larger font, and piece it together on your scroll. (There are also 24″ vinyl cutting boards)
While your vinyl is being cut, roll your paper at the bottom to create that “scroll look”, and secure it with paper clips in the back, so they are not visible. Do this to the top as well so the scroll stays in place once hung.

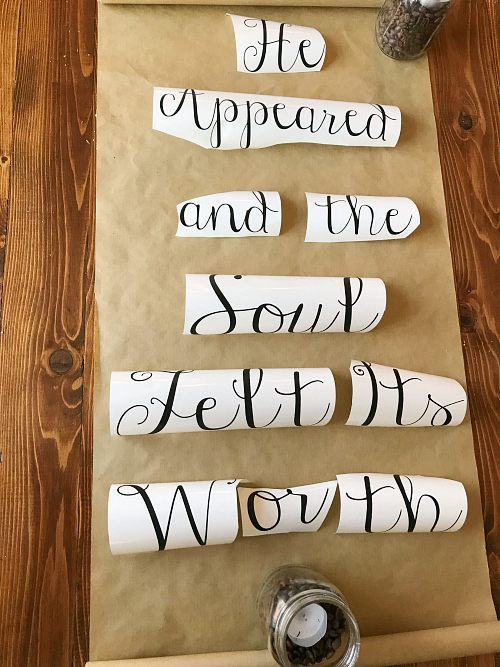
Once your vinyl is cut, peel away the background to reveal your wording and lay it out on your scroll until you’re satisfied with the placement. It helps to have something heavy holding your scroll open. (I used some coffee bean candles I had on my table, but canned goods would be a great option as well 🙂 )
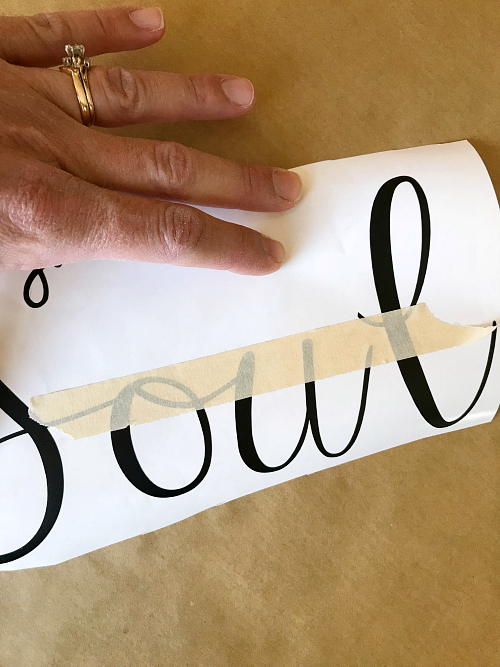
Using transfer tape (or masking tape in my case 🙂 ), peel the words and adhere them to your scroll. The reason you want to use transfer tape is to keep the spacing correct, and also to keep your letter pieces together (for example, dots on your i’s). If you decide to go the masking tape route, you only need to apply it over a portion of the lettering, making sure to get any potentially stray pieces.
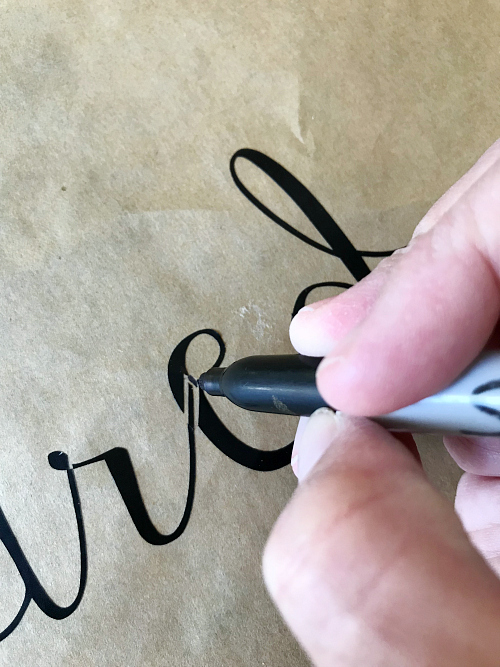
Because of the font I used, the cuts from one letter go into the letter next to it, and sometimes a little piece will not line up quite right. I just fill in any gaps (I had a total of two) with a black permanent marker.
***UPDATE: I later learned how to group letters together so you wouldn’t need to do this step.
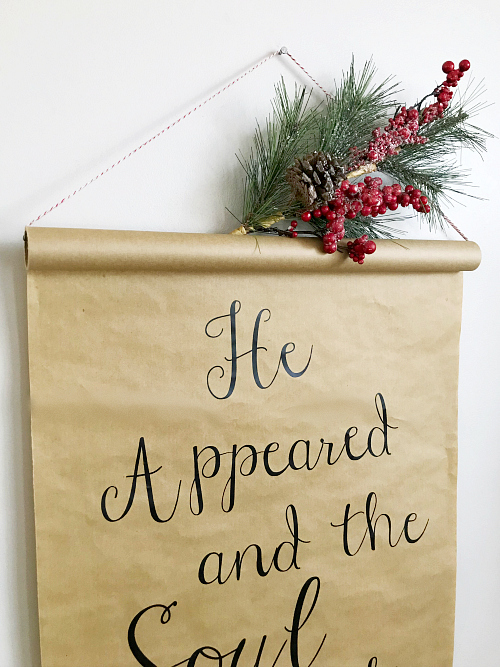
Once your lettering is in place and lookin’ good, grab your baker’s twine and run it through the top of the roll, and tie it off to create your hanger. Because baker’s twine isn’t real thick, I looped it through 3 times. If you’re having trouble looping the twine through (like me), add a small binder clip to the end of the twine to give it a little weight as you thread it through 🙂
You can certainly add some greenery to spruce it up for the holidays, or just leave it plain.
How cute is this DIY Christmas scroll? I am so excited to get it hung out on our porch for the season!
Love it? Pin it!
Leave a Reply