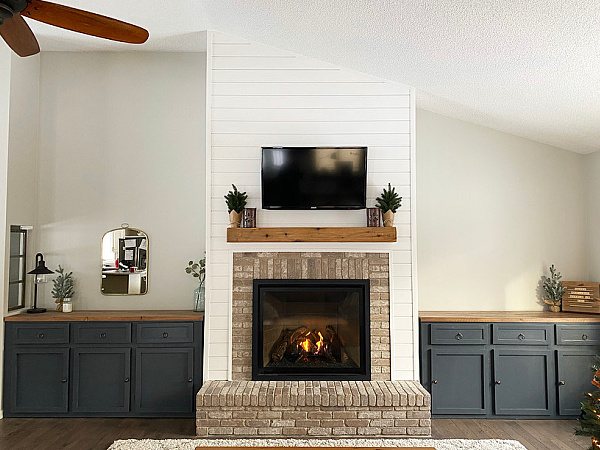
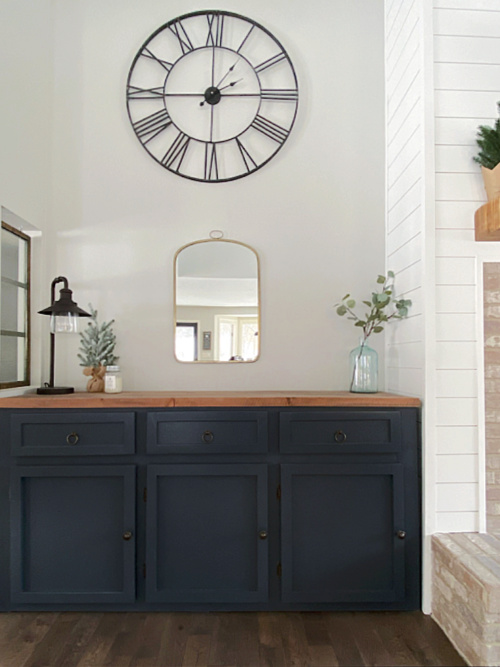
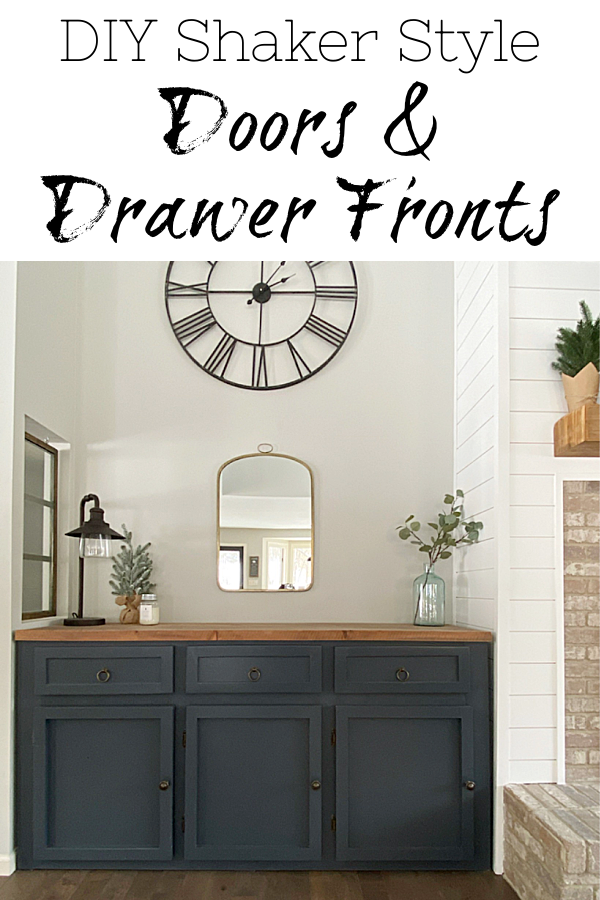
We are currently working on our laundry room for the $100 Room Challenge, and one of the things we wanted to do was hide the utility sink behind a faux vanity. As I was writing the post on creating this faux vanity, I thought it might be best to do a separate post on how to make DIY Shaker Door and Drawer Fronts. Trust me, we had a lot of practice as we tackled our living room fireplace surround, making a number of shaker doors and drawers for two cabinets we built.
Shaker style doors and drawers have a very simple design with raised trim around the edges and a flat surface in the center. This makes it fairly easy to create your own doors and drawers.
What You Need to Make DIY Shaker Doors and/or Drawer Fronts
Affiliate links may be used. Please see our advertising disclosure for more information.
- Underlayment– This is a thin 1/4″ plywood
- Wood for Trim- Our trim pieces were 1 3/4″ wide x 3/4 ” deep
- Table Saw– For Drawer Fronts
- Miter Saw
- Circular Saw
- Wood Glue
- Wood Clamps
- Nail Gun
- Wood Filler
- Putty Knife
- Sander
- Knobs and/or Pulls
How to Make Shaker Doors and Drawer Fronts
Please know that my husband is the builder, and I am the sander, primer, painter, everything-elser. While I tell him I need pictures for these blog posts, he often works so hard and fast that he forgets to let me know when he’s moving onto the next step, therefore, I apologize for the lack of visuals in this post, as well as my poor attempt at editing photos to show you what on earth I’m trying to explain. If you have questions, please feel free to ask and I’ll get back to you as soon as possible.
This post is broken into two “assembly sections”. One section walks you through the DIY Shaker Door tutorial (as this is a little easier to accomplish) and the other section will go through the DIY Shaker Drawer Fronts.
How to Make Shaker Doors
Start by cutting your trim pieces to size using a miter saw. Below are the measurements we used for our fireplace surround, however, you can certainly adjust the measurements to fit your piece.
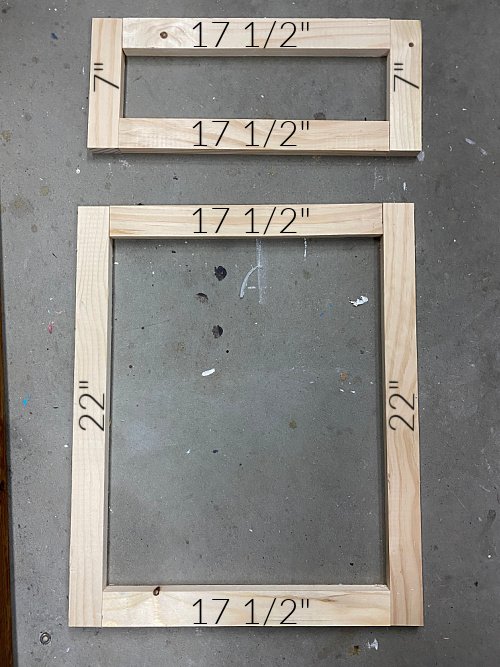
Using a Circular Saw, cut your piece of underlayment to size, so it fits squarely under the trimmed frame. In our case the underlayment was cut to a 22 x 20″ piece
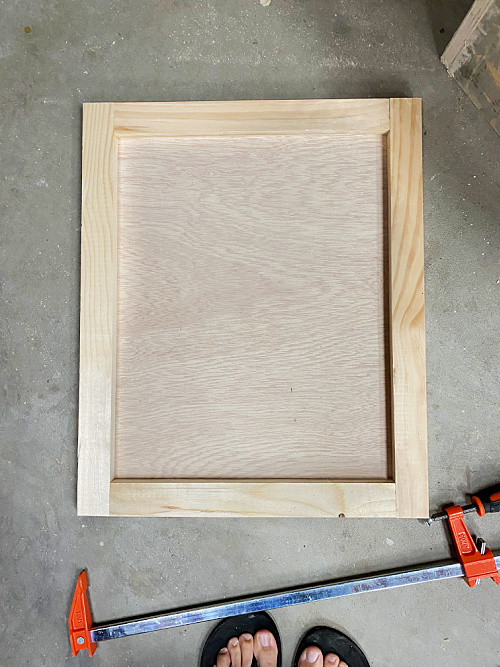
Use wood glue to attach your wood trim pieces together at the seams, then clamp them with wood clamps until the glue has dried.
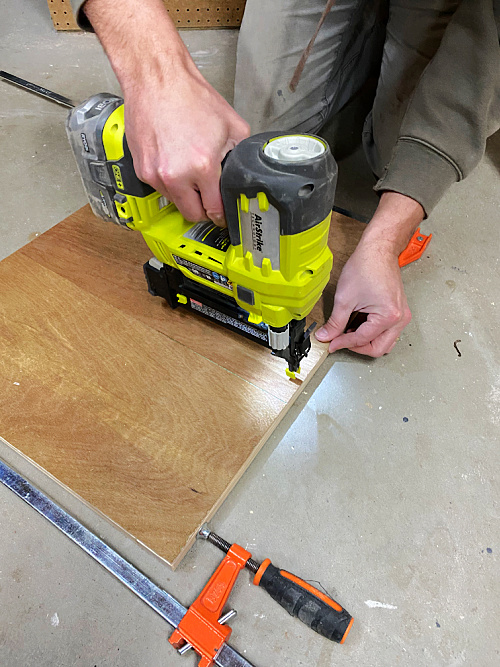
Once the glue has dried attach your underlayment piece to the back of the frame using a nail gun.
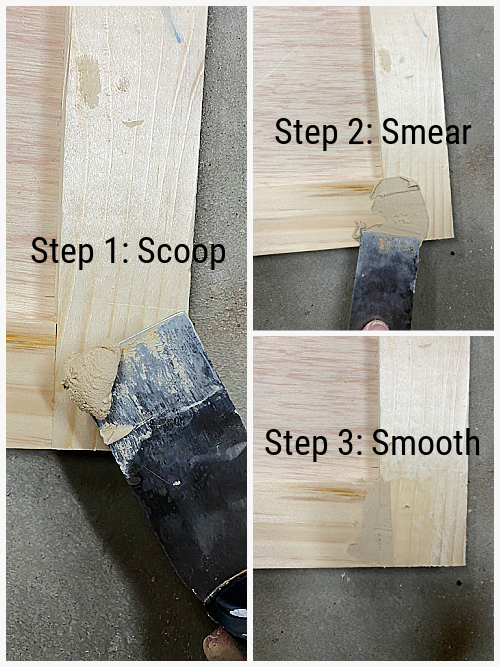
After your door is assembled, use wood filler along the seams (and anywhere else you notice imperfections). Simply grab a putty knife and add a bit of wood filler to it. Smear it into the seams and scrape away any excess.
Allow the wood filler to thoroughly dry and then sand the door with a sander*. I always start with a 120 grit sandpaper, followed by a 220 grit.
*Remember to wear a dust mask and eye protection when sanding.
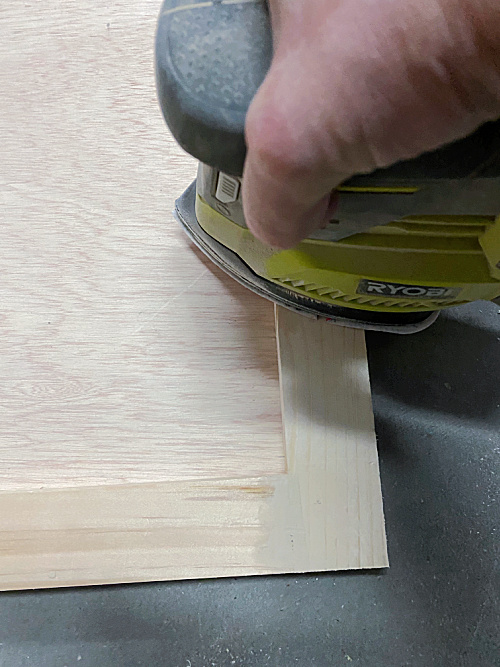
Before painting your door, clean off your piece with a microfiber dust mitt and/or a damp rag. This removes the dust created from sanding, allowing for a smooth finish.
You are now ready to prime and paint your doors. After the paint has dried, go ahead and add your knobs and/or pulls.
How to Make Shaker Drawer Fronts
While this tutorial is similar to the one above, there are some big differences. Just like you did for the door, you will need to cut your trim pieces first. Again, your measurements may be different than ours depending on your piece. As a reminder, here were the measurements we used.
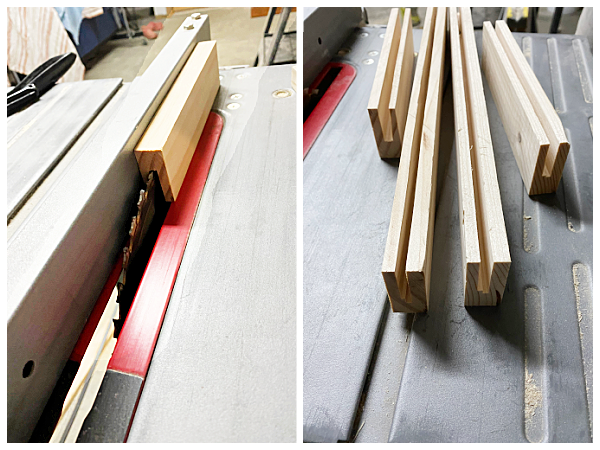
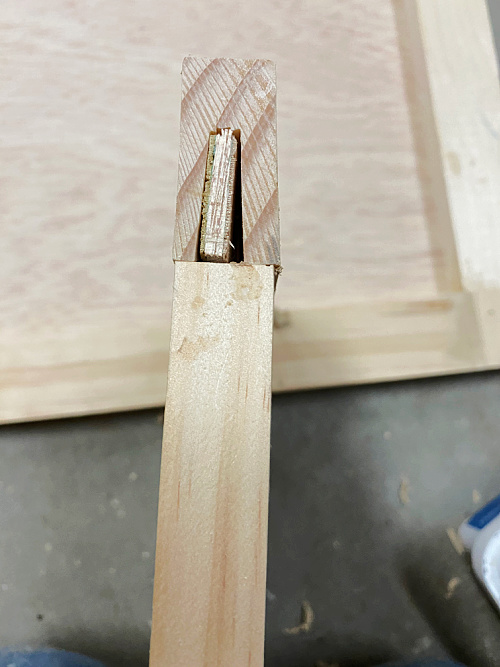
This is where the directions change a bit. Because you want your underlayment to sit in the middle of your drawer front (vs on the back), you will need to etch out a groove in your trim pieces for the underlayment to nest in. We did this using a table saw, setting it at just over half the height of the trim, and running the edges through. If you decide to take this route, please be very careful not to get your hands anywhere near the blade. Instead, guide your trim pieces through using a piece of wood.
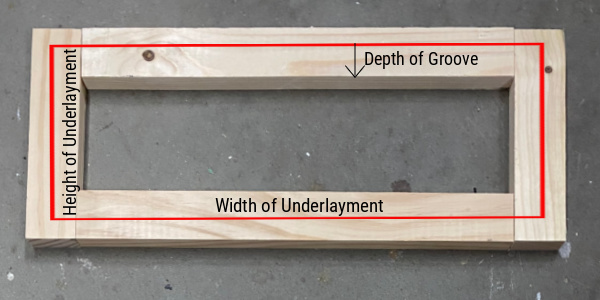
You will now need to cut your underlayment piece. This can be done by taking the measurements of your height and width of the frame and subtracting off the non-grooved sections. Hopefully this image (while not pretty) helps you visualize what I’m saying.
Use wood glue in the grooves and slide your underlayment into place. Allowing this to fully dry before proceeding.
When using this as an actual drawer front, you will need to cut an additional piece of underlayment to set in the middle of the back side of the drawer front… Okay… That sounds confusing. Another “pretty picture”?
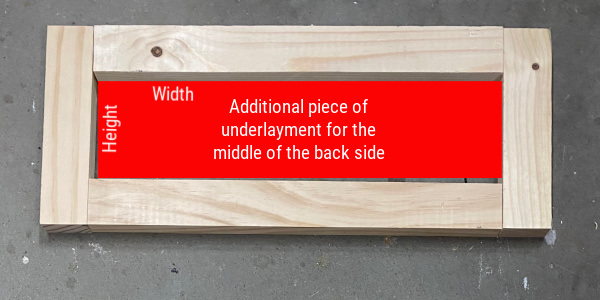
For reference, our additional underlayment piece was 16 3/8″x 3 3/4″. This can simply be glued into place, allowing it to dry before continuing.
Last little thing… You will notice you have gaps in the corners of your drawers from the grooves you created earlier. It is best to cut a small piece of underlayment and glue it into the corners. Once dry, you can fill in any remaining area with wood filler.
The remainder of this tutorial is the same as the door. See above for more details.
- Fill holes and seams with wood filler, then allow the wood filler to fully dry.
- Sand your drawer front, making sure to go over the areas where wood filler was applied. (Please wear a dusk mask and eye protection while sanding)
- Clean your piece prior to painting or staining
- Prime, paint, and add hardware
Here are the exact knobs, pulls, and hinges we used on the cabinets.
(Click image for details)

That’s it! DIY Shaker Doors and Drawers!
Shop the image
Love it? Pin it!
Leave a Reply