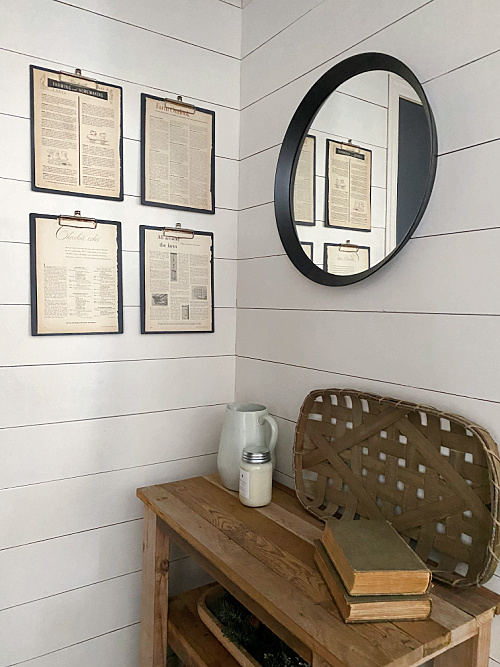
A few months ago we made over our entry nook for the $100 Room Challenge. While I loved the space, there was one thing that felt a little “off”. I had hung a framed print on the wall, and it just looked out of place for some reason. I’m not sure if it was the size, or the color, or what… I decided it was time to do something to fill the space and add a little character, so I made Dollar Store DIY Vintage Clipboards and added some magazine pages from an old farming magazine.
My goal for the wall space in our entry nook was to fill it with a little character, but (as always) I didn’t want to spend much money.
What You Need to Make Vintage Clipboards
Affiliate links may be used. Please see our advertising disclosure for more information.
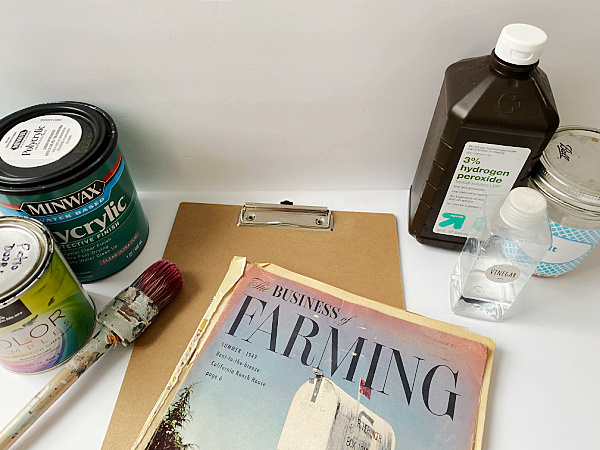
- Clipboards– The ones I used are from the dollar store, and had previously been used in my daughter’s room
- Rusting Solution (Optional)- Mixture of hydrogen peroxide, distilled vinegar, and salt
- Low Grit Sandpaper– If you choose to rust your piece
- Polycrylic– If you choose to rust your piece
- Painter’s Tape– If you choose to rust your piece
- Paint- Use leftover paint if you have it, or get a sample size from the store. You really don’t need much.
- High Grit sandpaper
- Paintbrush– I linked my all-time favorite paintbrush. Kinda spendy, but it is amazing.
- Printables- See below for ideas
How to Create DIY Vintage Clipboards
Step 1 (Optional): Rust the Clip
If you want these clipboards to truly look old, you can start by rusting the clip.
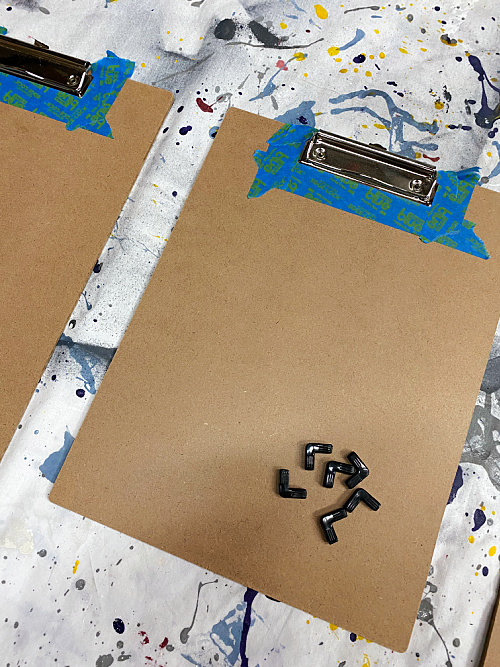
Place painter’s tape around the clip to avoid getting the “rusting solution” on your clipboard. If you have plastic black corners, remove those as well.
Then apply distilled vinegar with a cotton ball and allow it to sit for about 10 minutes. This helps reduce the sheen of the metal.
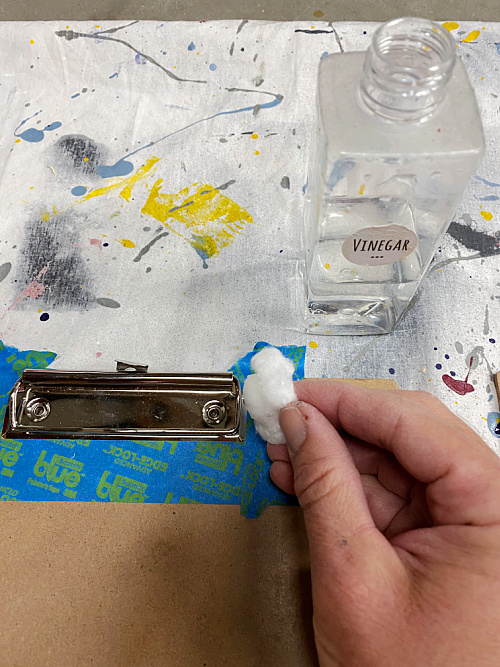
After the time is up, remove the vinegar with a clean, dry cotton ball and scuff the clip with a low-grit sandpaper. This step is important. If you don’t sand the clip, the rusting solution doesn’t work.
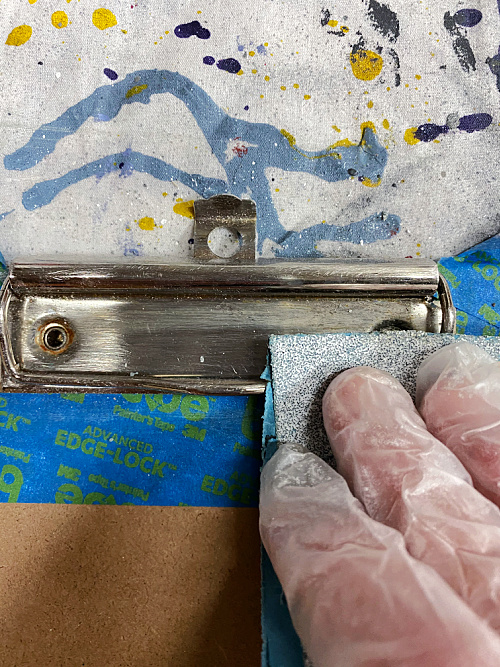
Once you have sanded your clip, wipe away any dust with a clean cloth. You are now ready to make your rusting solution.
Word of Caution: I followed this tutorial from Bob Vila for making the rusting solution, and after the fact found out that combining hydrogen peroxide with vinegar is not really recommended as it creates Peracetic Acid. Peraectic Acid is an eye, skin, and lung irritant. Honestly, similar tutorials are all over the internet, so proceed at your own risk. Also, the tutorial makes way more than you’ll need. I made 1/4 of the recipe.
If you choose to follow the tutorial:
- Make sure to wear gloves and eye protection
- Do everything in a well ventilated area
- Do not store the rusting solution
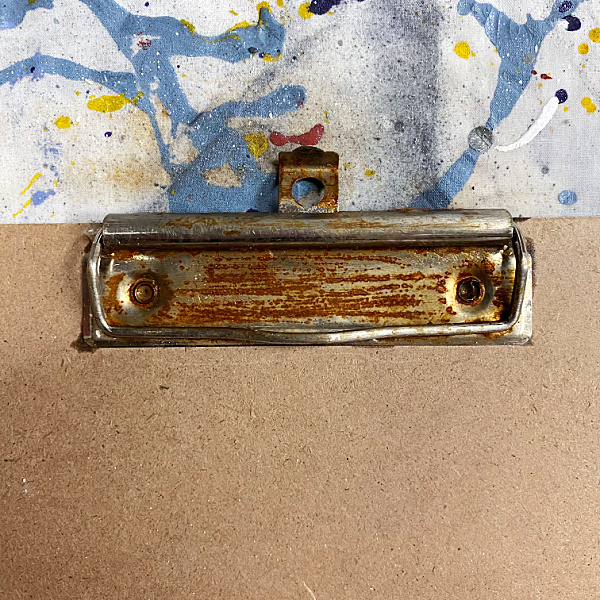
Spray the rusting solution onto the clip and allow it to sit for 10 minutes. After the time is up, while wearing gloves and eye protection, remove the excess solution with a clean paper towel.
The results were pretty incredible.
The rusty clip needs to be sealed, so make sure the clip is thoroughly dry before proceeding. (I actually used a hair dryer to make sure the clips were completely dry 🙂 ).
You can then apply a coat of polycrylic over the clip. And again, allow it to dry.
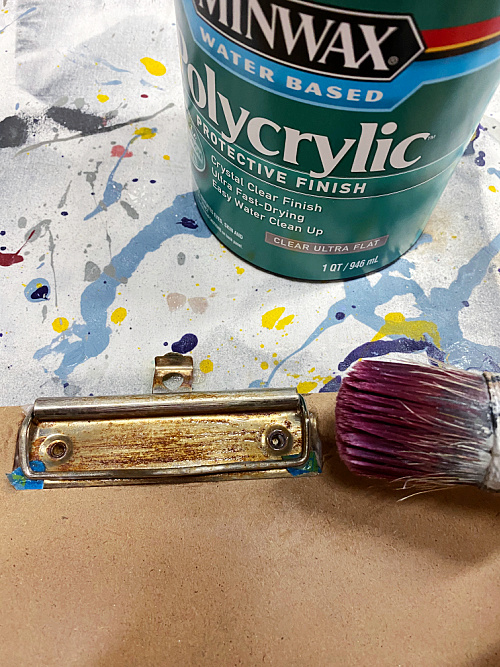
To avoid polycrylic getting under the clip and sticking, place a small piece of painter’s tape where the clip meets the board. (As seen in the photo above.)
Step 2: Paint the Clipboard
You can paint your clipboard any color you choose. I used paint we already had on hand: Cyberspace by Sherwin Williams.
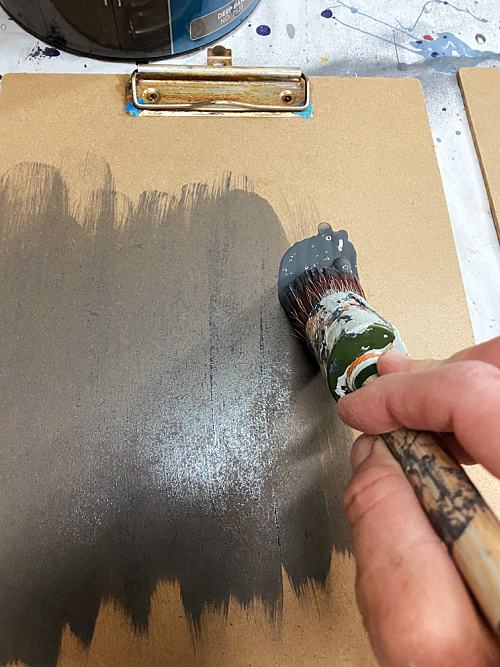
Depending on the paint you use, you may get by with one coat, but more than likely, you will need two. After each coat of paint has dried, go over the clipboard with a high-grit sandpaper to remove any “blemishes” and then remove the dust with a clean cloth.
Step 3: Add Prints
This is where you get to be creative. You can add so many things to these clipboards: maps, quotes, verses, sheet music, recipes, prints… whatever it is that you love.
(I love checking Etsy for downloadable prints. They have everything from quotes to maps, music to gardening. You can also check Pinterest for free printables. I have a whole board dedicated to printables here if you’d like to take a look.)
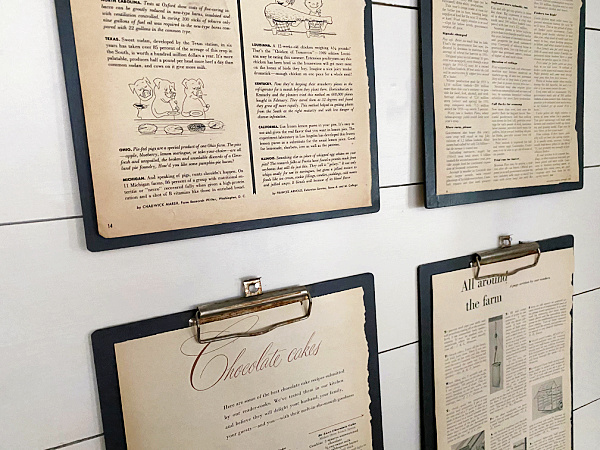
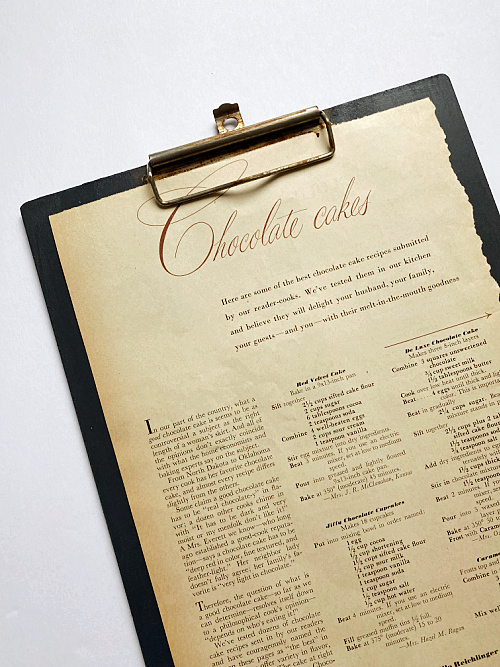
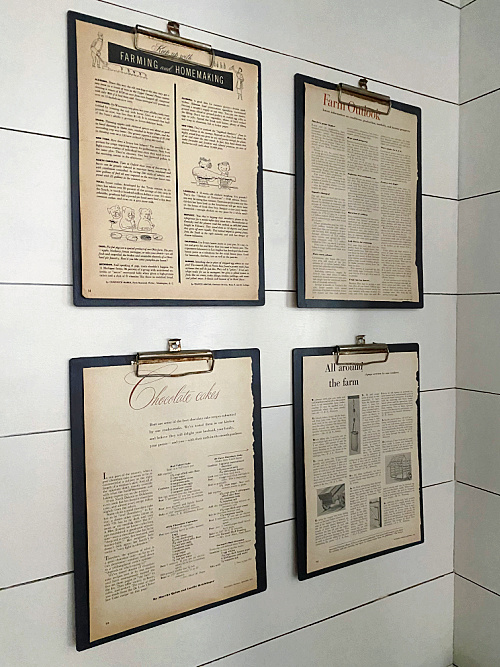
I happened to have some old farming magazines from 1949 & 1950 that I bought at garage sale years ago. I believe I bought them both for a dollar and they were so fun to flip through. I found a few pages I thought would be fun to hang in the entry.
Step 4: Hang on the Wall
Obviously, you can do whatever you want with the clipboards after you’re done, but I made four and hung them as a gallery wall in the entry nook. Because these clipboards had a little hanger in the middle, I just needed a few nails. Of course, remember to measure and level prior to putting holes in the wall 🙂
If you would rather buy than DIY, these clipboards were my inspiration for the project and you can find them on Wayfair.

Love it? Pin it!
Great idea, Erin! I might consider this for all the projects in my head, which allows a place for my notes and ideas. Appreciate you and your content!