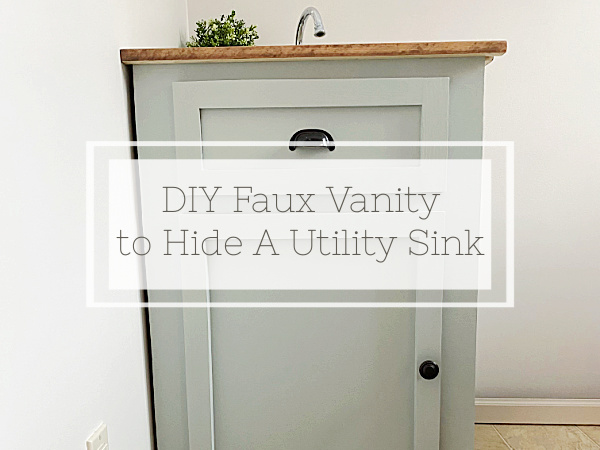
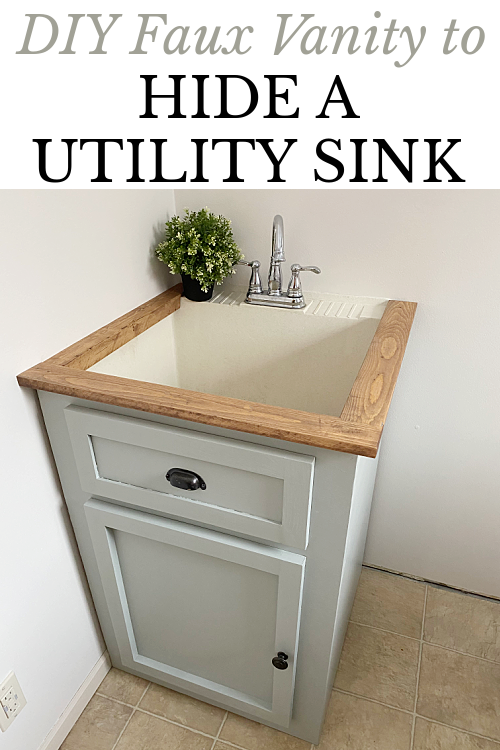
It is week 3 of the $100 Room Challenge and we are working on a laundry room makeover. This week’s project was to figure out how to hide a utility sink. I went through a bunch of ideas in my head (and on Instagram), but in the end, decided to create a faux vanity to hide the utility sink. I absolutely love how this project turned out.
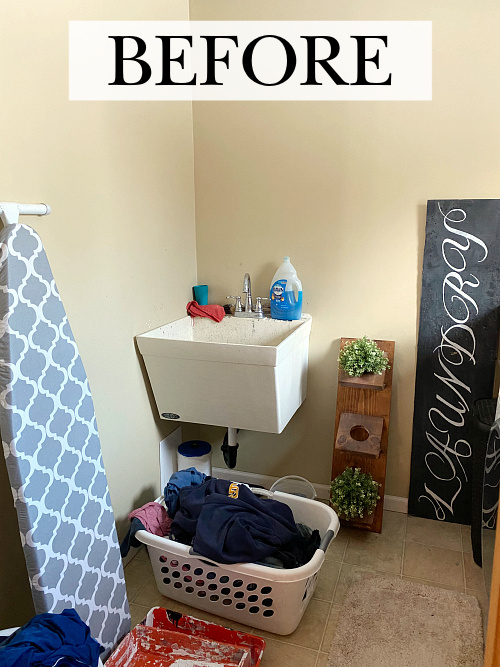
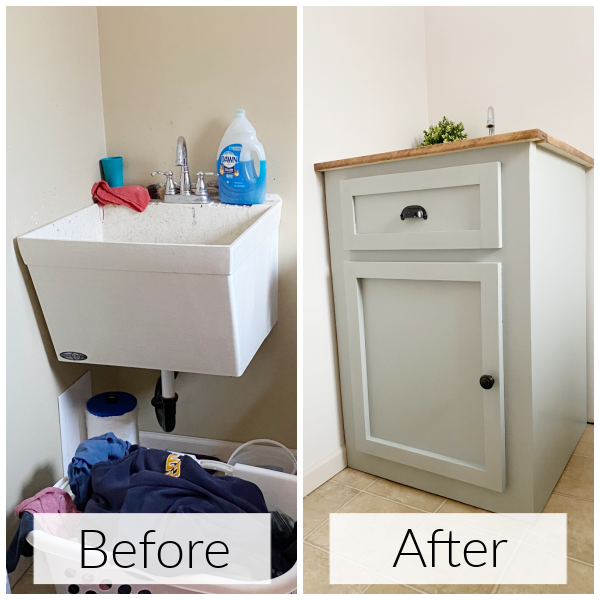
Utility sinks aren’t exactly pretty. And honestly, I don’t think they were intended to be. They are made to work hard and provide a deep sink to wash stuff you wouldn’t want in your kitchen or bathroom. We use ours to clean paint supplies and dump dirty water after mopping. However, as I was thinking about this space I wondered if there was a way to take a “not so pretty” sink and give it a little makeover.
I went back and forth on a variety of ideas, but then one night (when I couldn’t fall asleep) I figured out exactly what I wanted to do. We could create a faux vanity to hide the utility sink. I knew exactly what I wanted it to look like, so the next day we got to work.
What You Need to Create A Faux Vanity
Affiliate links may be used. Please see our advertising disclosure for more information.
Please note that we only had to create a two-sided vanity. If your utility sink is not set against a wall or appliance on one side (like ours), you will need an extra piece of plywood for the third side.
- 2 or 3 Pieces of 1/2″ or 3/4″ plywood to cover the front and side(s) of the sink. Remember to allow for an overlap of the corners when measuring. Also, feel free to buy a higher quality wood. We did this on a tight budget, so we went with a cheaper wood.
- Wood Glue
- Drill and Screws
- Clamps
- Circular Saw
- Sander
- Wood Filler– Make sure the wood filler is paintable
- Putty Knife
- Drawer Front– You can either buy a drawer front, or make one (DIY version below)
- Door Front– You can either buy a door front, or make on (DIY version below)
- Knob and Pull
- Primer
- Paint
- Foam Roller or Paintbrush– I linked to my very favorite paintbrush for painting furniture. It’s spend-y, but worth it.
- Nail Gun
How to Make A Faux Vanity to Hide A Utility Sink
My husband is the builder and I’m the sander, primer, painter. So despite my telling my husband to let me know when he moves onto the next step so I can take a picture, he often forgets. I love visuals, but they may be lacking a little in this post 🙂
Step 1: Assemble the Front & Side(s)
Start by creating the front and side(s) of the faux vanity. Since our utility sink is sitting against a wall, we created a L-shaped “vanity”. Depending on your layout, you may need to add an extra side for a U-shape. Prior to assembly, you will want to cut your plywood to size using a circular saw; making sure to measure and cut for both height and width. Remember to allow for an overlap at the corner.
Once the plywood is cut to size, run some wood glue along the seam where the pieces come together and secure them with clamps. Allow the glue to dry and then use a drill and screws to attach the pieces together.
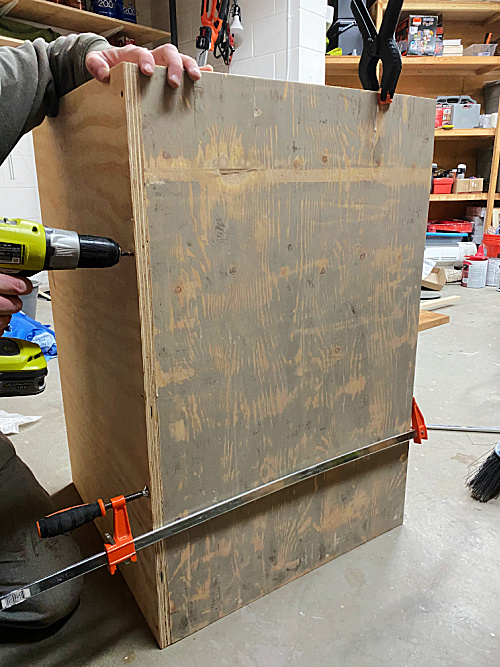
We butted the two pieces against each other to make the corner. (As you can see, we are reusing one piece from a shelving unit we took apart.)
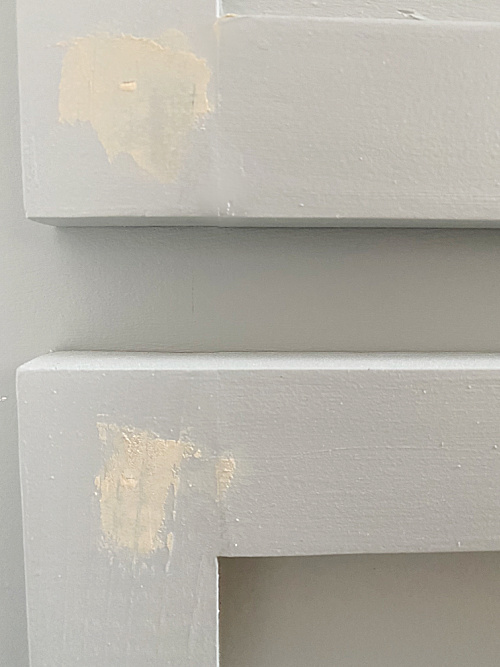
Step 2: Fill in the Screw Holes with Wood Filler
You want the front and sides to look finished, so make sure to fill in the screw holes with wood filler. If there are any other imperfections in the wood, use the wood filler to fix those as well.

To cover the screw holes, simply use a putty knife to scoop up a bit of wood filler and smear it into the holes, scrapping away any extra. Allow the wood filler to thoroughly dry before proceeding.
If you have really rough plywood (like mine… because no sanded plywood was in stock), follow this tutorial for hiding wood grain to ensure a smooth finish to the wood. (I actually ended up doing this.)
Step 3: Sand Your Piece
It is always recommended that you wear a dust mask and eye protection when sanding.
Use a hand-held sander to sand the front and side(s) of the piece until smooth, making sure to go over the areas in which wood filler was applied. Start with a lower-grit sand paper (around 120) and then go over the piece a second time with a higher grit sandpaper (220) for a smooth finish.
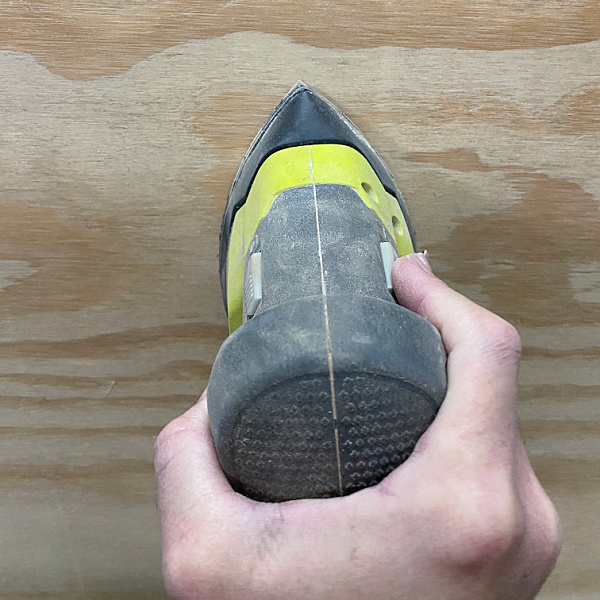
To avoid unnecessary work, remember that no one will be seeing the the inside that sits up against the utility sink, so there’s no need to sand that part unless you really want to. We chose to leave the inside unfinished.
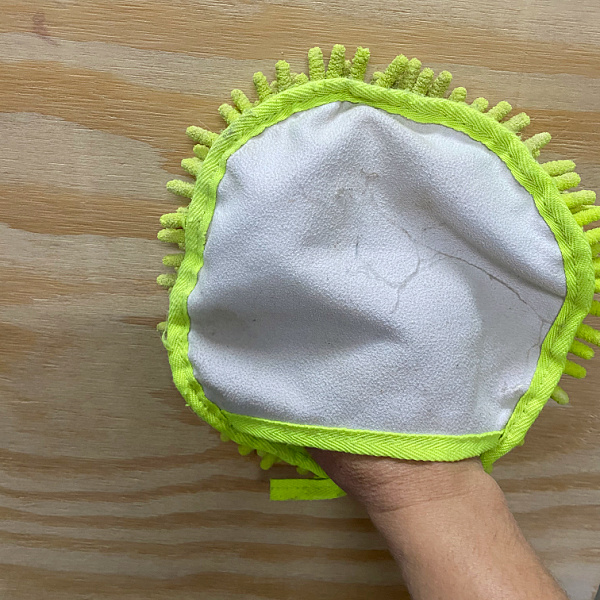
Step 4: Clean Your Piece
Make sure to remove all the dust that was created while sanding, otherwise you end up with grit in the paint. I typically start by using a microfiber dusting mitt followed by a wipe down with a wet rag.
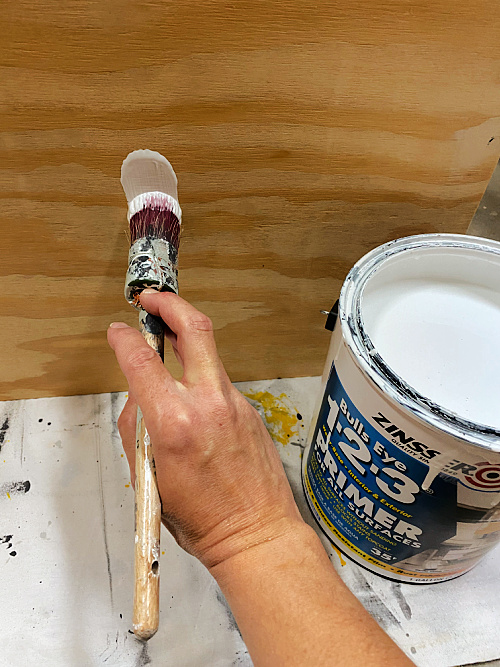
Step 5: Prime & Paint
I always recommend a coat of primer when working with wood. This helps to seal any knots and evens out the surface. Apply primer with a paintbrush or foam roller, allowing the piece to thoroughly dry before moving onto the next step. Each can of primer contains the proper dry time required prior to painting.
After priming (and prior to painting) go over the piece with a high-grit sand paper. (You can just do this by hand.) Remove any dust with a damp rag, allowing it to dry before painting. Once dry, you can go ahead and paint your piece with a paintbrush or foam roller.
Most pieces require two coats of paint, so make sure to let the first coat thoroughly dry before applying the second coat. Again, I recommend going over the entire piece with a high-grit sand paper and removing the dust after the first coat of paint has dried and before painting on the second coat. This ensures a smoother finish.
Step 6: Buy or Make A Door & Drawer Front
You can certainly buy a door and drawer front for the faux vanity, but making one is also an option.
In an effort to not overwhelm this post with too much information, I have created a separate tutorial on how to make Shaker Style Door and Drawer Fronts.
To save time, you can align the steps from this tutorial with the one for making the door and drawer fronts: assemble, wood filler, sand, clean, prime, and paint. Remember that you do not need to do anything to the back of the door and drawer fronts because they will be attached to the front of your faux vanity.
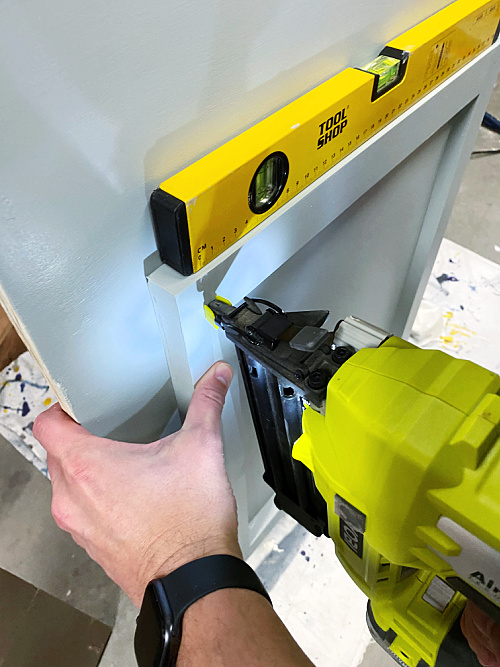
Step 7: Adhere the Door and Drawer Front to the Face of the Faux Vanity
Remember, the door and drawer to this faux vanity are not intended to function, so simply secure them to the face of the vanity using a nail gun (if they are light like ours). Just make sure to center and level them prior to securing them.
Then fill the holes with wood filler, sand, and paint.
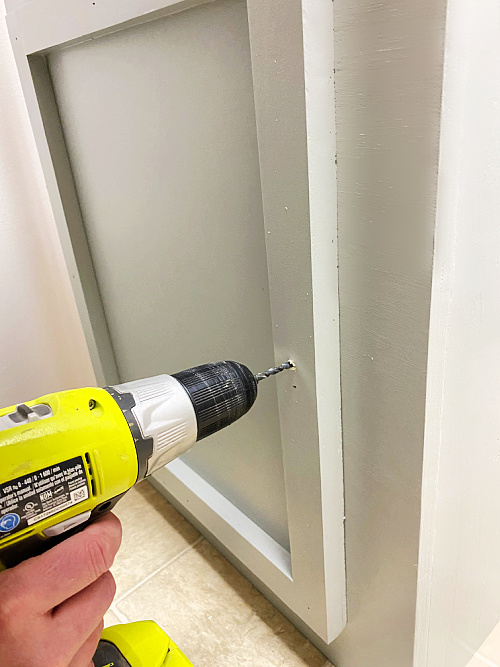
Step 8: Attach Knobs and Pulls to Door & Drawer Fronts
You are going to need rather long knob screws in order to go through both the plywood and the trim of your door front. Simply drill a hole where you want the knob to go, stick the screw through the hole, and attach the knob.
I found a knob that did a fairly good job of matching the other hardware in the room, but I couldn’t find a good matching pull, so I grabbed an old one my in-laws had given me and spray painted it to match. This is always a great option. Just remember to also spray paint the screw tops so they match.
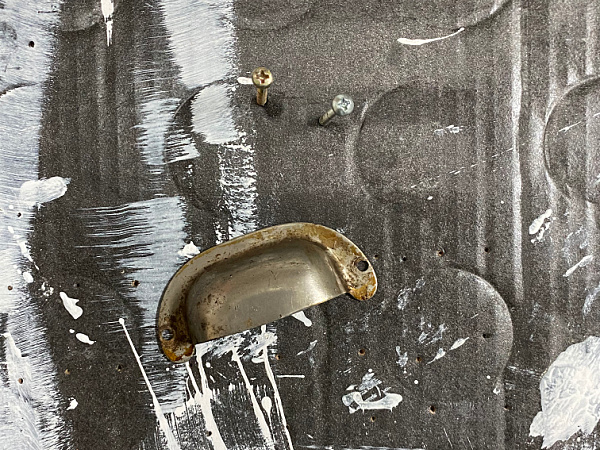
I always spray paint smaller pieces on an old piece of cardboard; that way I can stick the screws in to get the tops.
Step 9: Make a Vanity Top
In order to hide the seam between your faux vanity and utility sink, you can create a top. Measure the two (or three) sides where you want to add the top and cut to size. Then sand and stain your pieces of wood. Use a nail gun to attach your top pieces to the top edge of your plywood.
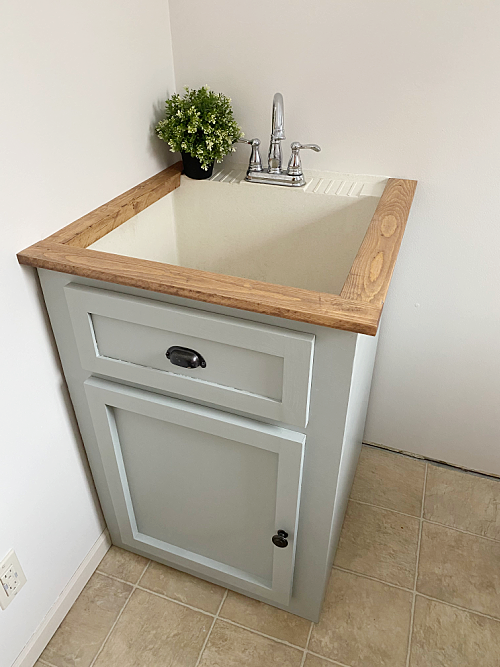
As you can see we kind of played around with a way to create a top all the way around the sides. Still trying to figure out the best solution for the piece against the wall.
And there you have it! The utility sink is now hidden behind a faux vanity.
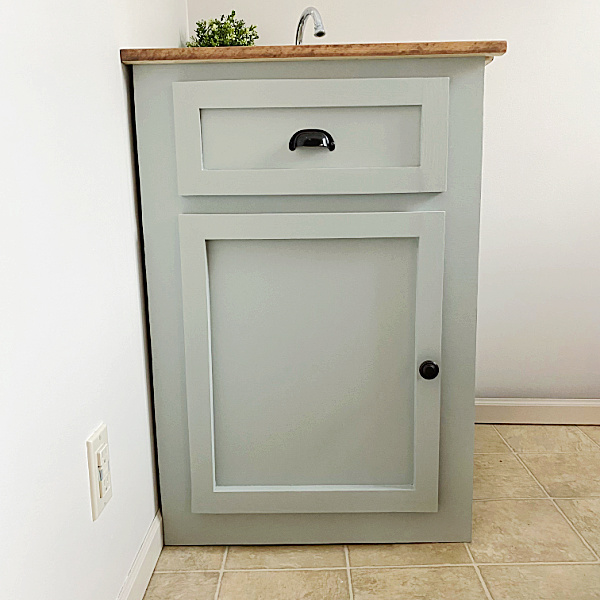
And if we ever need to access the plumbing, we can simply slide the vanity away from the sink.
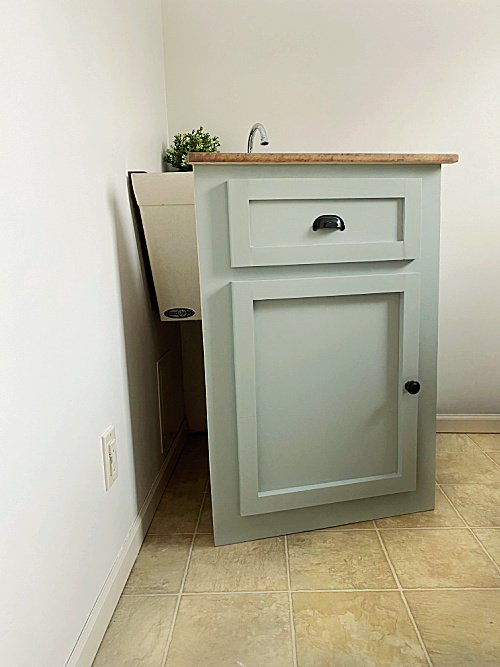
Doesn’t that look so much better?!
Budget So Far
Last week I had spent $16.48. Here’s the updated total.
- Paint for Walls– $27.98 (1 gallon of Sherwin Williams Marshmallow color matched in Behr)
- Faux Vanity- $27.23
- 2×4′ Plywood- $18.94 (I only needed one as we reused another piece from a shelving unit in the laundry room)
- Knob for Faux Door- $3.08
- Pull for Faux Drawer- FREE (Already had on hand)
- Spray Paint for Pull- FREE (Already had on hand)
- Paint- FREE (Using leftover paint from the cabinets)
- Roller Cover for Painting Walls- $3.42
- Foam Roller Cover for Painting Vanity- $1.79
- Primer, Wood Filler & Other Paint Supplies- FREE (Already had on hand)
Total So Far- $71.69
Wanna Catch Up or Jump Ahead?
Week 1 // Week 2 // Week 3 // Week 4
We think you might also love these ideas!
DIY Bifold Barn Door | DIY Wood Overlay for Wire Shelving | Laundry Sign from Cardboard

Love it? Pin it!
This is a great idea! You can notch out the trim so the cabinet will slide flush to the wall. If you cut out less than an inch of trim on both walls, it will hold the cabinet in place. The wood top may need to be a separate piece for this to work. I realize this post is a few years old, so I’m guessing you have already found a solution. 🙂
can you elaborate on how you did the top part? I’m not getting it! Does the wood sit on top of the sink edges?
What an amazing idea!!!!!!! I just love this!!!! Thanks for the inspiration.
Wow! This is genius! I am adding this to my to-do list now!
This is such a great idea! Especially only doing the sides that show, and not sanding the back. I like your style! (Easy yet elegant.) =)
This is genius, I love it!
What a fantastic idea Erin! I love it and it is brilliant that you can remove it anytime if you need to. Well done!!
Oh my goodness, this simply brilliant!!
I can not get over how good this looks! It’s such a great idea. Your room is really coming together
That was such a great idea! It’s so pretty now!
You made something that isn’t pretty, pretty! I just love this! I cannot wait to see it all come together next week!
Erin this is such a great idea, and looks amazing for your laundry room. We actually relocated. our sink like this to our shop, because I had idea how I was going to cover it up, but now I could do something like this in the shop further down the road.
This is just brilliant! And beautiful! It makes such a difference in how the space looks and feels. I can’t wait to see the reveal next week!
Erin, I am so impressed with how you did this and the difference it made. Great job!!