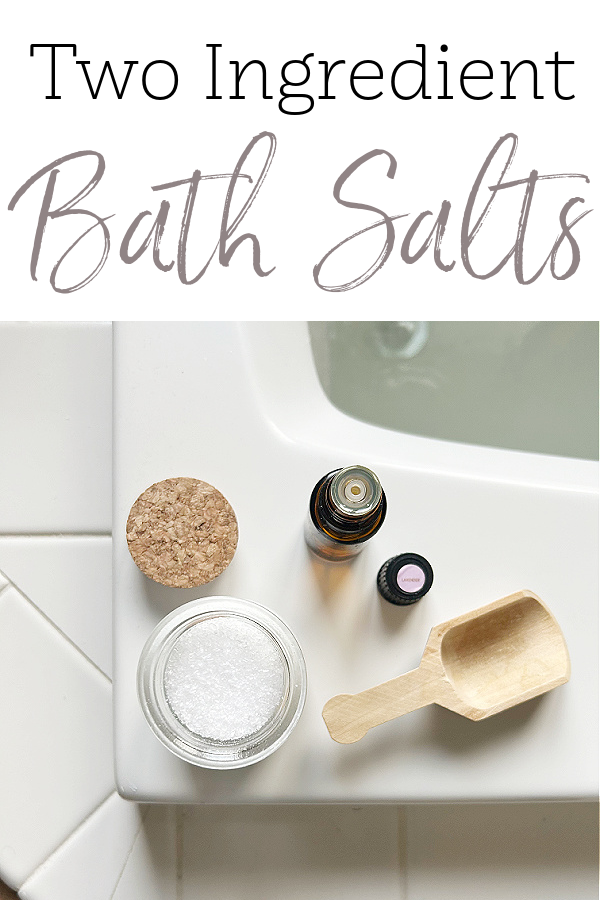
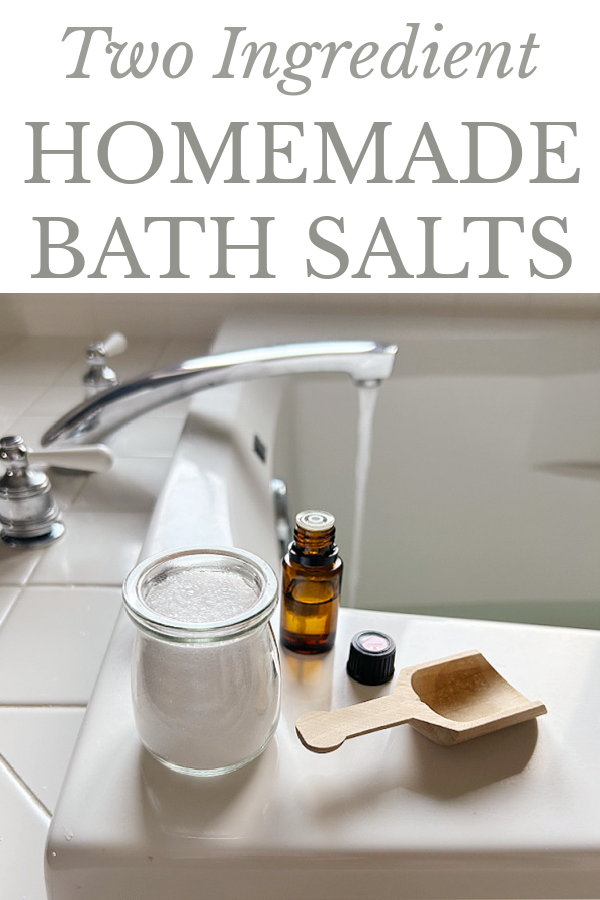
If I had known how easy it was to make my own homemade bath salts, I would have started long ago. Requiring only two ingredients, these DIY bath salts can be made in less than 5 minutes. Whether you are looking for a thoughtful gift idea or just need a little in-home spa day, this easy bath salts recipe is perfect.
Here’s the reality around my house. I jump in the shower, and within four seconds there’s a knock on the door. “Mom, I can’t find my toothbrush.” I yell out something like, “Check the toothbrush holder.” (I’m probably crazy to think it might actually be where it belongs.) Then I hear screaming. Big brother and little brother are in a battle, and they both come knocking on the door telling me what the other did (and how they are not to blame for any of it). I yell back that they need to figure it out. Two seconds later, I’m informed that the puppy just poohed on the floor. So much for a nice, relaxing shower…
Here’s an idea for the moms in your life; give her the gift of some uninterrupted time to soak in the tub… with a glass of wine and a good book. I have a very simple recipe for making your own DIY bath salts. If you are a mom (or not), you can certainly make these for yourself (just sneak in a bath after the kiddos are in bed).
What You Need to Make Homemade Bath Salts
Affiliate links may be used. Please see our advertising disclosure for more information.
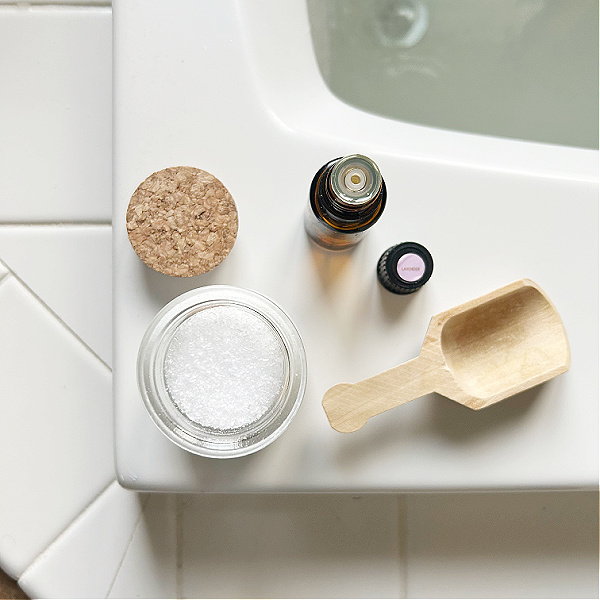
Ingredients Needed for DIY Bath Salts
- Epsom Salt
- *Essential Oil– Not sure where to buy essential oils? Check out this post.
- Food Coloring (Optional)- Please note: If you choose to add food coloring to the salts, less is more. Start with just 1 drop and work your way up to the desired color, one drop at a time. If you add too much moisture to the salts, this can cause the salts to harden over time.
Supplies Needed for Homemade Bath Salts
- Glass Mixing Bowl
- Airtight Glass Storage Container– Some essential oils will break down plastic, so it is ideal to use a glass container for storage. You also want to keep the salts in an airtight container to avoid moisture. I reused Starbucks Frappuccino bottles; you can find similar bottles here.
- Wooden Spoon (Optional)
- Twine (Optional)
*I link to essential oil brands I believe provide high quality oils and are transparent with their testing (in other words, the company publicly provides GC/MS results). I also try to link to the essential oil that will give you the “biggest bang for your buck” (often times buying a 30ml bottle of oil means greater savings per ml than purchasing a 10ml bottle). I provide more information on where to buy essential oils so you can choose a brand you feel is right for you.
How to Make DIY Bath Salts in Under 5 Minutes
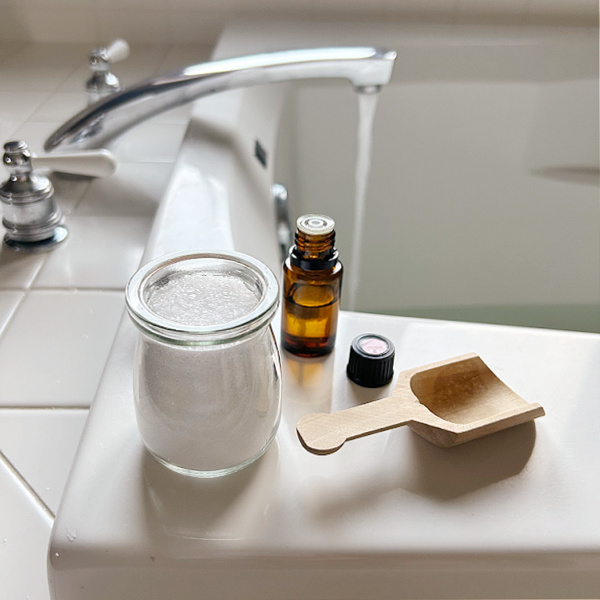
All of our homemade bath salts recipes start the same way: Pour 2 cups of Epsom salt into a glass bowl. You can certainly use more or less depending on the size of your container.
Now you can experiment a little bit with fragrance and color. Here are some great ones to try…
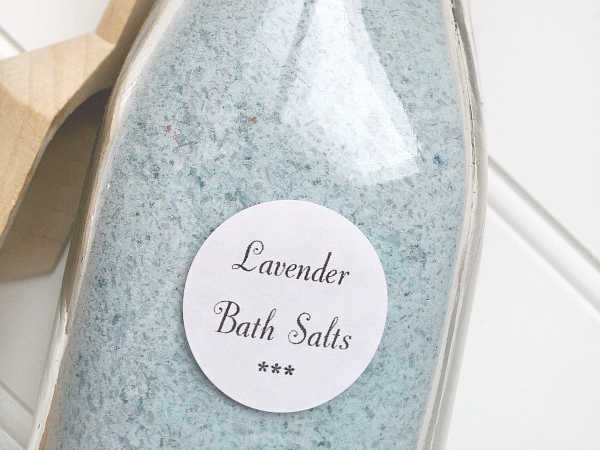
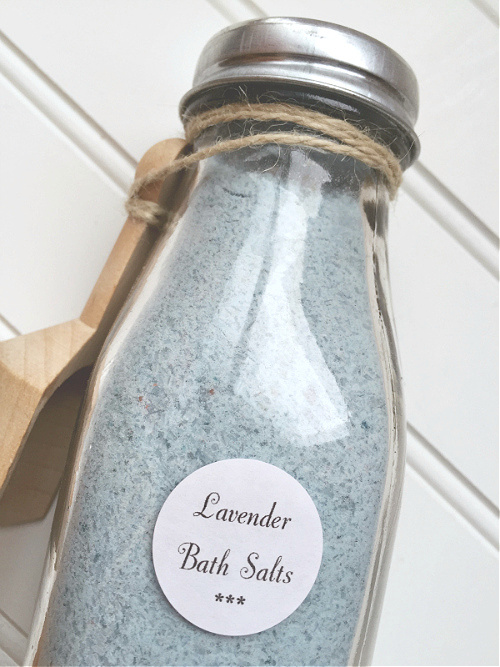
Relaxing Lavender Bath Salts
There have been many studies done on lavender essential oil (L. angustifolia) and its effect on stress, anxiety, and sleep; and many showing positive results! If you are looking for a way to relax and unwind, this homemade lavender bath salts recipe is for you.
Thoroughly mix 10-15 drops of Lavender Essential Oil into your 2 cups of Epsom salt to create a wonderful relaxing scent. If you choose to add color, start with one drop and mix it into the salt/essential oil mixture. Continue to add one drop at at time (thoroughly mixing after each added drop) until you achieve the desired color.
As mentioned above, adding to much coloring to your bath salts creates moisture, which can cause the bath salts to harden and clump. The less coloring you use, the better.
“Perk Me Up” Peppermint Bath Salts
If you have ever smelled peppermint essential oil, you know it has an invigorating scent. Again, studies have been conducted on the effect of peppermint oil on fatigue (particularly exercise-induced fatigue). While peppermint was shown to decrease fatigue, a combination of peppermint, rosemary, orange, and clove performed even better, so perhaps try that combination.

Thoroughly mix 10-15 drops of Peppermint Essential Oil to the 2 cups of Epsom salt to create an energizing scent. To create a layered appearance (in this case I went with a candy cane theme), divide your Epsom salt into two separate bowls. Add the colors of your choosing (one drop at a time) to each dish. Once you have achieved the desired colors, pour the Epsom salt into the container, alternating between the two colors.
Breathe Easy Bath Salts
According to Medical News Today, both peppermint and eucalyptus essential oils may help open the airways and ease sinus congestion. So if you need a little breath support, this bath salts recipe is perfect for you.
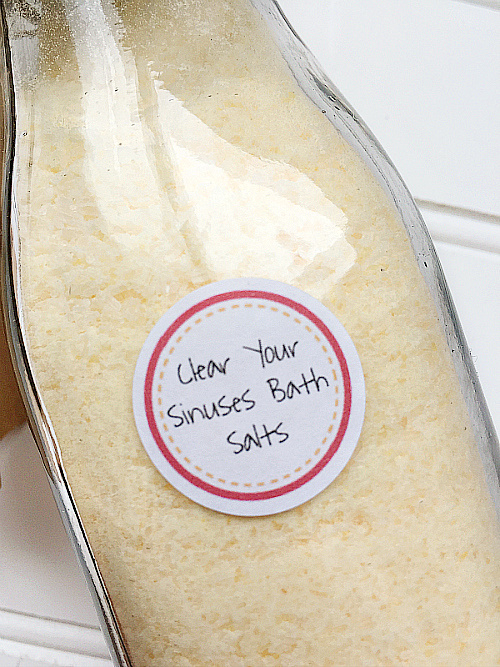
This DIY Bath Salts recipe was created for those times in which you need a little extra support to “breathe easy”. You can use a10-15 drops of a pre-mixed blend of essential oils or simply combine 3-5 drops each of Eucalyptus, Lavender, and Peppermint in lieu of the combination oil. Add the essential oils to 2 cups of Epsom salt and stir. Add color if you choose. As a reminder, add one drop at a time, stirring in between each added drop until you achieve the desired color.
After you are done creating your homemade bath salts, pour them into an airtight container and add a label if you’d like. I also attached a wooden scoop with twine.
If you need a little help getting the bath salts into the container (particularly if it has a narrow opening), try using a funnel.
To use, simply add a couple scoops of the DIY Bath Salts to the warm bath water as you fill the tub.
Enjoy!
We think you might also love these ideas!
DIY Milk Bath Powder | DIY Lavender Sugar Scrub | DIY Foot Soak

Common Questions About Homemade Bath Salts
Can I Add Baking Soda to This Bath Salts Recipe?
I see many DIY Bath Salts recipes use baking soda, however, in my experience, baking soda tends to harden into a solid mass which makes using the bath salts impossible. Baking soda is added to bath salts to help soften the water. You can get this same effect by simply adding a bit of baking soda to your water separate from the bath salts.
My Bath Salts Are Clumping or Hardening… What Can I Do?
Typically, the cause of clumping or hardening of homemade bath salts is due to moisture. To prevent this from happening, you can try a couple things. First of all, don’t add to much coloring. I mentioned this several times above, but one or two drops is all you should need to create colored bath salts. Adding too many drops of coloring increases the moisture level which can cause the bath salts to clump and harden. Second, make sure to store your bath salts in an air-tight container with a lid. Bathrooms are known to be a source of moisture caused by steam from showers and baths. This moisture finds its way into open containers (or those with a loose fitting lid). Storing your bath salts in an air-tight container reduces the amount of moisture that enters the container. The last option (which I have actually tried and seems to work) is to add a small Silica Gel Desiccant Packet to the bottom of your container prior to adding the bath salts. These packets help absorb moisture.
What Salts Can You Use to Make Bath Salts?
While I use Epsom salt in all my bath salt recipes, there are other salts you can try as well. Both Dead Sea Salt and Himalayan Salt are also used in making bath salts. I would stay away from any form of table salt, however, as it can be irritating to the skin.
Can You Make Bath Salts Without Essential Oils?
Essential oils are used to create a pleasant scent when added to bath salts, and may offer some health benefits as well. However, if you choose not to add essential oils to your bath salts, that is perfectly ok. One idea would be to add loose leaf tea (or simply cut open bags of tea to get the loose leaves out). I did this when making a DIY Foot Soak. The only thing to remember when adding tea leaves is that the tea won’t dissolve in the water, so you will end up with some bits of tea floating around. To avoid this, you can add your bath salt mixture (which would include the tea) into tea bag filters and add it to the tub as you fill it with water.
How Long Do DIY Bath Salts Last?
While bath salts don’t technically “expire”, I would try to use them within year.

Homemade Bath Salts
Ingredients
- 2 Cups Epsom Salt
- 10-15 Drops Essential Oil
- 1-2 Drops Food Coloring Optional
Supplies
- Glass Mixing Bowl
- Glass Air-Tight Container with Lid For Storage
- Wooden Scoop Optional
- Twine Optional- used to attach wooden scoop
- Label Optional
Instructions
- Add Epsom salt to a glass bowl
- Stir in 10-15 drops of essential oil until thoroughly combined
- If you want to add color to your bath salts, add one drop of food coloring and stir to combine. Continue adding one drop at a time (stirring after each drop) until you see the desired color. One or two drops should be enough. Adding too much food coloring can cause excessive moisture which may cause bath salts to clump or harden.
- Pour bath salts into an air-tight container for storage
- To use, simply add a few scoops to warm running bath water when filling the tub
Love it? Pin it

This post was originally published at Clean and Scentsible on January 29, 2016.
Will these salts make your tub slippery?
I have not experienced that, however, I think anytime you add something to your bath water, you want to use caution to prevent slipping and possible injury.
Hi there! Thanks for the bath salt recipe! I have made bath salts before but always like checking out new ideas. I had experienced the hardening of the bath salts before. I actually think it might have been the oils and soap colarant I used. I found that spreading out the salts after mixed on some baking sheets to dry overnight before putting in jars really helped. Hopefully that helps your followers if they are still having hardening issues with the salts. Do you ever add Sea Salt? Thanks!!
Thanks for the tip Cassandra! In answer to your question, I have never used sea salt, however, it might be a great addition to try.
For the silica gels do you open the little bags and mix it with the salt or do u just leave in the little bags and put it on the bottom of the jar?
Keep the silica in the bag and just toss the bag into the bottom of the jar 🙂
How much of the Bath Salts do you put in your bath ?
I add about 1/4 cup.
If you add some old fashioned glycerin, you can use baking soda and epsom salt in your mix. It also aids as a moisturizer.
Hi there. I tried this and loved it ! I just started using oils and this was most easy. I used jelly jars to keep salts in and various ribbons. They make wonderful gifts
LOVE your Mother’s Day idea! ❤️ All of these bath salt combinations sound just lovely. ?
Hi Erin,
I just fell in love with your site! I’m a beginner with essential oils but a real believer. I have some health issues and have found that the oils are often much more helpful than medication. I’ve begun the journey of ridding my home of chemically based cleaning products, not to mention diffusing like crazy.
I look forward to your updates and will take them all to heart.
Blessings,
Karen
Where do you get these container bottles?
They are actually Starbucks Frappuccino bottles 🙂 I just cleaned them out, removed the stickers, and spray painted the lids. But you can buy little milk jars like this on Amazon. I’ve also seen them in the Target Hot Spot from time to time.
hello, I was wandering if ya can do a print out page with the recipes for each?
Where can I find bottles like that?
Amazon has some (aff.link): http://amzn.to/2ksKtg0 Otherwise, I’ve seen them in the Hot Spot of Target a few times… or do what I do and reuse Starbucks Frappuchino bottles 🙂
How much of the bath salt mixture do you use each time?
I would use about 1/4 cup.
Looks fun to do. They make nice gifts.
WHERE DID YOU BUY THE OILS?
I use Young Living essential oils. If you’d like to know more about them, feel free to email me at [email protected] OR you can use the contact form here: https://www.lemonslavenderandlaundry.com/contact-me/
How long will the bath salts last in a sealed glass jar
That’s a great question, and I don’t necessarily have the answer. I have made these and used them within a couple months. As long as they don’t get moisture in the bottle to create hardening, they should last a long time. If I were to guess, I’d say a year or two.
I think these sound wonderful and I will try!
Thank you for the tips, will try several to give away an keep some for me?
I’d like to address the problem that many are having with the Bath Salts hardening. I have been making Bath Salts for many years now and I also had an issue with this initially. The very best way to deal with this is to BAKE your Bath Salt mixture. Spread them out on a foil lined baking sheet (double layer) for 15 minutes @200 degrees F. Stir them every 5 minutes to ensure no burning. Cool and package in an airtight container immediately.
Thanks for the tip! What do you use in your bath salts? Do you use both the Epsom Salt and Baking Soda?
Question, does it really matter if I use plastic or glass containers? I have a company and we are making bathsalts and found the resealable bags that were paper didn’t work so good and they became clumpy and moldy smelling.. Help.
If you are using pure essential oils, it is recommended that you use glass for storage because certain essential oils will break down plastic. If you need to use plastic, PETE 1 or HDPE 2 are the ones that are best for use with essential oils.
I cannot wait to try this! I’m having trouble imagining how one drop of food color covers the Epsom salt completely. What utensil, if any, do you use to mix the coloring and salt? Thank you!
You will probably need more than one drop of food coloring. It’s just best to start with one drop and work your way up to your desired shade. I would guess I used, maybe 3-4 drops. I simply used a spoon to stir the food coloring, essential oils and salts together. You’ll have to, kinda, smooch the coloring in against the sides of the bowl to get it to even out, but it shouldn’t be too difficult 🙂
Hi and thanks so much for all this info. I am making toiletry gift bags for Christmas gifts and just made up some of your bath salts. I used empty dry yogurt containers to mix the salts – just poured everything into the plastic containers, put the lid on and then shook them up well. Love the layering you did with the colours!
Also, your comments are useful too. I didn’t know they could clump up.
I love the last combination idea! I really like how bath salts can be fragrant and awesome, but sometimes you need something that’s going to directly help you. Having an option to help you clear up congestion is awesome.
Would you put the silica packet on top of the salts or in first on the bottom of the jar
Honestly, I don’t think it matters. I put mine on top of the salts, but I continued to shake the bottle every couple days to make sure there wasn’t any clumping, so it ended up in the middle. I think it’s up to you as to which way you’d rather do it, but I don’t think the salts will be affected any differently if you place it on top or bottom. Hope that helps.
I also made these in a glass container and they hardened all the way through. So all I made was ruined.
I am so sorry to hear that this recipes hardened. I originally thought it was the glass jars that might be the culprit because I had stored some of my left over salts in a plastic container and there was no hardening of the salts, even after months of being in the bathroom. I tried doing a bit of research to see if others were experiencing issues with similar recipes, and it turns out the culprit might actually be the baking soda. I am going to try this recipe without the baking soda to make sure that’s the issue (and I’ve updated the post to reflect this).
I’m interested in trying these, doesnt the food coloring stain your skin when your soaking in it?
every time I’ve used food coloring I always end up with it all over my hands and it takes days to come off. I’m just asking what am I doing wrong that it does that?
I have never had a problem with the food coloring staining my skin from use in the bath tub. You would just put a handful or so in the bath with all that water, so it’s pretty diluted. However, when making the salts, you do need to be careful about not getting it on your skin as it really does stain. They now sell food coloring as a gel, so with a thicker texture, maybe it would be easier not to get in on your skin. You can also forego the coloring all together, it’s just there for fun.
Wow!! Love it , especially the color of the salt look so nice!!! Where did you buy your bottle from just curious thanks !!
I actually used Starbucks Frappachino bottles that you can buy in the store. I drank the coffee, removed the label, washed out the bottles, and then spray painted the lids to it didn’t say “Starbucks” on it 🙂
I love the idea of recycling so I’ll be using my empty starbuck’s frappachino bottles too! Thanks 🙂
Made it 2 times, first with food colouring and essential oils, hard as a rock. Second time with essential oils and rose petals, not sure how yours never got hard. That was after 3 days being in a glass bottle.
I am so sorry this happened to you. If you are not using a citrus essential oil, I would try storing it in a plastic container instead, and hopefully this will resolve the issue. I have updated the post so others are aware of this concern as well. No one wants hard bath salts.
This is an awesome recipe! Thanks for sharing. Is there a specific kind of food coloring that works better? I have some gel colors from making a birthday cake would that work okay?
I feel like all they make is that gel kind now. I tried looking for the “usual liquid kind” and couldn’t find them. I actually used the liquid kind that I had on hand for this recipe, but I would THINK the gel kind would be fine as well, but maybe you’d have to mix a bit more.
How much do you add to the bath at a time?
Honestly, I just sprinkled some in, but I would guess it was about 1/4 cup or so.
Not only interesting and useful to make. But simply loved the adorable bottles!! A must to try!
Thanks Amanda. I love the old milk bottles too.
You could also put a little bit of rice in a small cloth “bag” that can be found at most craft stores in the jewelry section and toss it into the container. That way you don’t have to worry about “ricing” your bath water. They also make tea bags and coffee bags that you can fill yourself then just iron them shut. They are hard to find though. A good substitute would be a Mr Coffee type filter that you could tape or hot glue shut.
Those are good ideas. Thanks for sharing. I also thought of putting a silica packet in there… the ones you’d find in shoe boxes.
Hi Erin, I would love to know how to stop this problem I’m having. My bath salts, mixed as above, seem to harden when in the containers. What am I doing wrong?
Thanks for you question Cindy. Although I haven’t, personally, experienced clumping with these bath salts, I do have a couple ideas that might help. Typically, the reason the bath salts would clump is due to moisture in the container. First, and foremost, make sure the container is completely dry before you add the mixture to the container, and then, when being stored, make sure the cap is on tightly. My other thought would be to add a layer of rice at the bottom to the container. Rice is often put into salt shakers in restaurants to prevent clumping of the salt (since the holes in the top of the shaker expose it to moisture in the air). If you choose to add rice, I would only use a container wide enough to use a scoop, so you don’t end up mixing the rice in with the bath salts (as would happen if pouring the mixture vs. scooping it out). Then, when you approach the bottom of the container, where the rice becomes visible, toss it. I hope that helps.
I thought of one more idea you could try. You know those silica packets you get in different items (the only thing coming to my mind right now it that they’re in shoe boxes)? They are there to absorb moisture as well. Since the silica beads are in a little packet, it wouldn’t interfere with the salts (like rice).