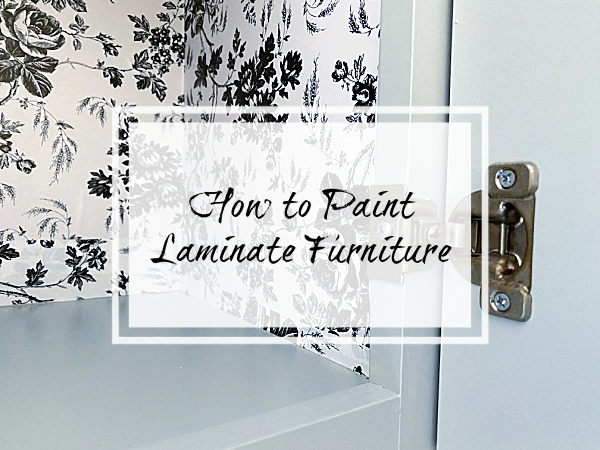
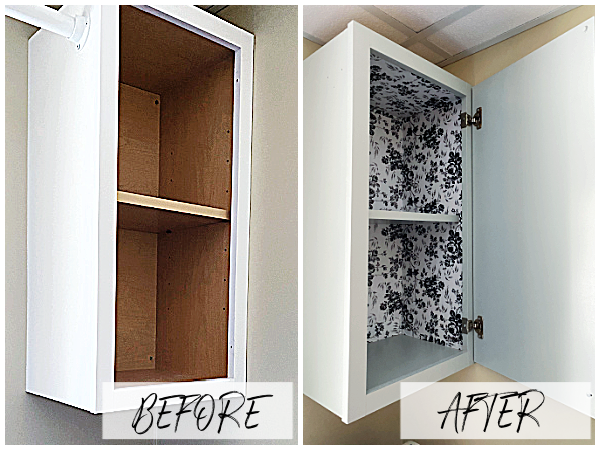
We are taking on our laundry room for this month’s $100 Room Challenge, and this week was all about giving the cabinets a makeover. I had always assumed our cabinets were wood, but as I took them down to paint them, I realized I actually had laminate (or melamine) cabinets, which are a higher-gloss material. This added a few more steps to my painting plans, but I love the way they turned out. I thought I’d share the process on how to paint laminate furniture in case you have some in your home.
If you want to paint laminate furniture, you need to take a few additional steps in the painting process because you want to ensure your paint adheres to the high-gloss surface. No one want chipping paint after a couple months.
Please note that I am painting cabinets that don’t get a ton of use. If you try this method on “high-use” cabinets, results may vary.
UPDATE: It has been almost 1 1/2 since I painted these cabinets and they look just as good as the day I painted them, even the shelves where I store items for our laundry room (pulling things on and off the shelves) have held up beautifully.
How to Paint Laminate Furniture
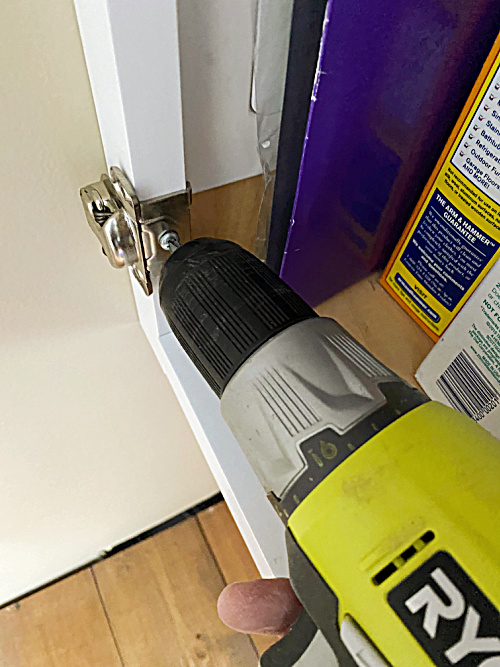
Step 1: Remove Hardware and Sand
The first step for any project is to remove the hardware (if the item has any) and place it in a secure location so you don’t lose any screws or knobs. If you are dealing with a lot of hardware, make sure to label it so you know which door/drawer it belongs to.
Once your hardware is removed, you’ll want to sand your laminate furniture just enough to remove that high-gloss sheen. This provides a better surface for paint adhesion.
I used a mouse sander with a 120 grit sandpaper for this, but you can certainly do it by hand if you prefer.
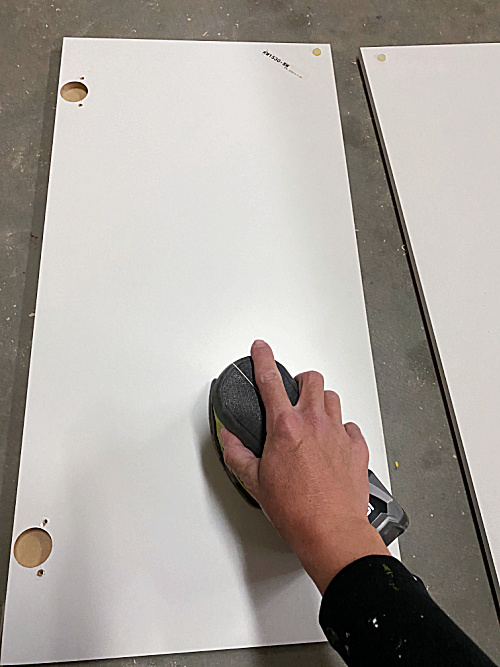
*Remember to wear a dust mask and eye protection when sanding.
Step 2: Clean
Cleaning your piece prior to painting is super important. You not only want to remove the dust you just created while sanding, but also any dirt or grime that may be on your piece.
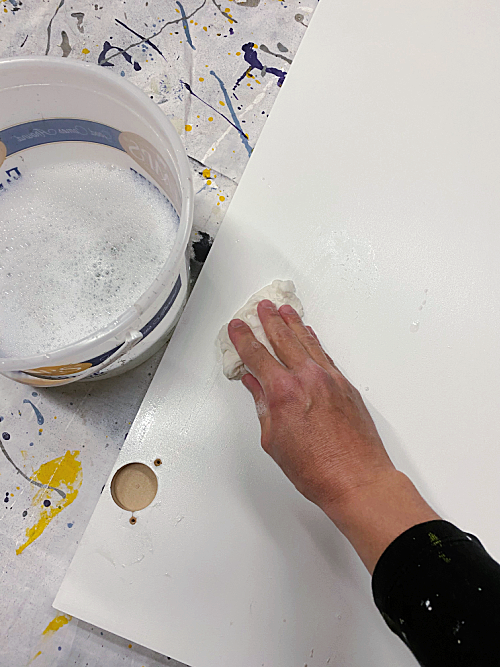
I often use TSP on high-use pieces as it is made to clean surfaces prior to painting. However, on pieces that don’t get much use (like our laundry room cabinets), I just used a squirt of dish soap in warm water.
Step 3: Prime Your Piece
When painting laminate surfaces, it’s best to start with a primer. Primer does a great job adhering to a variety of surfaces, and this allows your paint to stick better.
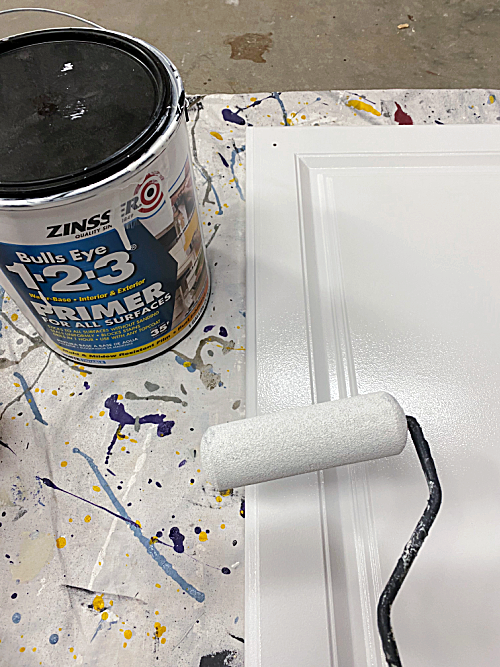
Make sure to check your primer for proper dry-time, and allow your piece to fully dry prior to applying paint.
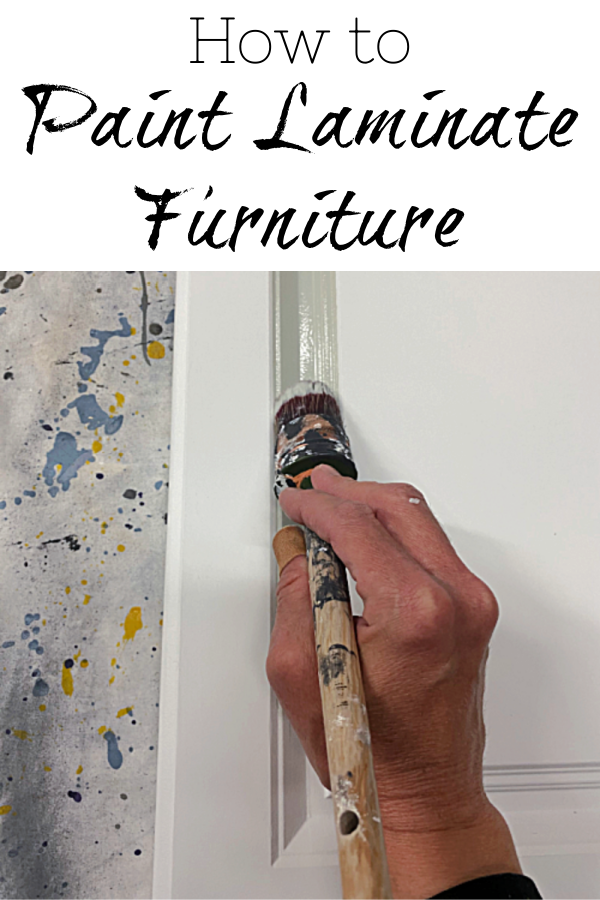
Step 4: Paint
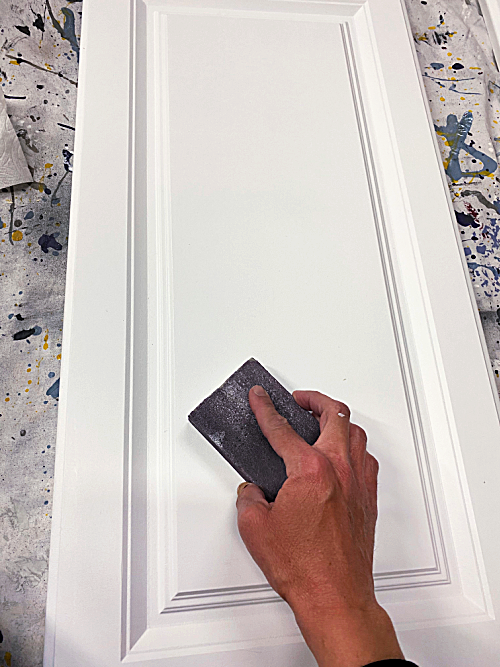
Prior to painting, I highly recommend using a sanding block on your piece (220 grit). This ensures a smooth surface for your paint. Simply rub the sanding block on the piece and wipe away any dust with a microfiber dust mitt or damp cloth. (If you use a damp cloth, make sure to dry your piece before painting.)
I use a 4″ foam roller on most furniture pieces as the paint goes on smoothly. For corners and trim areas, I love using this paintbrush. It’s a bit spendy, but it works beautifully!
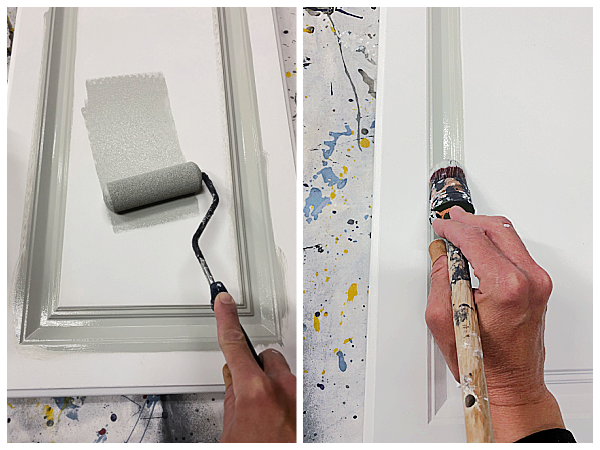
I typically apply two coats of paint, but three may be necessary if you are painting a lighter color over a darker one. I recommend using the sanding block before you paint on a new coat, removing any dust after sanding as this ensures a smooth surface on the finished project.
Step 5: Seal Your Paint
This step is “optional”. If you are painting a highly used piece, then sealing it is recommended to protect the paint. If the piece doesn’t get a lot of use, you don’t have to do this step, but you may notice the paint scratching or chipping over time. Because these cabinets don’t get much use, I didn’t seal the cabinets and doors, but I did seal the shelves since I am storing items on them and taking things in and out.
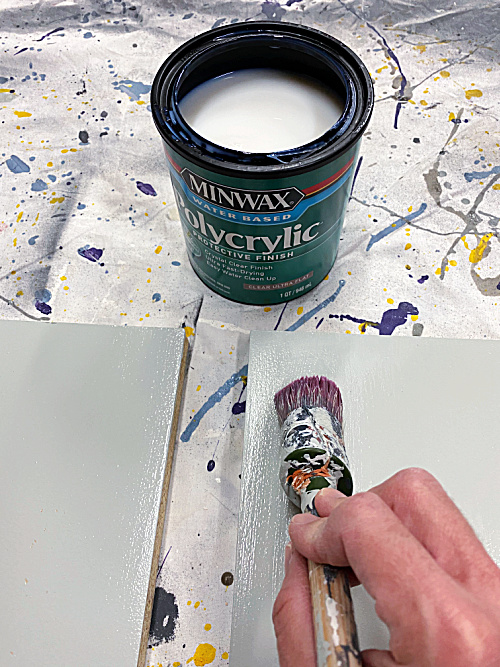
I recommend using Polycrylic for sealing your paint, as polyurethane will yellow your piece over time. Polycrylic comes in a variety of sheens, so you can choose whether you want a glossier finish or a matte finish. I used “Ultra Flat” on mine because I wanted the sheen on the shelves to match the rest of the cabinet that wasn’t getting sealed.
It is recommended that you do a minimum of two coats of Polycrylic, with three being advised. (I did three.) Remember to (again) sand and remove the dust after each application has dried, prior to starting on your next coat.
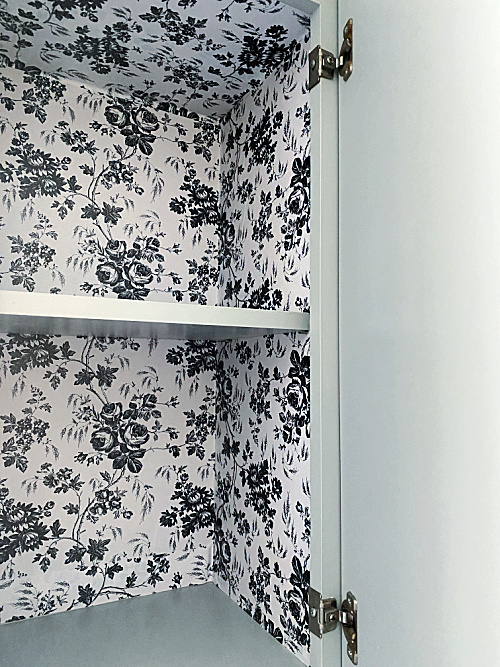
I decided to add one more thing to the inside of our cabinets for a fun twist. I had one roll of this shelf liner sitting in our linen closet, so I bought two more and applied it to the back, sides, and top of the cabinets.
One project done. Quite a few to go 🙂
Budget So Far
- 1 Quart of Paint- $14.48 (Sherwin Williams Magnetic Gray color-matched in Behr)
- Shelf Liner- $2.00 (I already had one roll, so the other two cost $1.00 each)
- Primer, Polycrylic, and Paint Supplies- FREE (Already had on hand)
Total So Far: $16.48
Wanna Catch Up or Jump Ahead?
Week 1 // Week 2 // Week 3 // Week 4
Love it? Pin it!
Thank you for the tip! I’ve always skipped laminate as I have seen other people’s paint not work out well. I will have to try your method.
I really love the paper that you used inside the cabinet. Also, great tutorial on painting laminate. Your room is going to be beautiful!
Great tips! The color is great and the shelf liner looks awesome! I love that you used it on the sides on top.
It looks beautiful Erin! I am painting mine for the challenge too and am loving the results so far! I love your paper on the inside… it looks so cheery and fun 🙂
Love the pattern inside the shelves! It’s going to make laundry more fun 😉
This is great, Erin! I’ve never painted anything like this and I use all those products, so I am feeling well prepared now from your tutorial. Oh and the cabinet looks fantastic!
Wow that looks like a whole new cabinet with the shelf liner inside, what a great idea, and fun pattern too! The paint color makes all the difference in the world too and brightens up the space.
The color is really pretty. And I love your use of the contact paper!
I love this!!! So pretty!!
These cabinets already make me so happy! I love the color and the fun “wallpaper” on the inside. Can’t wait to see them in the big picture!
Great tips here! I love the paint color you chose but the shelf liner is such a fun surprise. I can’t wait to see what else you do in the room!