Grab some toothpaste ’cause we have some pictures to hang! Yes. You heard me right… toothpaste.

I used to dread hanging signs and frames because it meant I was going to create 172 holes in my wall trying to getting things looking good… and straight. I thought I had things figured out with masking tape: basically adhere a strip of masking tape across the back of your frame/décor, create holes where the nails (or screws) need to go, and then put the tape on the wall, using a level to make sure the tape was even. Pound the nails into the holes in the tape and hang your décor… But, I found something that works even better!
This trick is not new, but since I had never heard it before, I thought you might not have either, and it’s been such a game-changer, I had to share.
What You Need to Hang Pictures Straight
Affiliate links may be used. Please see our advertising disclosure for more information.
- Toothpaste (The brand does not matter 🙂 )
- Level (Preferably one that is a bit smaller)
- Hammer & Nails or Drywall Anchors and Screwdriver (if hanging something heavier)
How to Hang Pictures Straight With Toothpaste
While it’s a great idea to use a tape measure to center frames and décor on the wall, we are simply going to talk about how to hang that picture straight once you have found the perfect spot.
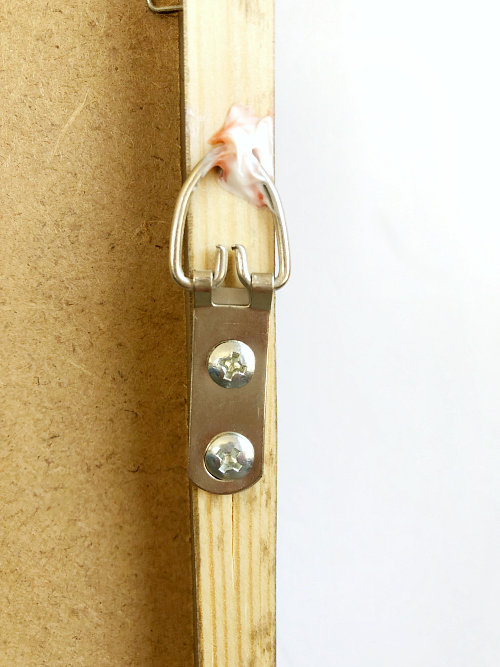
First, grab your tube of toothpaste and apply a blob where the picture is going to hang. This may be in the middle of a sawtooth hanger, it may be at the top of a D-Ring; wherever the nail/screw is going, put a blob of toothpaste.
Now grab your level and place it on top of your frame/décor, and slowly raise your frame up to the place you want it to hang on the wall (not allowing it to actually touch the wall yet).
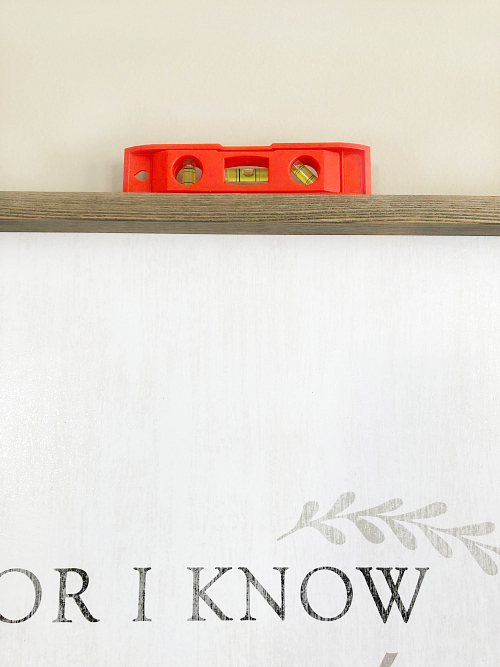
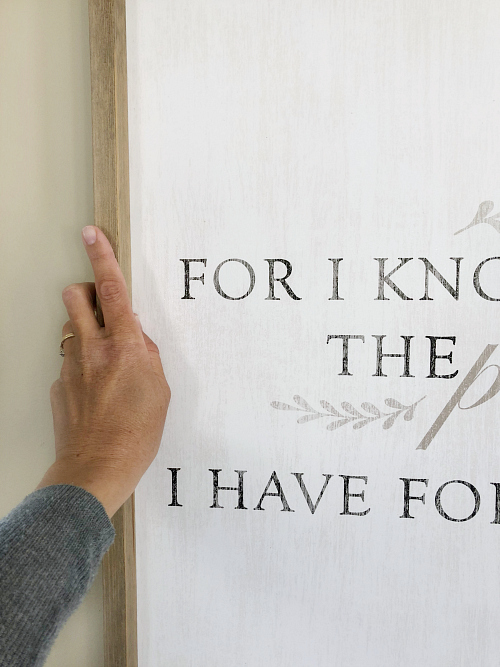
Check your level to make absolutely sure you’re holding it straight, and then press the frame towards the wall so those blobs of toothpaste leave a mark 🙂
Now you know exactly where to put your holes, and you know things will hang straight.

Obviously… not a hand model 🙂
Quick Tip: Because we are human, and may end up angling our nails a bit, if things aren’t exactly straight, a little tap on one of the nails, in an upward or downward motion (depending on which way you need it to go) should put it into place.
Love it? Pin it!
I was behind on checking/clearing out my emails and I obviously Always save yours to make sure I go back and read them. This is why! What a Genius Idea! I have never heard of this, but I plan to most definitely give it a try. Thank You So Much for sharing.
I saw another extremely cool way to ensure frames are level if using a single hanging point. This was on NCIS, a blind woman placed a marble on the top center of the frame and adjusted it until the marble did not roll.
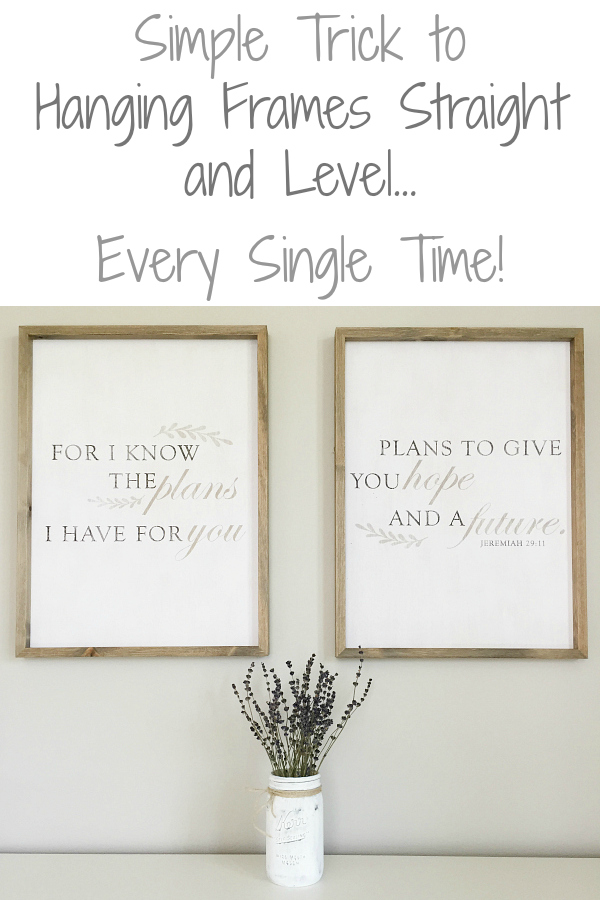
Did you make these pictures? I love them!
While I’ve made similar, these were bought at Hobby Lobby 🙂
I am thrilled to learn this tip! Thanks for sharing. I have left way too many holes when hanging things – even when I just KNEW I had it in the perfect spot. I’ve also used toothpaste to “putty” an errant hole, so apparently it’s good for a lot of things besides cleaning our teeth!
I have heard of using toothpaste to fill holes, but I’ve never tried it 🙂 Who knew toothpaste had so many uses?!
Did you DIY these frames? They are so pretty! Will you post a tutorial?
I didn’t make these exact ones, but I have a tutorial for something similar here: https://www.lemonslavenderandlaundry.com/diy-farmhouse-sign/ Hope that helps 🙂
Thanks for sharing! I had heard that tip but forgot about it. Another tip I learned years ago is to drive your nail in at a slight upward angle, rather than in straight in. It will support the weight of the picture(or whatever you are hanging) better and be less likely to pull down and making a larger hole and possibly slipping out. I also like the grooved nails (I believe they are called paneling nails) as I think they grip the dry wall better than the smooth ones. Happy hanging, so much fun to decorate a new home!
Great tip Vicki! Thanks for sharing!
I never heard of this before, but I will use this method now! I tried using chalk and crayon, but they didn’t work for me. Thank you very much! ☺️
I love that it’s so easy… and everybody has toothpaste on hand (I hope).
Are you kidding me? hahaha! That is just the best! I had never heard of it! Thanks Erin!
This little trick has saved me from so much frustration 🙂