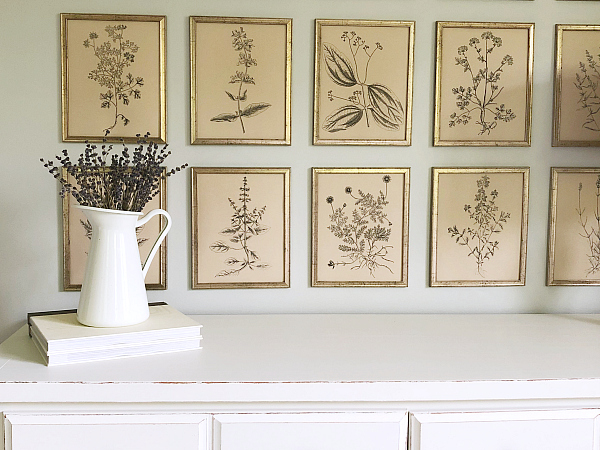
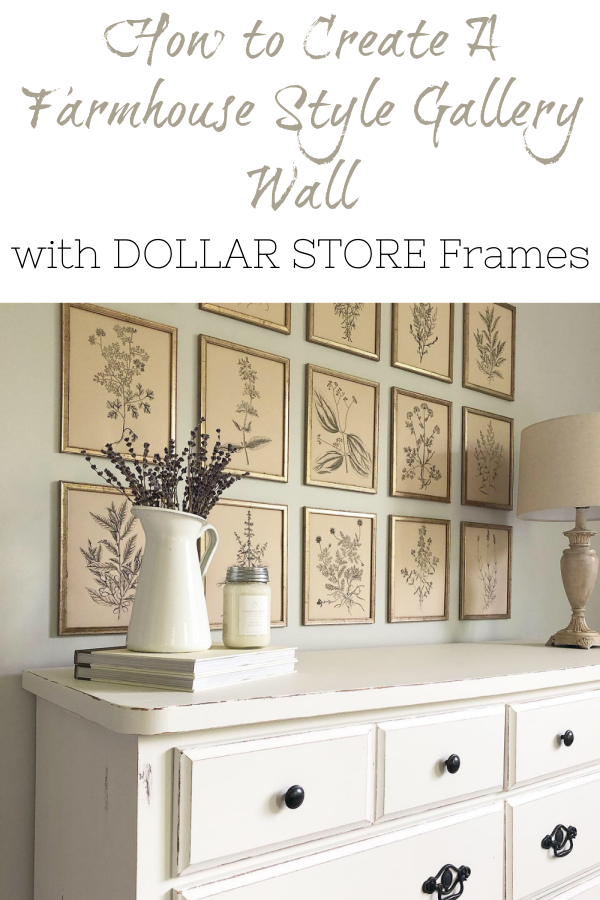
We are slowly working on a master bedroom makeover. Keyword: slowly. So far, we’ve got a new paint color on the wall, a dresser makeover (which I love), and this vintage botanical gallery wall. Before we start, I need to let you know that my inspiration for this gallery wall came from My Vintage Porch. If you love the vintage farmhouse vibe, she is definitely one to follow. She is incredible!
What Need to Create A Farmhouse Style Gallery Wall
Affiliate links may be used. Please see our advertising disclosure for more information.
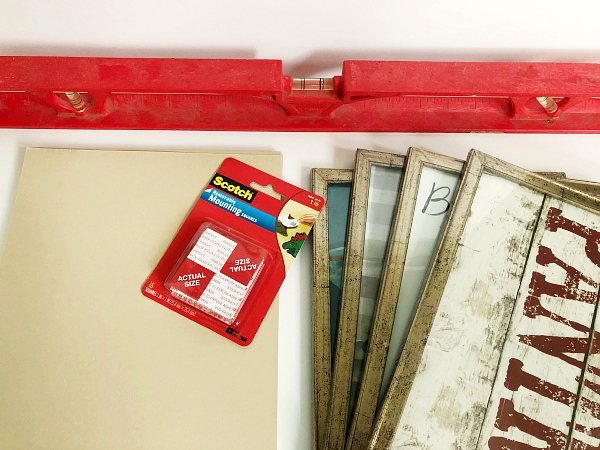
- 8×10 Frames- I bought 20 framed 8×10 prints from Dollar Tree, however, you can go with more or less, and vary the size depending on your preference and wall size. If you don’t have a Dollar Tree near you, Amazon has distressed 8×10 frames in a set for less than $4 a frame.
- Botanical Prints- I bought a monthly subscription to The Graphics Fairy, where she provides a set of 16 herb prints. The monthly cost of the subscription is $9.98, and you get access to more than 100 sets of printables, with new ones coming out each week. $10 for 16 herb printables is already an amazing deal, but for hundreds of printables, it’s a total steal! If you don’t want to mess around with a subscription, there are similar printables available on Etsy.
- Cardstock or Thicker Paper- I found some at Michaels that had a “vintage-y” color, but there is some great looking vintage paper on Amazon that’s a bit cheaper.
- Removable Mounting Squares
- Ruler
- Small Level
How to Create A Farmhouse Style Gallery Wall
Creating Your Prints for Framing
Start by removing the glass and any prints from the frames. This creates a lighter print to hang on the wall (and no glare from the glass).
You are now ready to print and frame your botanicals. You have a few options here:
1.) You can purchase printables off Etsy or Amazon that are the exact size you’ll need. Some are instant downloads, others will be shipped to you. Here are some of my favorites… Just make sure to purchase a couple sets so you don’t have too many repeats 🙂
Clicking on the image will provide you with more information

This Etsy Shop has a ton of gorgeous printables in all sorts of themes if you’d rather do something other than botanicals.
2.) You can purchase a Botanical Wall Décor Book in which you can frame the prints from the book.
3.) You can do as I did and buy/create your printables. I simply downloaded the prints and copied them into a Publisher file. I then expanded the graphic to the size I needed and centered it on the page. There was a little trial-and-error getting the right size, but remember you have two sides of each piece of cardstock to work with, so if you don’t get it quite right, you can reprint it on the other side (or try on copy paper first). I found it extremely helpful to keep the correct size graphic in the publisher file as my reference and then move it off the page for printing.
Once all your prints are printed, trimmed, and framed, arrange them on the floor to make sure you like the lay-out.
How to Hang A Gallery Wall
Once you love your lay-out, you are going to start by creating your “anchor frames”. In other words, your bottom row going horizontally and the middle row going vertically. This will be your guide to placing all your other frames.
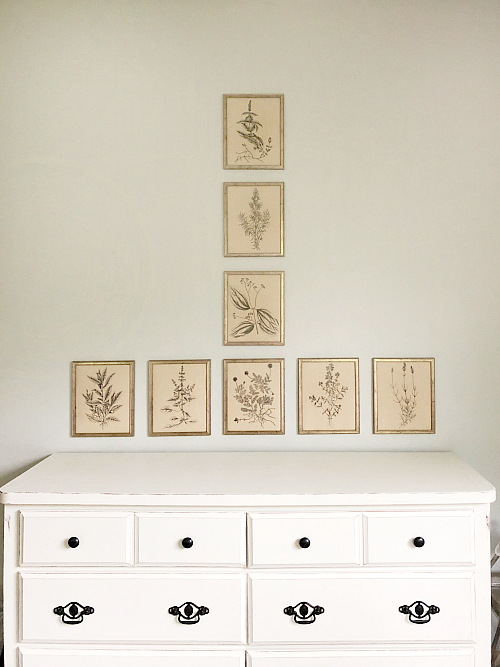
Start with your bottom row, making sure you have it centered with any furniture piece below. Then add the middle row going up.
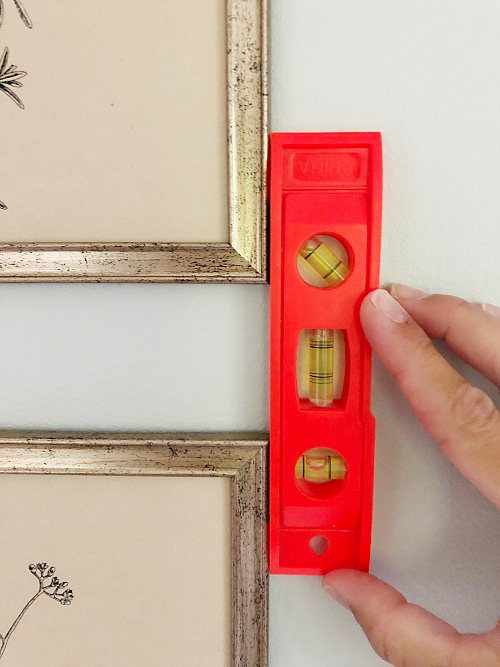
Remember to use a ruler to get the proper spacing between each frame. I went with 2 inches all the way around.
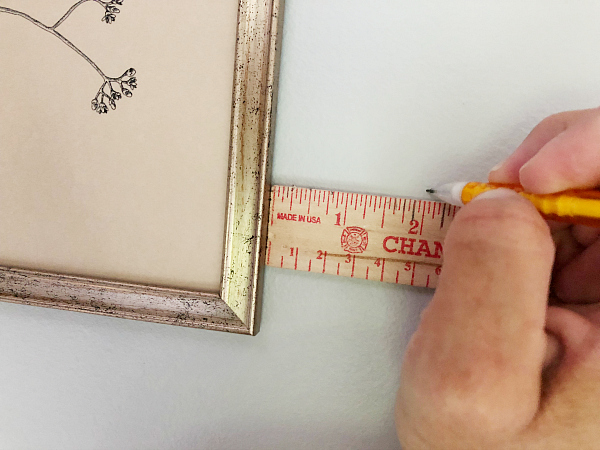
Use your level to make sure the frames are aligned both vertically and horizontally.
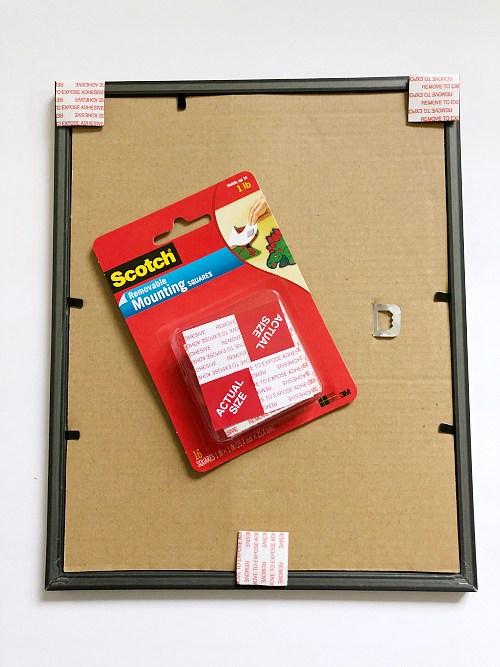
To secure the frames to the wall, I used Removable Mounting Squares. They each hold one pound, and because I removed the glass from the frames, they definitely weigh less than a pound. For added security, I placed one in each of the upper corners and another in the middle, on the bottom.
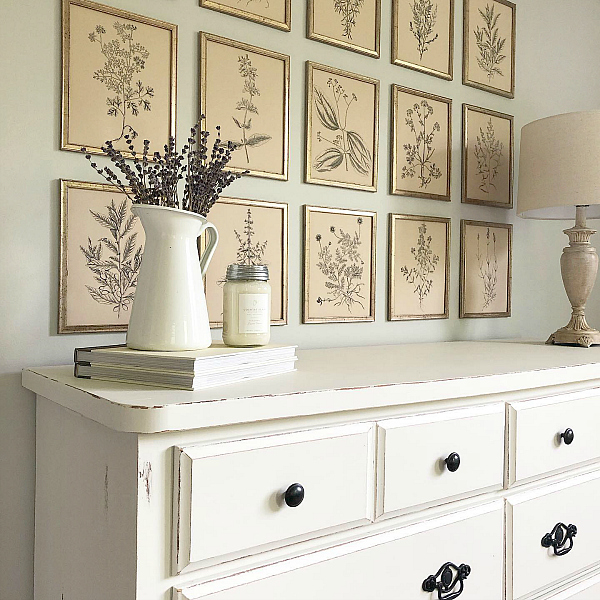
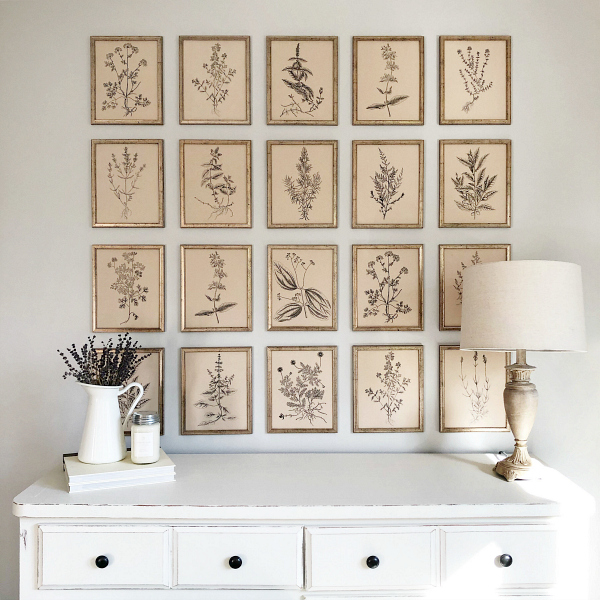
I could not be happier with the way this gallery wall turned out. I absolutely love the simple vintage vibe.
For more information on creating this look, check out my dresser makeover and $12 Goodwill lamp makeover.
Love it? Pin it!
What is the name of the new paint color on your bedroom walls? I love it!
The color is called Stonington Gray. It’s a Benjamin Moore color, but I always color match in Behr to save money 🙂
WOW! It looks fantastic. And so does the dresser.