Fusion Mineral Paint provided the paint and supplies for this post. All opinions are my own.
I have painted quite a few pieces of furniture in my life and have used a variety of techniques. Today I’m sharing how to use Fusion Mineral Paint. Seriously… this might be my favorite paint ever!
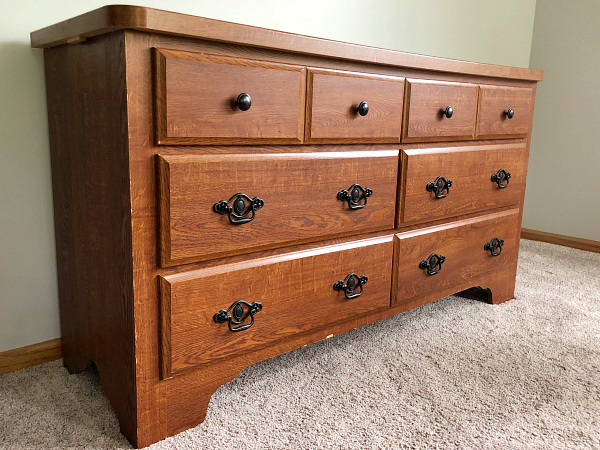
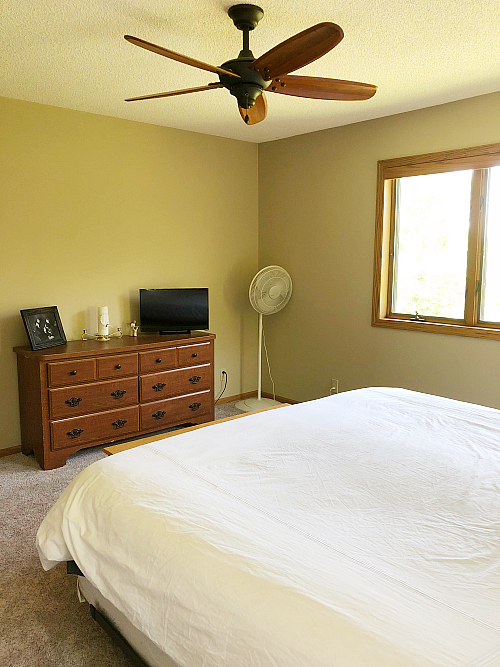
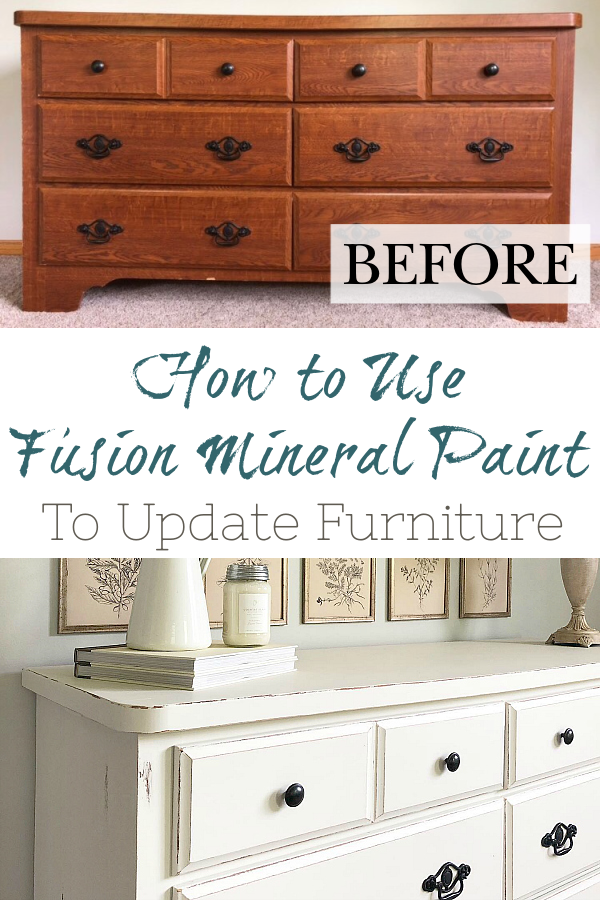
How many of you have an outdated piece of furniture? (Me!) Our bedroom dresser is almost twenty years old. We bought it when we were young (and poor). It has held up well over years, but the style was no longer “us”. It had also been through many moves ‘cross country, creating some gouges in the top. Definitely needed some love…
Here is what we started with…
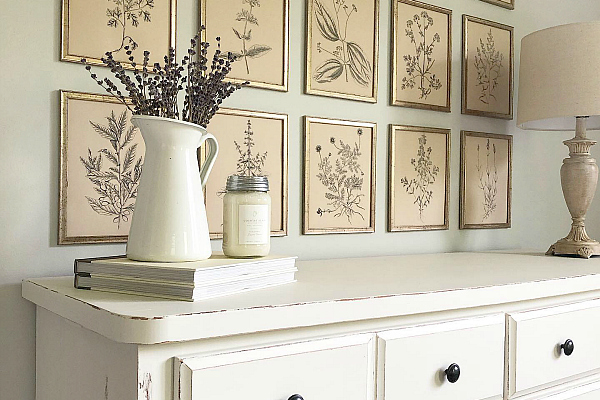
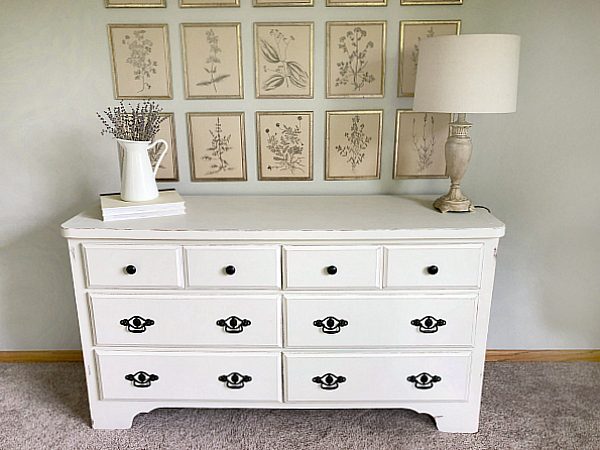
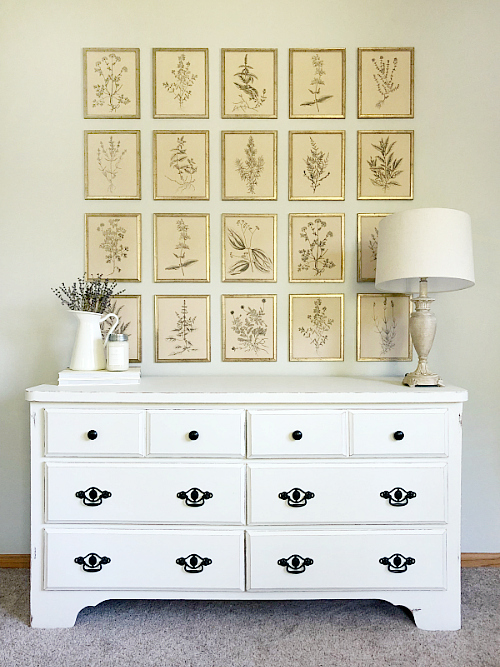
And here’s where we ended up!
Now, let’s talk about how we got there…
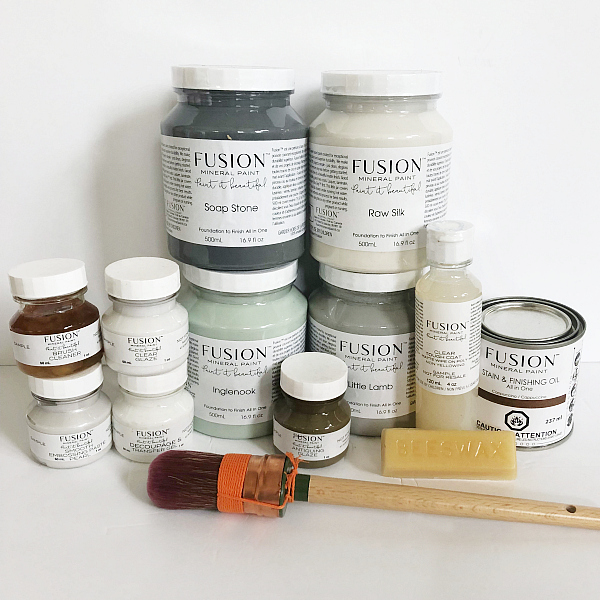
I had heard wonderful things about Fusion Mineral Paint™, so I reached out to see if they’d like to collaborate on this project, and I was so excited when they agreed. They sent over the paint needed for this dresser, along with some other goodies.
Affiliate links may be used. Please see our advertising disclosure for more information.
While I have painted furniture with chalk paint, latex paint and satin enamel paint, this was my first time trying any of the Fusion Mineral products, so I did a lot of research before I started. Here is the step-by-step tutorial of everything I did, from beginning to end, so here we go. (You can also find the process in my Instagram Story Highlights).
How to Use Fusion Mineral Paint
Step 1: Prep Your Piece
Luckily, there isn’t a lot of prep work that needs to be done before using Fusion Mineral Paint. I started by removing all the drawers, then the knobs and pulls. (If you are doing a piece with a lot of hardware, like cabinets, I highly recommend labeling it to match the doors/drawers it belongs to). Because this dresser isn’t a “heavy use” item, I simply cleaned all the areas that were being painted with a little soapy water.
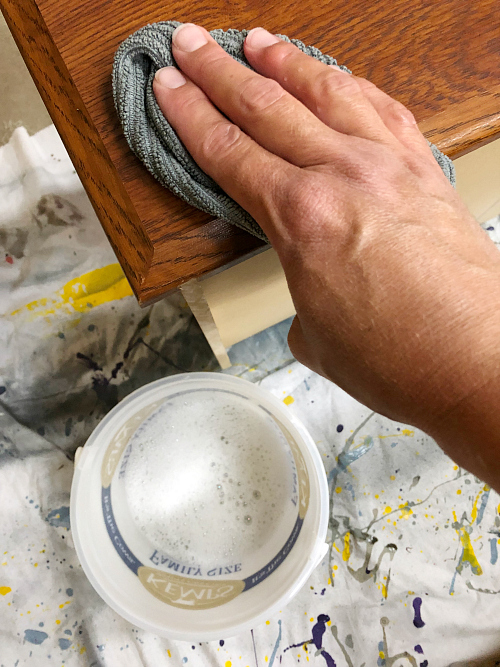
If you are painting a piece that gets a lot of use (like a bathroom vanity or kitchen table) you may want to use TSP for a more thorough cleaning. Once everything was clean and dry, I lightly sanded each piece with a 180 grit sandpaper.
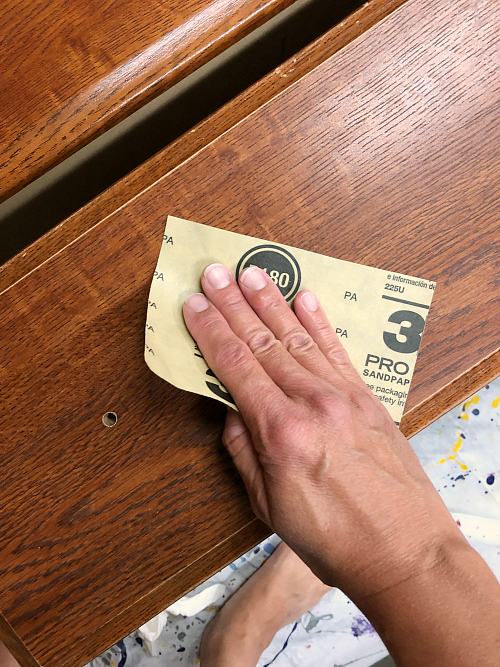
Remember to go over your sanded areas with a damp cloth to remove any dust. If you have any areas that need repair (like I did), use wood filler and a putty knife to fill in the nicks and/or gouges. Also, if you are painting a high-gloss surface or laminate, it is recommended that you apply Ultra Grip first.
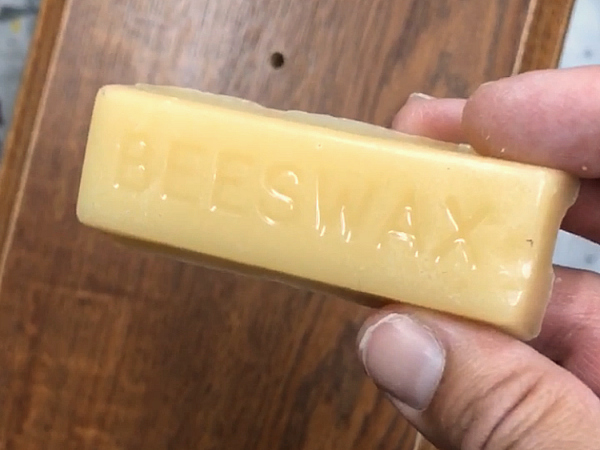
Because I wanted to distress my piece, I used a Beeswax Bar. Fusion Mineral Paint doesn’t adhere to wax, so you simply apply the Beeswax to any area you’d like to distress.
Step 2: Paint
Lessons Learned When Painting Furniture with Fusion Mineral Paint
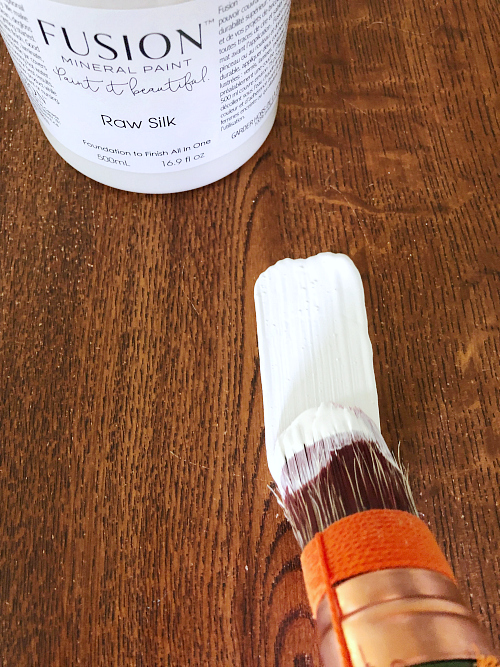
- It is better to do multiple light coats vs. a couple thick coats. When you get too much paint on your brush, it creates brush strokes and an uneven appearance. I know that means more time painting, but it’s worth it.
- Use a high quality brush (even though they’re more expensive). Trust me. I am always looking for a bargain, but using a high quality paintbrush will make a world of difference. This paintbrush I was sent is the best I have ever used.
- Long, even strokes. If possible, try to create one long, even stroke from one end of the piece to the other. This, again, reduces the appearance of brush strokes and allows for a more even finish.
- When choosing a white paint color from the Fusion Mineral Paint line, check out this video. I found it super helpful in choosing the color I wanted. In the end I went with Raw Silk.
Okay… go ahead and paint on that first coat!
If you decide to create the distressed look by applying wax, wait 30 minutes after application and then go over the areas in which the wax was applied with sandpaper. The paint will easily sand off, creating a distressed look. Remember to go over the sanded areas with a damp rag to remove any excess dust prior to applying your next coat of paint.
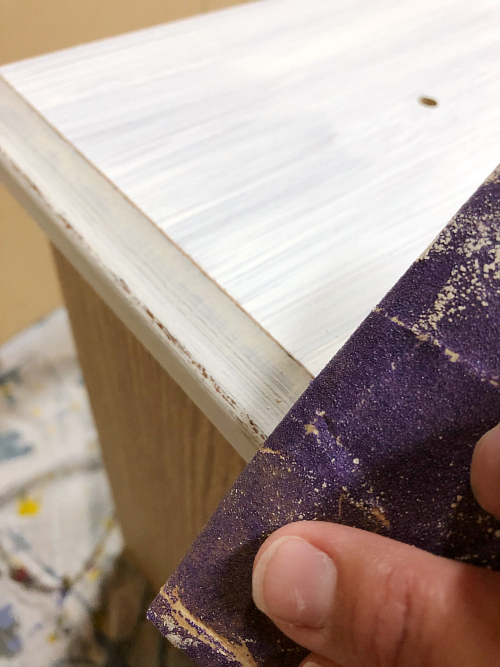
Fusion Mineral paint is dry to the touch after 2 hours, however, it is recommended that you wait 4 hours before applying your next coat. I decided to go over the distressed areas with the Beeswax Distressing Block before each coat, and sand it off each time. Here’s the final result…
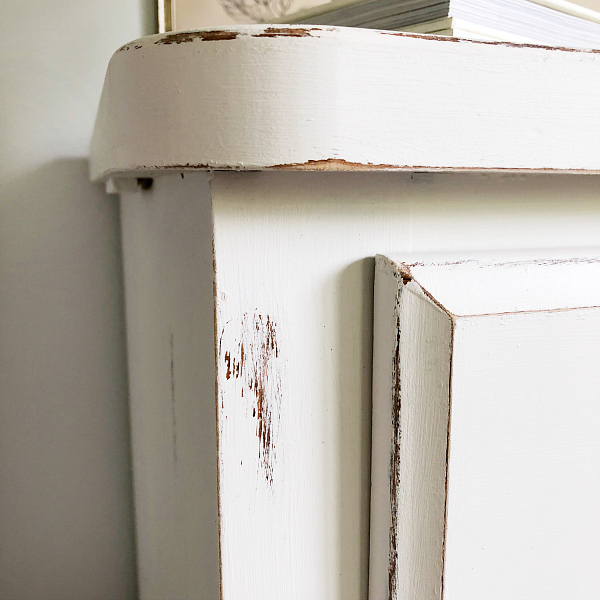
Because I chose to use a white paint over a dark surface, it took a total of 4 coats of paint to fully cover the piece, however, I was able to do all four coats with just one jar of paint (and I still have some left over)!

Fusion Mineral Paint dries to a matte finish, and doesn’t require a top coat/seal in most circumstances, however, if you are painting a heavily used piece, you can apply Tough Coat™ Wipe On Poly.
Step 3: Finishing Touches
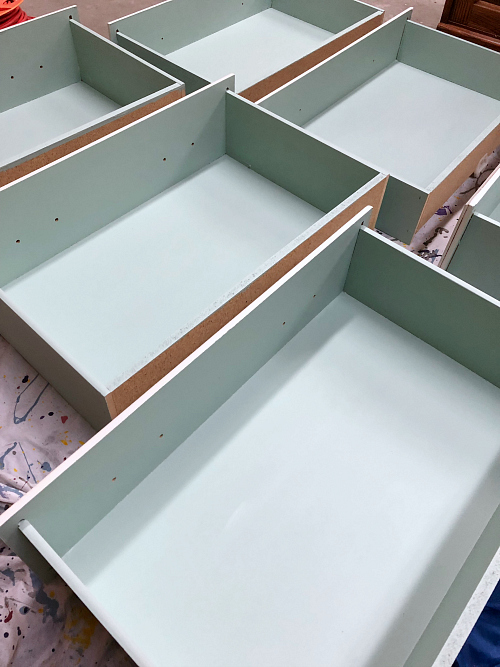
While many would choose to stop at this point, I decided to add a little pop of color by painting the drawers in the color Inglenook. I followed all the steps from above, however, I did not distress any part of the drawers, and it only took two coats of paint to cover.
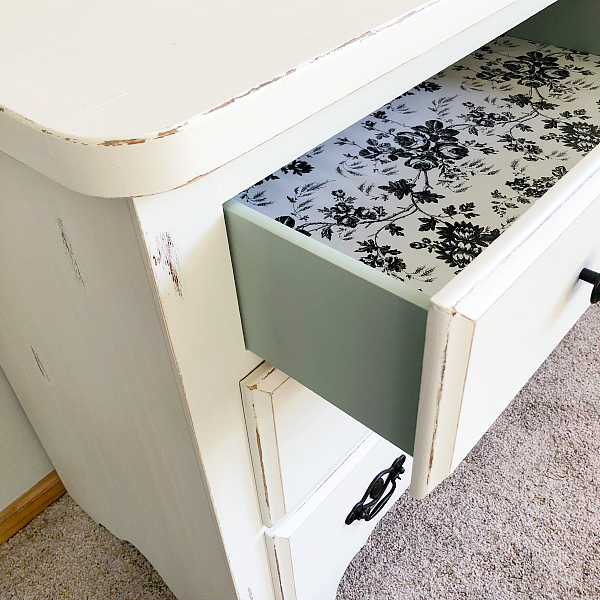
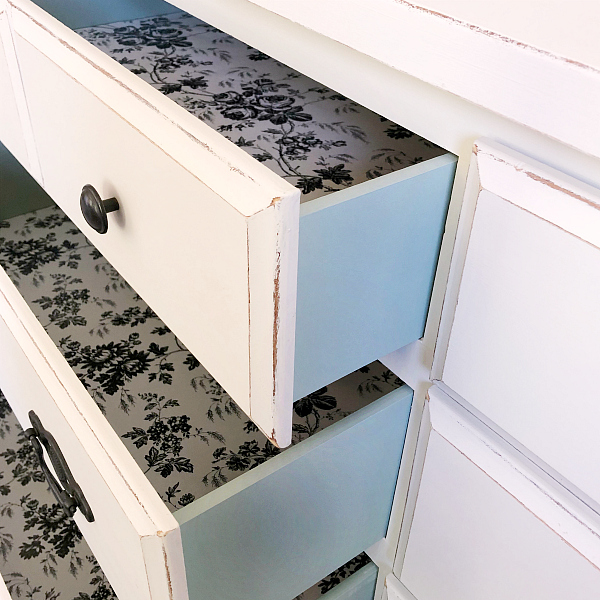
The last step was to add cute drawer liners. And guess where I found them? The Dollar Tree! Black and white floral contact paper for $1? Yes please. (Larger and very similar liner from Amazon). Each roll covered 2 drawers, so I spent $3 total.
*To avoid the difficulty of working with contact paper, I simply cut the backing off only on the four corners; this way it sticks, but remains easy to work with.
… and that’s all there is to it!
Before
After
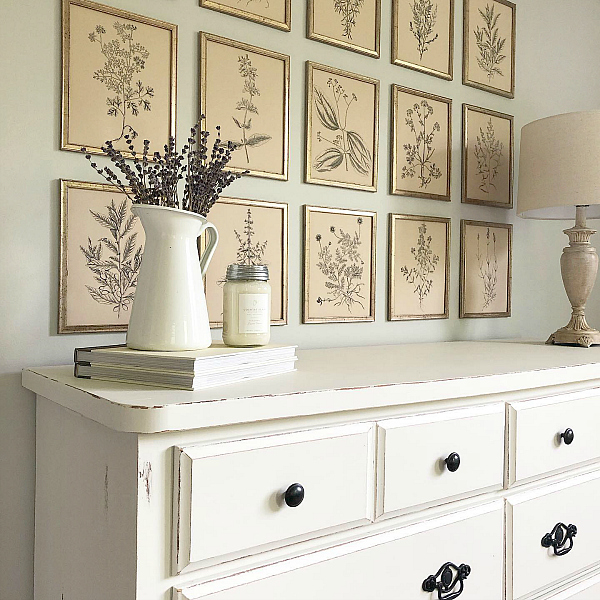
… and that “Botanical Gallery Wall”? You can find that tutorial here.
Looking for more furniture flipping inspiration using Fusion Mineral Paint?
Check out more furniture flipping ideas and color options!
Love it? Pin it!
Beautiful work on the dresser! I especially like the distressed look. It makes the dresser look like a piece that has been handed down through your family for generations. Well done.
I love it! Can’t wait to try it on a piece of my own (might be months as we’re in the process of a major move)
Looks so good!! Where did your purchase the bee wax distressing block? Is there any other distressing techniques you suggest?
I love the way it turned out. easy to follow instructions. Thank you so much’!
i’m loving this!! And great tip on the drawer liners, too. Gotta remember that! You made a great choice using Fusion. So glad you love it!!
Keep up the great work!!
Your dresser is beautiful! Also, I love the tip about only sticking down the corners when using contact paper as drawer liner, genius! I recently purchased some milk paint to try on old furniture, I’m inspired to get to it. Looking forward to seeing your completed bedroom!
Impressive looking dresser! Love the distressed look!
This looks awesome! I’m going to check this paint out to do a project of my own. Thanks! Great job!