I am currently working on redoing our porch for the $100 Room Challenge. As you may recall from week 1, I really wanted a blue front door, and how perfect it is that the red paint started peeling off the door and it needs new paint anyway. As I went through the process of painting our front door, I learned a few things I thought I’d share with you.
I always like to share where a project starts… so, here is our front door prior to painting. Lovely, huh?
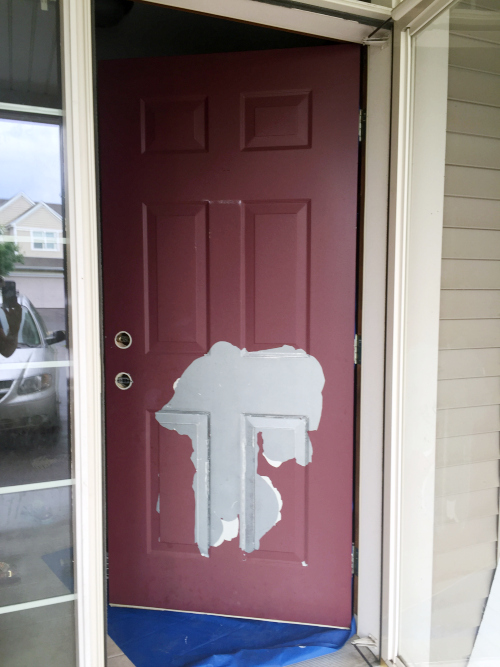
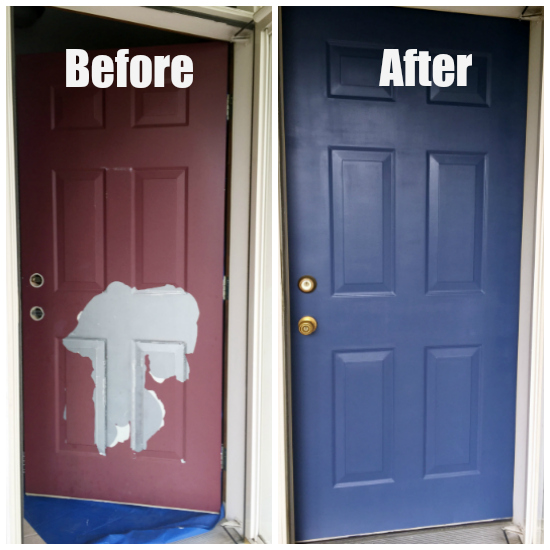
First, I didn’t love the color. It had faded in the morning sun, so it was kinda “rosy red”. Then, over the winter, the paint literally started peeling off in big sheets. Problem is, you can’t paint while it’s snowing, so we had to wait it out until spring.
How to Paint A Front Door with Tips I Learned Along the Way
Step 1: Prep the Door
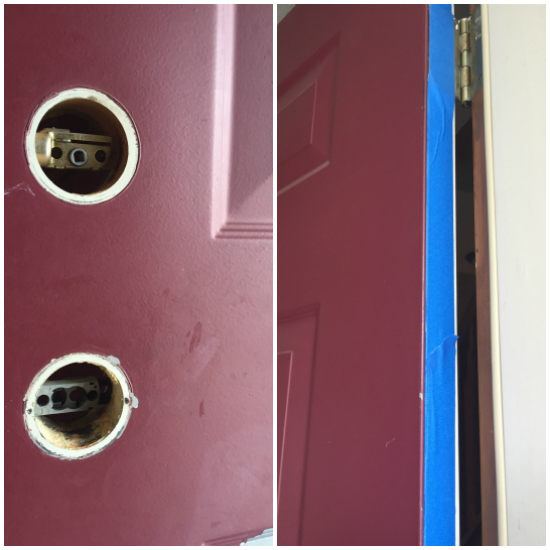
Start by removing the door knob and lock. Then apply painter’s tape to the areas you don’t want stripped and painted.
Step 2: Strip Old Paint Off The Door If Needed

Because the paint had peeled in some sections, we couldn’t just paint over it; we had to strip off all the old paint. This was the first time I’d ever stripped paint, and I learned a few things I want to share.
Things to Consider When Stripping Paint
Use Proper Protection
- Wear gloves that prevent chemical burn- I started out thinking some vinyl gloves would be sufficient. I was wrong. Every time the paint stripper touched my skin, it burned. I’d run to the sink and wash it off, but I’m sure this wasn’t a good idea. I had to go back to the store, so I purchased some disposable gloves that were supposed to work with chemicals, but they would tear easily. I made it through with those, but next time, I’m investing in a better pair of gloves.
- Wear a respirator/mask- I didn’t do this because I was working in a well ventilated area, which was what the directions said to do, but my throat got pretty irritated… admittedly, this could just be my seasonal allergies, but I’m pretty sure those fumes are not great for breathing. I will absolutely use a respirator if I ever strip paint again.
- Wear Safety Goggles- I did wear safety goggles to prevent eye irritation.
Prepare the Area
Make sure there is adequate ventilation when using paint stripper. I opened the door to the outside, and opened all the windows on the main floor. I also put down a plastic tarp so all the paint would fall onto it, making for easy clean-up. I then poured the stripper into a metal can and used a plastic putty knife to remove the paint.
Make sure to follow the instructions on the can of stripper for proper use and disposal.
Apply A Thick Coat of Stripper
Since this was my first time stripping paint, I didn’t realize you needed such a thick coat of stripper. When I applied a thinner coat, the stripper dried so quickly, it didn’t have a chance to do its job. So really lather the stuff on there.
Dispose of Paint Properly
Check with your state/county to see what you should do with your stripped paint. Our home was built in 2002, so I wasn’t worried about lead-based paint* on our door, but, for proper disposal of the paint chips, I was to double bag them, and put them in the trash. Unused paint thinner cannot be placed in the trash, so I’ll store it, but you can also bring it to a recycle center.
*If you have concerns about lead-based paint, you can buy a lead paint testing kit prior to using paint stripper.
Step 3: Prime The Door
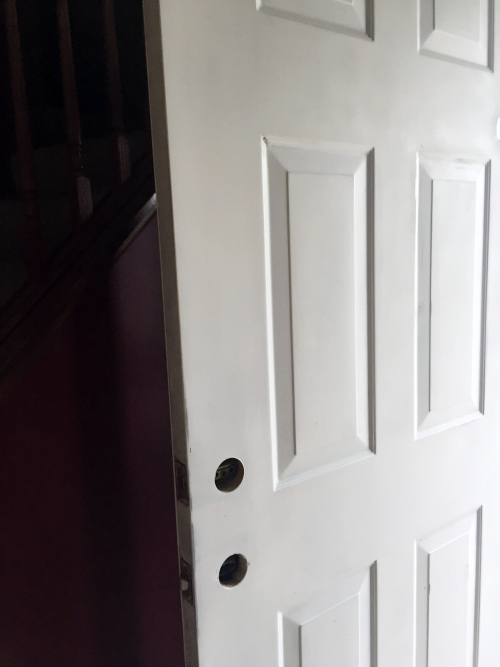
Once all the paint has been removed, thoroughly wash the door to remove any dust/dirt, etc. Now you are ready to prime the door with primer. I asked some trusted bloggers what they use for primer, and most suggested Gripper Primer, so that’s what I used. (UPDATE: Gripper Primer has been discontinued, so I would suggest trying a bonding primer instead.)
Step 4: Paint The Door
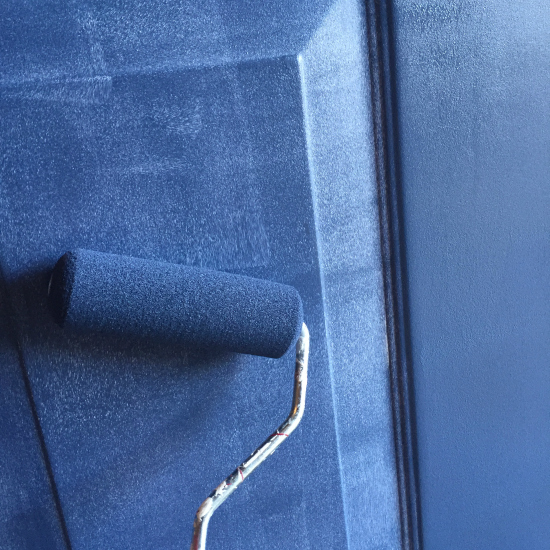
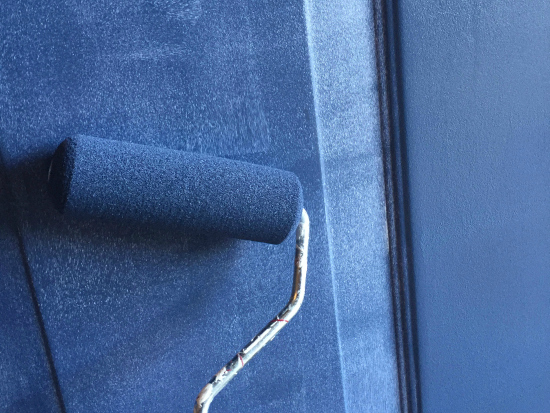
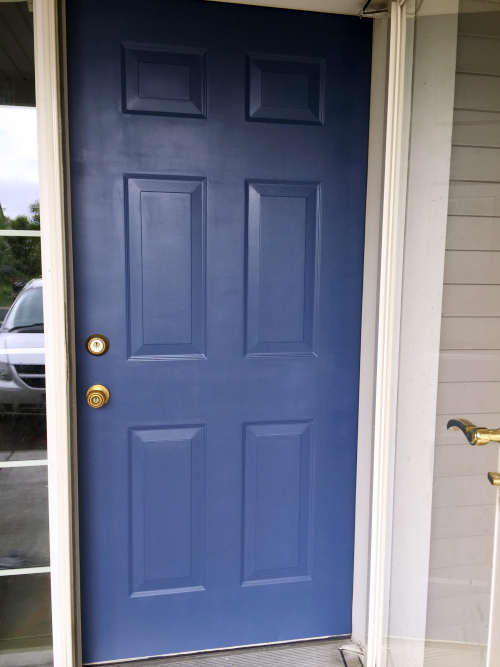
If you are an Instagram follower, you got to help choose the color for the door (and got a sneak peek). I went with the majority and bought English Channel by Behr in an exterior satin. Using a small foam roller, I applied 3 coats, and… ta da!
Here’s a look at the before and after…
Budget… So Far
For Stripping the Paint: $14.43
- 1 Quart Paint Remover- $8.98
- Plastic Scrappers (3 pack)- $2.97
- Plastic Table Cloth (To catch paint chips)- FREE (Already Had)
- Paint Brush- FREE (Already Had)
- Metal Can- FREE (Already Had)
- Disposable Chemical Gloves- $2.48
Primer– FREE (Already Had)
1 Quart Exterior Paint– $17.54
Foam Rollers– FREE (Already Had)
Total So Far- $31.97
Wanna Catch Up or Jump Ahead?
Week 1 | Week 2 | Week 3 | Week 4 | Week 5
We think you might also love these ideas!
How to Strip Furniture with Oven Cleaner | DIY Bifold Barn Door | How to Paint Appliances

Love it? Pin it!
So my front door is the same ugly color your before door is, and I hate it! Unfortunately my window shutters are the same color. Do you think the door and shutters have to match in color?
Thanks
We had red shutters that matched the original door color as well. We ended up leaving them red because we moved and never got around to doing something different… However, had we stayed in the house, I probably would have removed the red shutters and gone with a stained wood to match the pillars on our front porch.
Could you tell me is this a wooden or steel door. I am wondering if the stripper could be applied over a steel door. Thanks!
This was a steel door 🙂
?love the color!?
i will be painting my front door this summer and I am looking at blues as well.
thanks!!!
Thanks for the great DIY! I’m wondering if you are able to shut the door that night? My concern is about the paint getting messed up along the edges??
Hi Amy-
As long as you paint in the morning, allowing it most of the day to dry, it should be fine to close and lock the door at night without ruining the paint. The paint dries rather quickly, but best to let it really cure for as long as possible. Hope that answers your question 🙂
Thank you for this good advice. I plan to paint my front door purple. I want to see and remember all things with color before I head out to the next life. For one, my eyesight is poor but as long as I can still use my hands I’m painting everything!
Well, purple sure sounds like a fun color for a front door!
Hi, I’ve been reading article after article before attempting to paint our front door. Your post has been the most thorough! However it didn’t say if it was a wood or metal door, could you let me know? I know that will change what paints I have to get. My door is a metal door so I want to make sure I do it right the first time! Thanks
I also have a metal door, so everything I did here was done on a metal door. Good luck!
Erin,
I’m re-reading this post because I attempted to paint my own front door earlier this week, but had to stop because the paint did not smooth out after being brushed and rolled on. It looked- for lack of a better word- bumpy. And where I had cut in around the window retained the brush marks. I see you used an exterior paint which is what I used and I used a foam “door” roller too. Did your paint look not so great after the first coat? When I opened the paint, I was surprised at how thick it was; like unset pudding. But we painted our garage not too long ago, and I think that thickness comes along with exterior paint. Any insight or recommendations you can make would be greatly appreciated!
I am not quite sure why the appearance would be bumpy, unless there was an uneven texture on the door prior to applying the paint. Did you sand and clean the door prior to applying the paint? The other issue might be that the paint itself has something in it, but if it’s a new can, that would seem unlikely. As for the brush strokes showing; this is quite common after the first coat. They tend to become less noticeable after the second (or third) coat. I also do not recall the paint being as thick, as you described. However, different brands of paint can vary in consistency.
If I were in your position, I would try lightly sanding the door to remove any uneven (bumpy) texture, clean it really well, and try painting again. Hope that helps.
I love this! How long did it take you? From beginning to end?
Hi Maria- Stripping the paint was the thing that took the longest… probably an hour or two. Once that was off, and the surface was cleaned up, painting didn’t take long, maybe 15-20 minutes per coat of paint. You do need to let it dry in between coats, however, but if you wanted to, you could do this in a day.
Your door looks great! I wish the blue would match my house. Try Citristrip next time instead of those toxic chemical strippers. No fumes and has proven to work better for me than the harsh chemicals. Also, Glidden makes a timetable gel paint that is great for steel doors and it’s supposed to be fade proof.
That’s tintable, not timetable.
Thanks for the tips Rebecca! I will definitely look into Citristrip if I ever tackle another paint-stripping project.
I never stop being amazed by the power of paint! Love the color you selected!!!
Thanks Tammy! I totally agree. Paint can do wonders!
what a HUGE change from one little can of paint! You did a great job. It looks fantastic!
Thanks Janis. Paint is such a game-changer!
Looks amazing Erin! I love bright doors! I don’t like stripping paint either, but understand that sometimes it just has to happen..thanks for the info of what you went through!
Thanks Kristen! Pretty sure I will not be adding “paint stripping” to my list of favorites, but you’re right, sometimes if just needs to be done.
It looks great! Love the shade of blue you chose!
Thanks Ruthie! I have wanted a blue door for-ever. So nice to change things up.
Love it! I too like blue doors. In fact, your color looks very close to what I painted front door which was a kelly green when we moved in.
Yay for blue doors! Love them!
Well you certainly did that door a favor…lol!!!!! Super job!
Ha ha! I don’t think it could have been much worse at the start, so really, anything would have been an improvement, right?