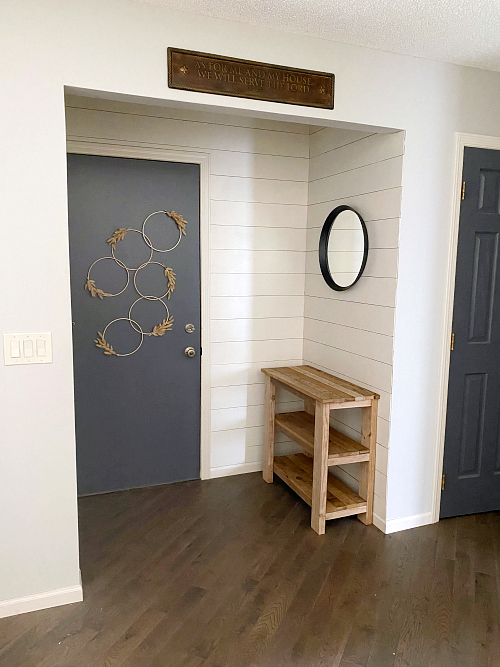
We have a very plain, very boring door in our entry, and I wanted to spruce it up for the $100 Room Challenge, so I grabbed a few craft supplies I already had on hand and made some DIY Door Decor… and it’s not a wreath!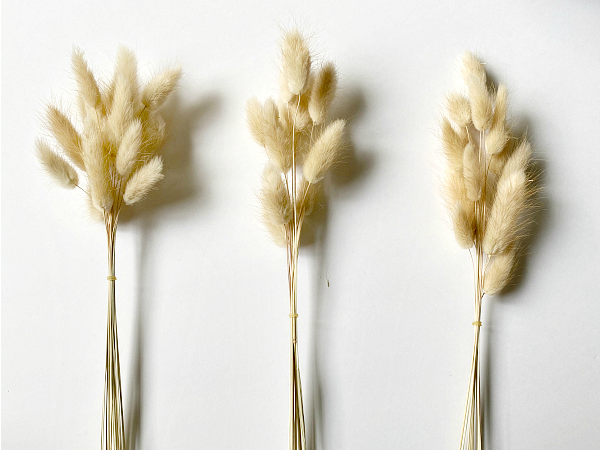
We are in week 3 of the $100 Room Challenge! Our biggest project was making an entry table… and you guys… I need some help! (We’ll discuss that in a minute.) The other project I worked on is creating something to decorate our very plain door that leads out to the garage. Because we are on such a tight budget, I cannot afford to buy anything new (like a wreath), so I looked through my craft supplies and I think I’ve discovered a pretty cute way to make our door look a whole lot better! Let me share what I did…
What You Need for This DIY Door Decor Project
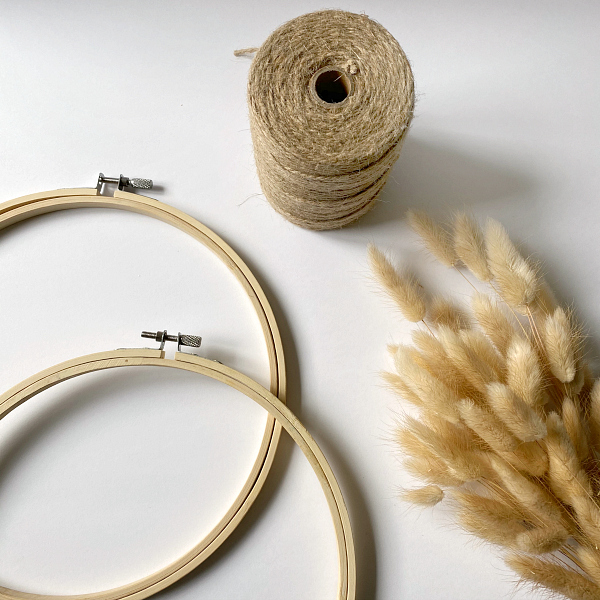
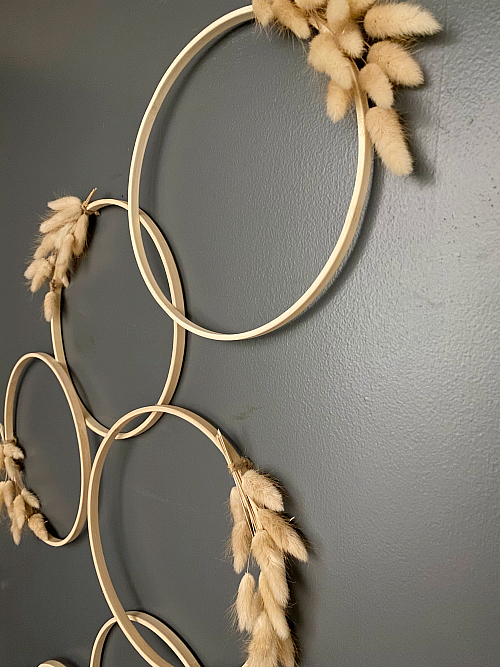
- Embroidery Hoops– I took mine apart, so each embroidery hoops gave me two circles to work with. Mine were 9″, but you can certainly use a different size or a variety of sizes.
- Hot Glue Gun
- Twine
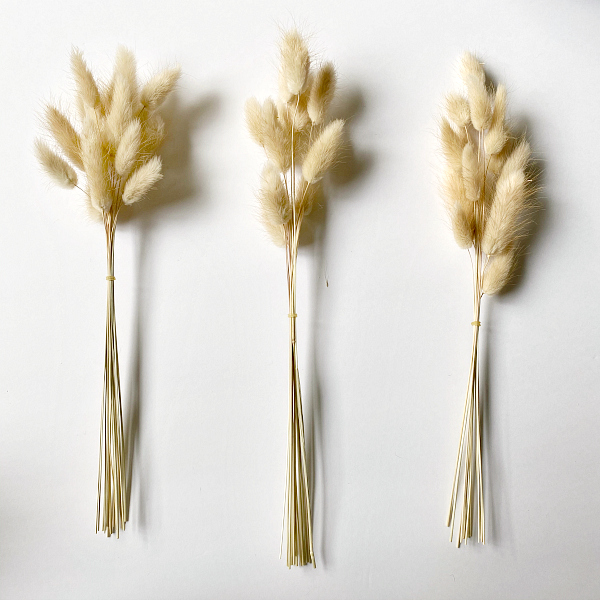
- Floral and/or Greenery Stems– In this case, because we’re entering fall, I used some wheat stems I found in my basement
- Command Hooks
How to Make DIY Door Decor with Embroidery Hoops and Wheat Stems
After gathering your supplies, arrange your hoops and florals/greenery in a variety of combinations until you find a design you love. Since I’m working on a door, my design is more vertical, but this can be used in other areas as well.
Once you find an arrangement that works well for your space, use a dab of hot glue to hold your embroidery hoops in place.
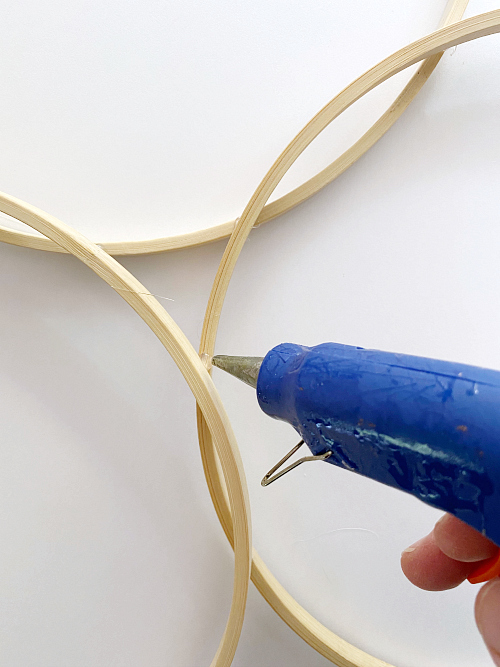
*Please note, this is not going to be what holds everything together in the end, but it helps keep things in place as you add the florals to your piece.
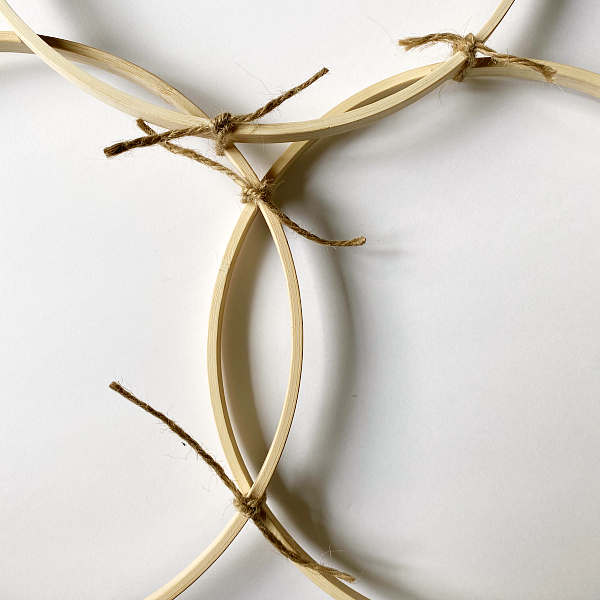
For a little extra security, tie those areas together with a little twine as well. In the end, you can choose to keep the twine or cut it off if it’s not your style.
Now that your embroidery hoops are in order, you can add your florals. For the wheat, I gathered several small bundles and tied them together with my son’s braces bands (do NOT tell his orthodontist that I’m using his bands for crafting 🙂 ).
I then laid the wheat on the hoop in the general area I wanted it and secured it with some twine. Because I wanted to wheat to curve around the edge of the hoop, I used more twine to tie it in various places along the hoop.
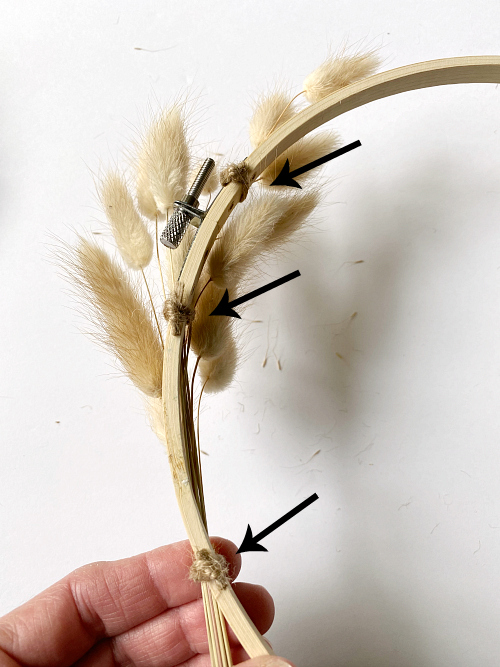
*Please Note: Do no worry about long stems at this point. You will want them in place for now because, more than likely, you’ll want to tweak things a bit. Everything you have done up to this point still allows you to move the wheat/florals around on the hoop.
Once you have secured all the florals onto the hoops in a way that looks good to you, set each hoop into a command hook, hidden under the wheat/floral.
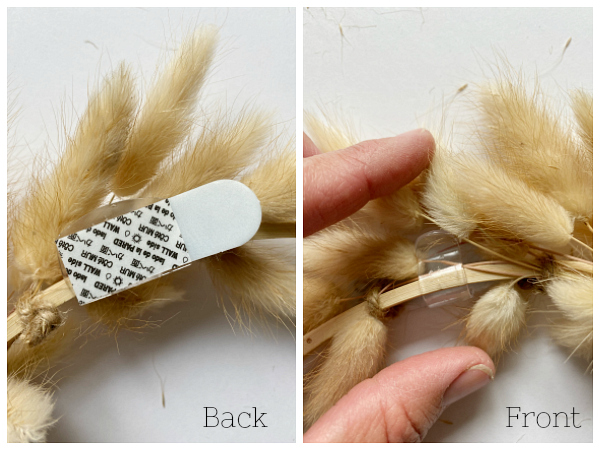
Center your piece in the space you are using it, and then peel off the back of the command hook and secure it to the door/wall. Step back and take a look at everything; then make any necessary adjustments to your florals.
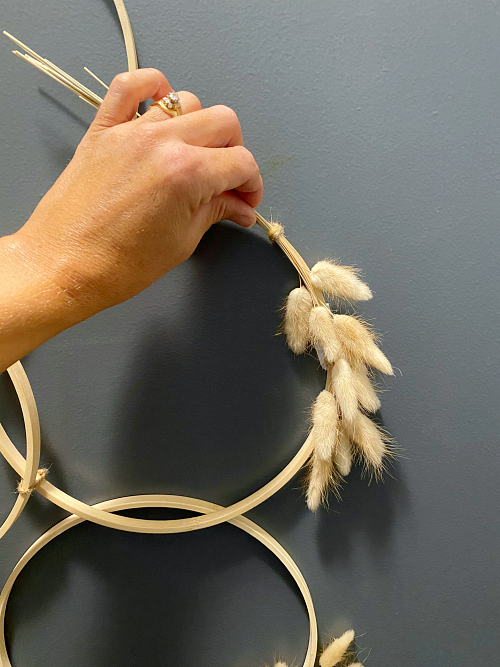
Once you have everything just where you want it, go ahead and clip the ends off your florals. This is also the point you can cut the twine you used to secure your hoops together if you don’t want to keep it.

This is what I ended up with in the end.
Let’s Talk About that Table…
We got a table (almost) built. The slats on the shelf have not been nailed in and we are making “x” shapes on the ends, but I have a dilemma. I keep going back and forth on whether or not to stain the table. I love the look of this old rustic barnwood with all its different shades and imperfections, but when I originally saw this entry in my mind, the table was a dark stain to match the floor. What do you think? Leave it light or stain it darker? I truly cannot decide.
The Budget… So Far
Last week I had spent $27.96 on shiplapping the walls. Here’s where we stand this week…
- Mirror- 29.99
- DIY Door Decor- $1.51
- Embroidery Hoops- Bought one for $1.51 (after 20% off coupon) and had two on hand
- Wheat Stems- Already had
- Other Supplies for Project- Already had
- Table- FREE (So far anyway) The wood is from my husband’s grandma’s barn mixed with other wood we had on hand
Total So Far- $59.46
Wanna Catch up or Jump Ahead?
Week 1 // Week 2 // Week 3 // Week 4 // Week 5
Love it? Pin it!

I am loving that fall “wreath” so much! I am a sucker for dark-stained furniture usually but I love the contrast the light wood here! Tough decisions!
I would leave it as is but that’s the farmhouse lover in me saying it. That “not a wreath” is awesome!
How darling is this?! I’m always looking for non-wreath ideas and you nailed it. Beautiful job!
Erin I am absolutely in love with this idea, embroidery hoops are so cool and this reminds me of the baskets galleries that are popular right now. Great idea!
I like the slats the way they are or with a clear coat to finish. You could either leave it all natural or just stain the frame.
What a beautiful idea for a wreath, simple and makes that door pop. Enjoying seeing all your progress.
This hoop art is so cute! I love that this works so well for fall, but can be used all year long. I say leave the wood as is- I like the natural wood tones of the different woods. And live with it for a while- then if later you decide to stain it you can. Win-win
Normally I love darker stained furniture, but I really like your table as is with the varying wood tones. maybe with just a matte or satin clear coat. It’s a nice contrast with your floor and still stands out against the wall color. The hoop door decor is really cute!
Your entryway is looking awesome already! Just based on the photo, I would stain the table. I think it would look great in a nice medium brown shade like Minwax special walnut. You would still be able to see the variations in the wood tone through the stain but it would give it a more finished look. But that is all based on the photo – I know things can look pretty different in person sometimes!
Erin,
I LOVE your table. So cute. What a great project to dress up a door!