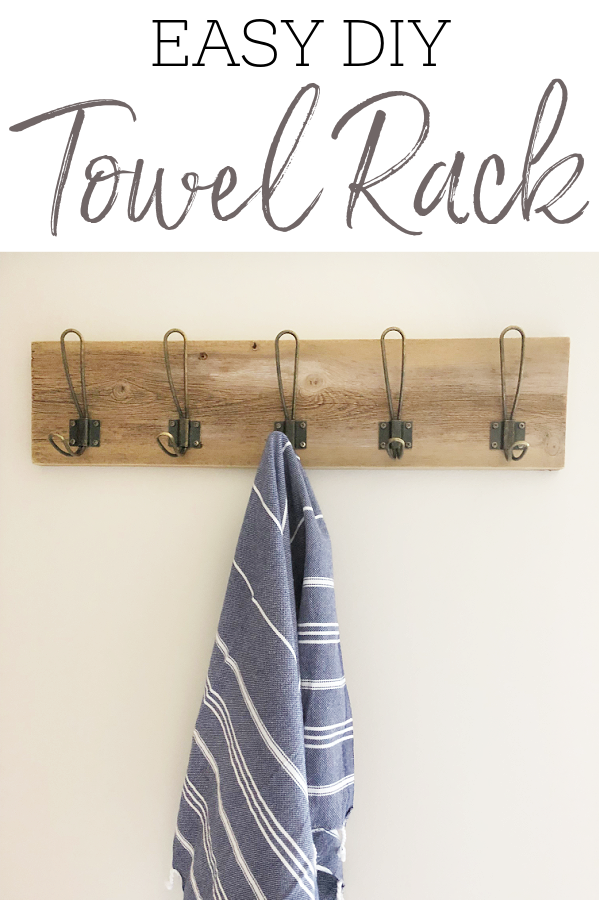
It’s week 2 of the $100 Room Challenge, and things are coming along. If you are following the progress on Instagram, then you know we got some paint on the walls and are rethinking the black accent wall… more on that later. For now, let me share with you a very easy DIY Towel Rack.
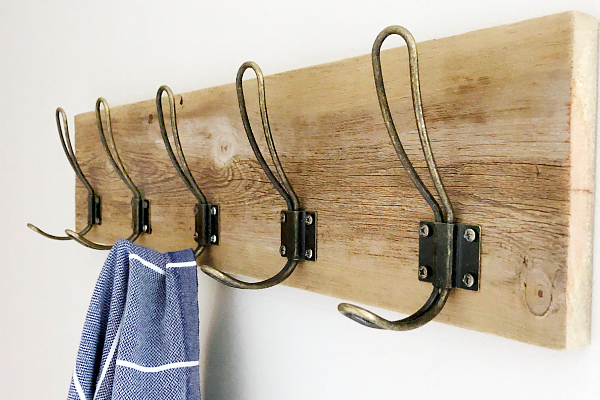
As I was getting ready to paint, I realized what an outdated towel rack we had hanging on our wall…
Yea… Not great. So I decided to make a new one. This is so incredibly easy to do, and luckily I had everything I needed, except a few screws (Score!)
What You Need to Make A DIY Towel Rack
Affiliate links may be used. Please see our advertising disclosure for more information.
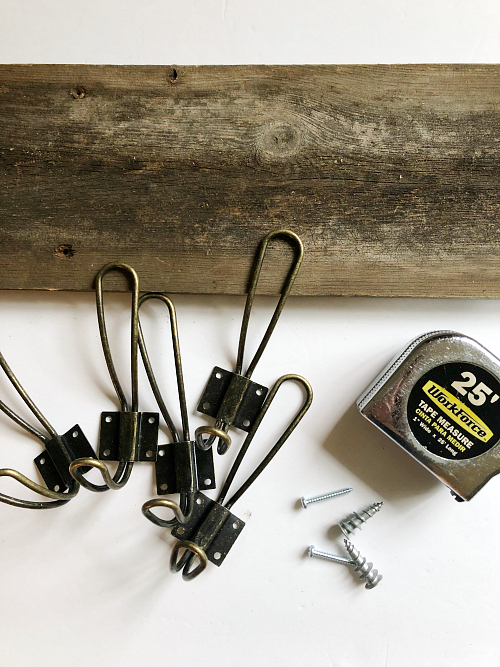
- A Piece of Wood- You can buy new or use something you have out in your garage (like I did). Dimensions will depend on the size you want. If you are only adding 2-3 hooks, the wood can be shorter. Adding more will require a longer length. Height will depend on the hooks you choose to use. See how you can get free/discounted wood here.
- Hooks– Amazon has some wonderful “farmhouse style” hooks for cheap, otherwise, Hobby Lobby has a great selection as well (just make sure you buy them the week they are 50% off)
- Drywall Anchors
- Tape Measure
- Level
- Drill
- Sand Paper & Stain (Optional)
How to Make A Farmhouse Style Towel Rack
Step 1: Clean Your Wood
If your piece of wood has been sitting out in a dirty garage (like mine), go ahead and clean it. I used a little soapy water and a mild scour pad to loosen the dirt and grime. Once clean, allow the wood to thoroughly dry. While the wood is drying, make sure it is lying flat to prevent warping. If you are using a new piece of wood, you can skip this step.
Step 2 (Optional): Sand & Stain
This next part is completely optional. If you want a smooth board, you can sand it. If you want the wood to be a different color, you can stain it. I, personally, love old weathered wood, so I chose to leave the board “as is”. No sanding. No staining.
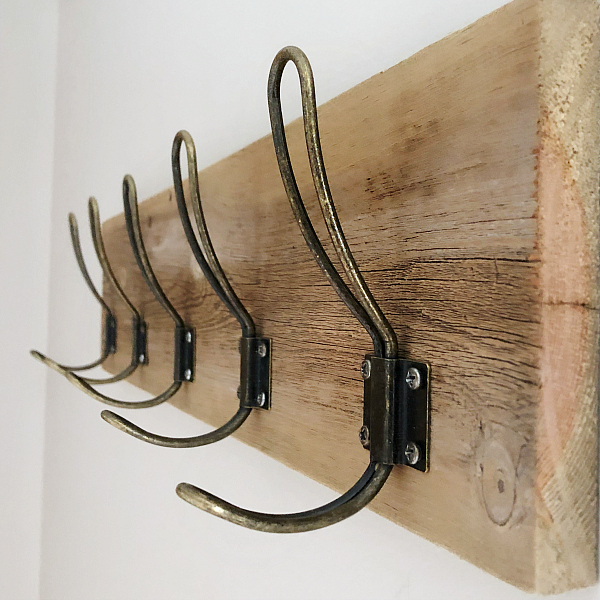
Step 3: Add Hooks to Wood
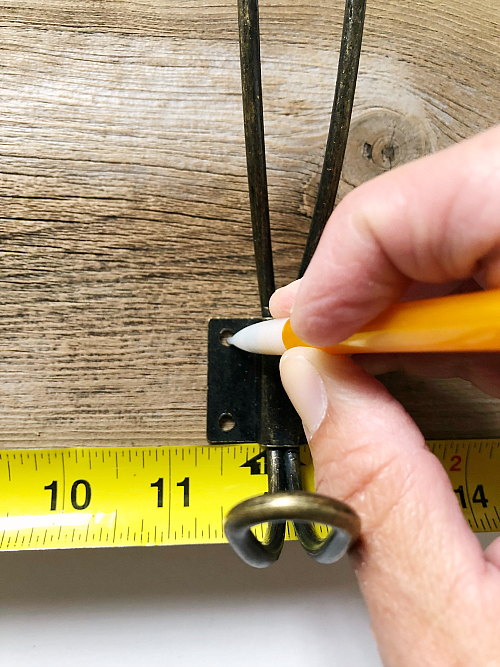
Once your board is clean, sanded, and/or stained, you can go ahead and add your hooks. Use your tape measure to find the center of your board and mark where you’d like your hooks to be placed; making sure they are equally spaced on the board. Mark them by placing a pencil mark into the holes where your screws will go. I always think it looks best to go with an odd number of hooks so you have one exactly centered, but that may be personal preference.
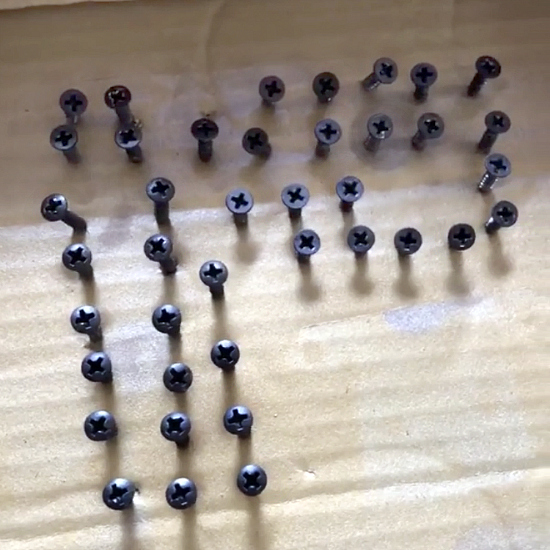
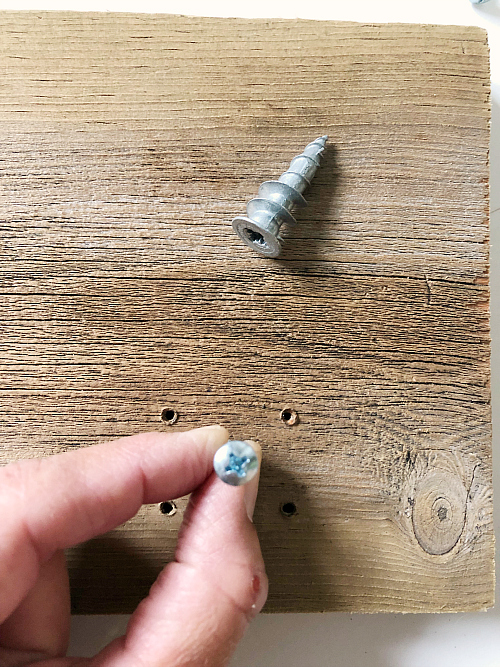
At this point, you can use your drill to attach the hooks onto the wood. Unfortunately for me, the screws that came with the hooks were too long. This is really not a huge deal. I just headed to the hardware store and bought shorter screws. Even though they weren’t the color I needed, I simply poked them into a piece of cardboard and sprayed the tops with a little spray paint so they’d match the hooks. If you need to do the same, just make sure to allow the spray paint to fully dry before proceeding. (FYI, I totally forgot to take a picture, so the image below is from a different project where I had to do the same thing 🙂 )
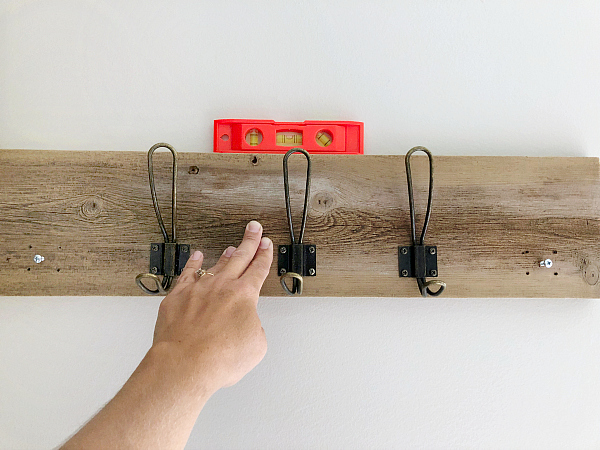
Step 4: Mount Board to the Wall
I know this next part is going to sound counter-productive, but you’ll see what’s happening in just a minute. Go ahead and remove the end two hooks. Weird. I know. Just bare with me here. After the hooks are removed, drill your drywall anchor screws through your wood, under the area where your hooks were, using the holes to center it. You don’t need to screw all the way through, just until the tip is coming through the wood. By doing this the hook will cover the screws that are securing the towel rack to the wall. (I learned this trick from The Frugal Homemaker, so I can’t take credit.)
*Important Note: Because you are adding the hook over the screw, make sure you are using a flat screw vs. one with a rounded top. I realized this after I took this picture, but did switch.
With the screws sticking out of the board a bit, level the board on the wall and apply a little pressure so the two screws leave an indentation in the wall.
The indentations that were made are where you will screw in the drywall anchors.
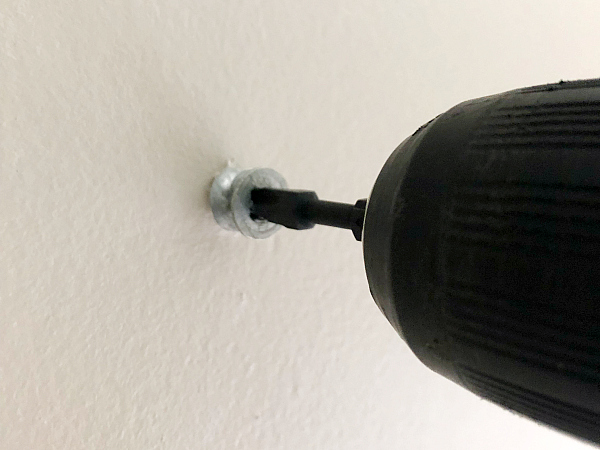
Secure the board to the wall by drilling the screw into the anchor and then re-screw your end hooks back on. Done.
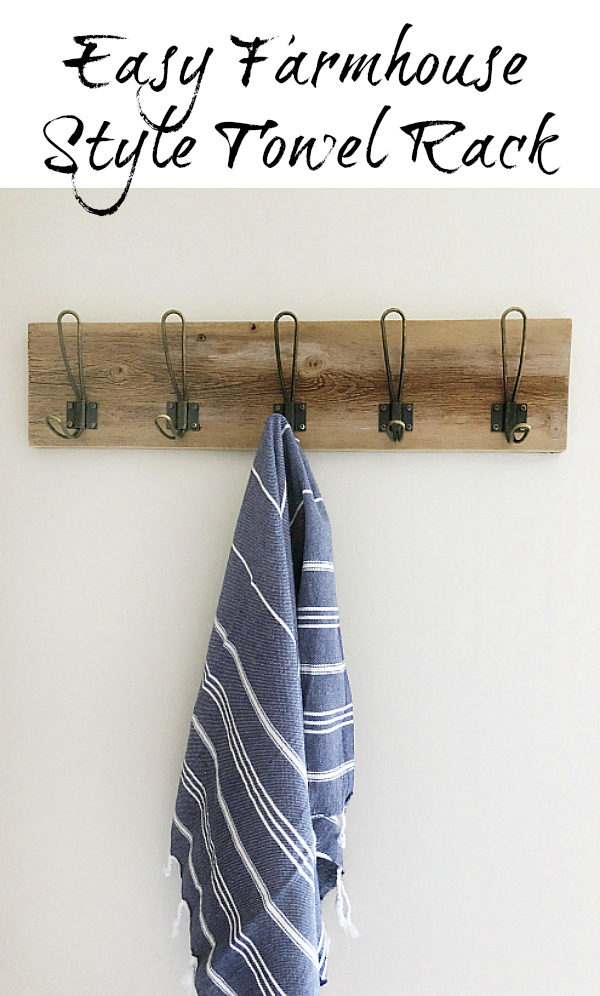
By using items I already had on hand, I was able to make this towel rack for less than $3. That’s a savings of $30+ over a similar item from Amazon!
Love it? Pin it!
In Other News… Paint & Medicine Cabinets
I looked through my paint stash downstairs and found two gallons of Worldly Gray paint that my parents had given me months ago. (They were going to use it in their house, and once it was going up on the walls they didn’t like it, so they offered it to me. I’m never one to turn down free paint, so…) I decided to use it on all the walls except the two with the white tile tub surround. I also found a quart of black paint and a couple other dark blues. I then headed to my local recycle center and found yet another dark blue. So, now I have options: stick with the original idea of black or go with one of 3 other colors: Hale Navy, Charcoal Blue, or a mystery color I bought from the Oops section this past summer. Pop on over to Instagram and help me decide 🙂
We also removed the medicine cabinets, which will be replaced with open shelving. One little glitch… behind one of the cabinets was a square cut-out in the drywall?! (That’s our pocket door peeking through.)
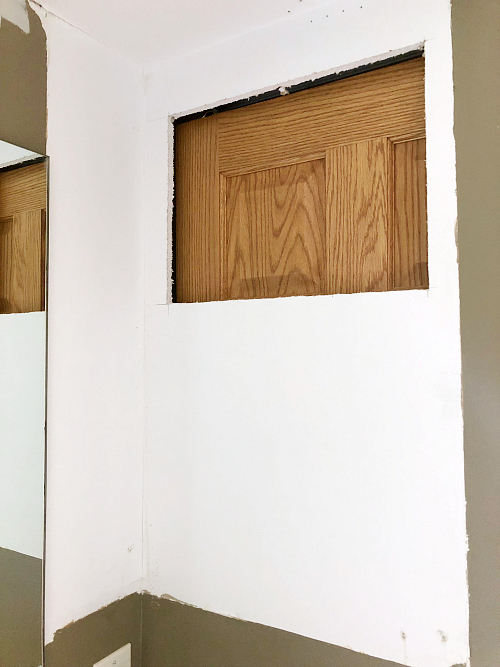
I don’t get it. Luckily, my husband found free drywall on Facebook Marketplace, so we’ll be repairing that soon.
Oh… and I also took down the valance in about 12 seconds. Why do we live with things we don’t love for so long when they can be easily removed?
Budget… So Far
DIY Towel Rack: $2.36
- Wood- FREE (Found in the garage)
- Hooks- FREE (Already had on hand)
- Screws- $2.36 (2 packs of 10 at $1.18 each)
- Spray Paint for the Screws- FREE (Already had on hand)
Paint (So Far): $3.42
- Paint Roller- $3.42 (Ugh. I hate that I didn’t have one, but alas, I didn’t, so… $3.42)
- Worldly Gray Paint- FREE (Already had on hand)
Medicine Cabinet Removal: FREE
- Drywall- FREE (Thank you Facebook Marketplace!)
Valance Removal: FREE
Total So Far: $5.78
You never know what is and isn’t lurking behind cabinets! lol Love the towel rack and how simple it is!
What a beautiful towel rack. That’s a great tip about mounting under the hooks! Glad to hear you found the drywall! I just got through a dreadful spackle job on our bathroom…totally feel your pain with drywall problems!
Hi there! I love this! Do you have the exact dimensions of yours? Size of wood, placement of hooks?
Thank you!
Oh my goodness! What a shocker to find a hole in your drywall! Thank goodness for Facebook Marketplace. I guess drywall isn’t all that expensive, but still! Every dollar counts! Your towel rack looks lovely! I love the shade that your wood aged to naturally! SO beautiful!
I love this project! It may be a small piece of the whole puzzle but it makes a big impact. I’m so curious about your black accent wall…
Your towel hooks look amazing! I love how much you spent on this because it shows that you don’t have to spend a lot of money to have the things you need for your home. I can’t wait to see your room next week!
I love how this turned out and how you used so much of what you had on hand!! I made a similar one is our old guest bath and I brought it with us because I love it so much!
Solid progress! I wonder if that hole was to access the pocket door hardware in case it came off the track.
Thank you so much for providing me the motivation to tackle a fairly small and simple space. I’d love your input on which artwork to select which I asked on today’s post. 🙂
Such a cute DIY! Hooks are so functional but a lot of people don’t realize they can be cute too! Great progress!
Fantastic new towel rack Erin and those hooks are a great price! I need to pick up a few myself for another project! Thanks for sharing your thrifty finds I love them and the results.
Erin I am in love with the towel rack and the best part it was a low budget, DIY friendly and re-purposed item we all can do. I am so excited to see how things progress over in your bathroom. Over here the painting continues.
Ohh that wall mount trick is pretty genius! Girl you are killing it on the budget front already!!
Love the new towel rack Erin. I’ve always been afraid to use one like that for fear of the weight and yanking out of the wall. I suppose those drywall anchors are super important!
I always love that style of hook and always prefer hooks over towel bars. Pity about the hole in the wall behind the medicine cabinet, but how convenient you were able to find the material to patch it.
Can’t wait to see what color you choose for the accent wall!