Welcome to week 3 of the $100 Room Challenge. This week’s project was updating our oak vanities. The problem with oak is it has a very deep wood grain that will show through, even after painting. Because I was using chalk paint and wax, I didn’t want the wax settling into the grain, so I had to figure out how to hide the wood grain. After doing a little research, here’s what I ended up doing to hide the grain on our oak vanities prior to painting.
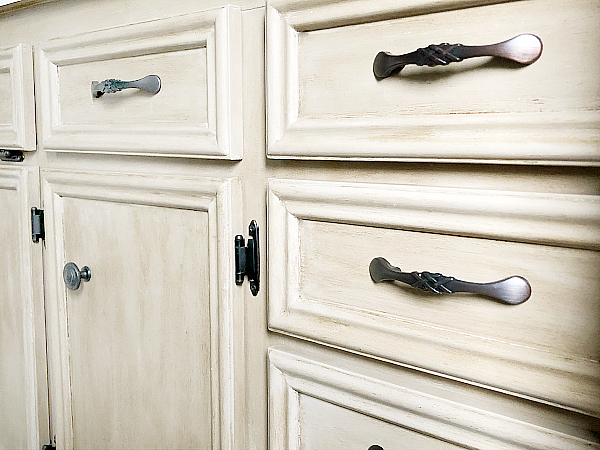
Our house was built in the early 90s and it shows. Literally every vanity and cabinet is made from orangey oak. Not my favorite look. When deciding to makeover our bathroom, I knew I wanted to tackle the oak vanities, but unlike the vanity I painted for our downstairs bathroom (a dark Hale Navy color which tends to do well hiding the grain), I wanted to paint these vanities with chalk paint and wax to created a weathered wood look. I knew I had to hide the wood grain prior to painting or the wax would settle into the crevices and look terrible. So… here’s what I did to hide the wood grain on our oak vanities prior to painting them.
What You Need To Hide Wood Grain Before Painting
Affiliate links may be used. Please see our advertising disclosure for more information.
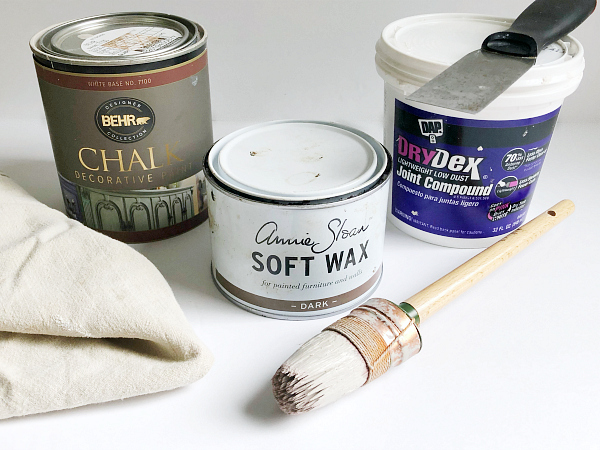
Items Needed to Fill the Wood Grain
- Joint Compound– I read about others using spackle instead of joint compound. I did a little research and found that spackle and joint compound are very similar. However, joint compound dries slower (which I wanted for this project) and it can also shrink a bit more, which didn’t bother me… plus I already had joint compound and didn’t want to spend money on spackle.
- Putty Knife
- High Grit Sandpaper– Both a 180 and a 220 grit sandpaper are used for this project
- Microfiber Dusting Cloth
- Vinyl Gloves (or similar)
- Dust Mask
- Protective Goggles
Items Needed for Painting & Waxing
- Primer– A water based primer is fine for this project. I used Zinsser Bulls Eye 1 2 3.
- Small Foam Roller
- Chalk Paint– I used Behr Chalk Decorative Paint in Pale Sepia. I have used Annie Sloan in Coco to do the weathered wood technique in the past, but it’s a more expensive brand.
- Paint Brush– This one is my favorite for use on furniture! I know it’s spendy, but it’s totally worth it.
- Dark Wax– I used Annie Sloan for this because I already had some on hand
- Old T-Shirt or Lint-Free Towel
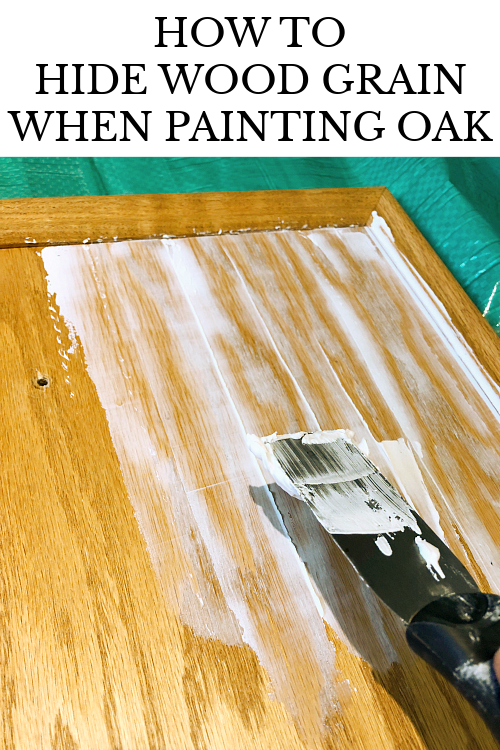
How to Hide Wood Grain When Painting Oak
This project is, admittedly, a little time consuming, but it is so worth it in the end. Before getting started, remove the doors and drawer fronts from the vanity (or cabinets), along with the hardware. Label each piece (and the hardware that goes with it) to ensure everything gets put back in the correct place.
Step 1: Clean the Doors & Drawers Fronts
Whether or not you see visible dirt and grime on the wood, give them a good cleaning. I typically use TSP, but I guess I got lazy and just used some soapy water and a soft bristle brush. After a good scrubbing, dry things off with a flour sack cloth (or something similar).

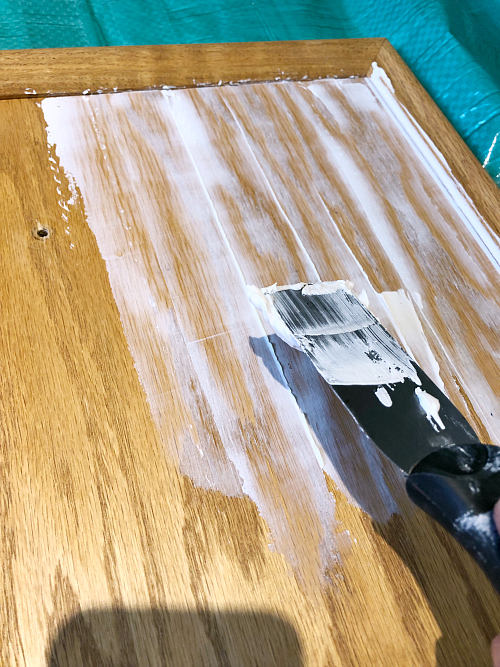
Step 2: Apply Joint Compound
Grab a putty knife and apply joint compound over the entire surface that is going to be painted. Spreading joint compound is a lot like spreading frosting… only don’t eat it 🙂 “Frost” your wood surface with a scoop of joint compound, spreading it evenly across the wood, and then glide the putty knife over the area to remove any excess. This process fills in the small niches in the wood grain. Please note that you want just a thin layer of joint compound, otherwise there will be a lot more sanding in the future.
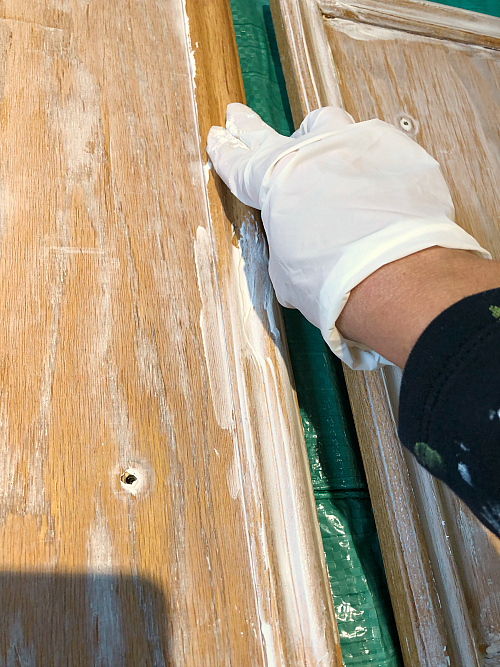
If you have trim work (like I did), the putty knife does not work well. Instead, grab a vinyl glove and apply the joint compound using your gloved fingers, smearing it into the seams. My one piece of advice is to try to get the thinnest layer possible, otherwise, like I said, there’s a lot more sanding involved.
Once the entire surface is covered and the excess removed, allow the joint compound to thoroughly dry.
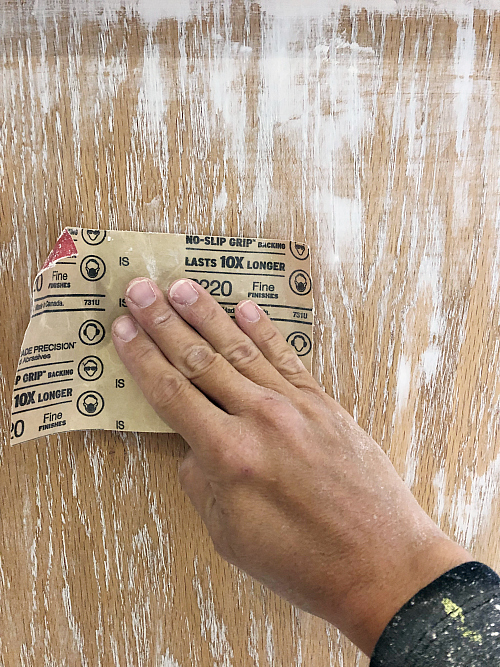
Step 3: Sand
I’m not gonna lie… this part is the worst. It’s time-consuming and dusty, so please wear a dust mask and safety goggles because you don’t want to breath in dust nor get it in your eyes… and sand outdoors if possible.
Use a high grit sandpaper and sand off the joint compound until you get a smooth surface. While the image shows a 220 grit, I ended up switching to a 180 grit which worked a bit better. I ran my hand over everything to make sure there were no rough patches before moving on. Notice how the joint compound settled into the wood grain? That’s what you want to see.
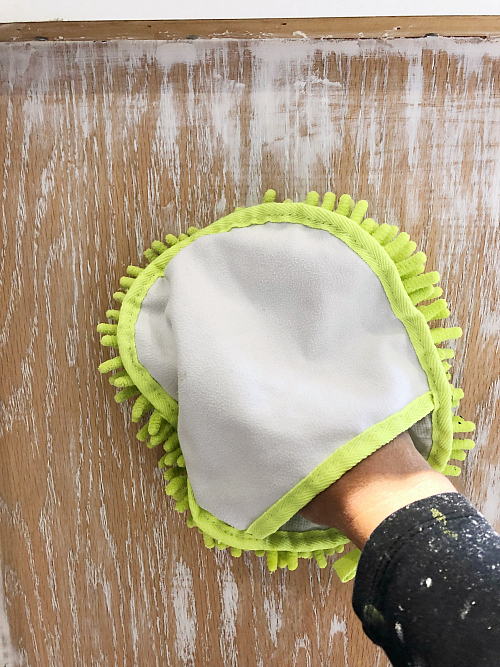
Step 4: Dust
Dust all the sanded surfaces to ensure that your paint goes on smoothly. Start by vacuuming up the loose dust and then go over everything with a microfiber dusting cloth to remove even more.
Step 5: Apply Primer
The last step is to apply a coat of primer with a foam roller. While chalk paint typically doesn’t need sanding, nor priming, prior to application, when trying to hide wood grain, a coat of primer will help to further fill in the grain.
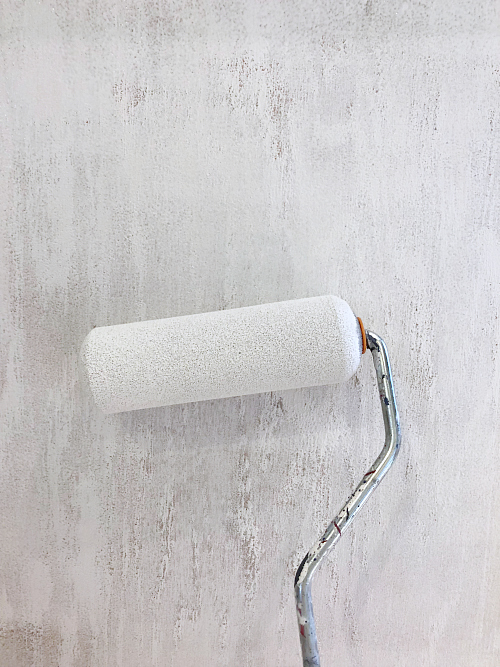
After the primer is dry, lightly sand it with a 220 grit sandpaper. This helps create a smooth surface.
You have now filled in the wood grain so it won’t show when you paint. YAY!
I don’t want to be redundant, so if you are interested in the painting technique used on this vanity, there is a full tutorial on how to create a weathered wood look with chalk paint and wax already on this blog. While it was done on a table, I did the same technique to our bathroom vanity. For a quick peek, you can check out the image below.
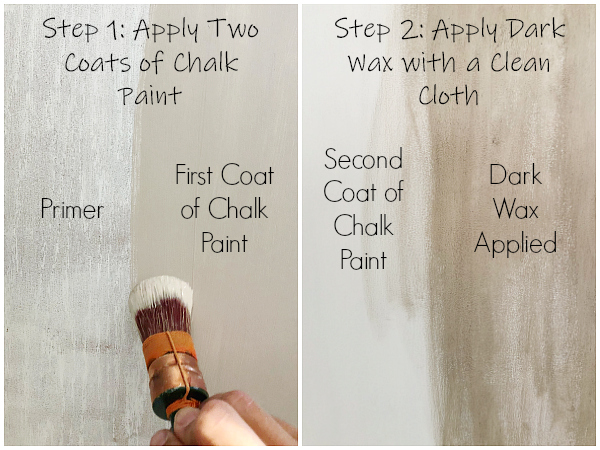
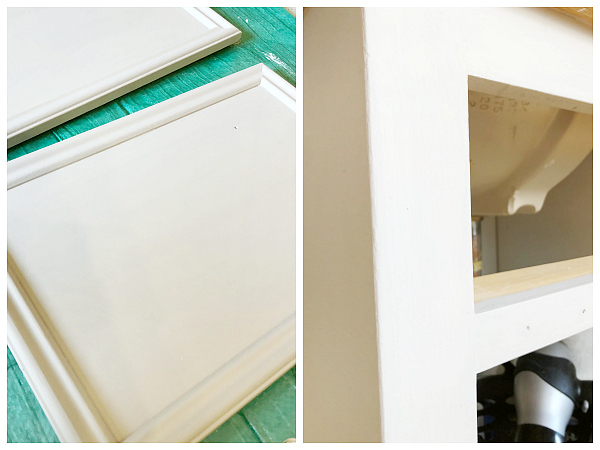
While not the most attractive picture, here are a couple close-ups of the vanity with two coats of chalk paint. As you can see… no wood grain is showing.
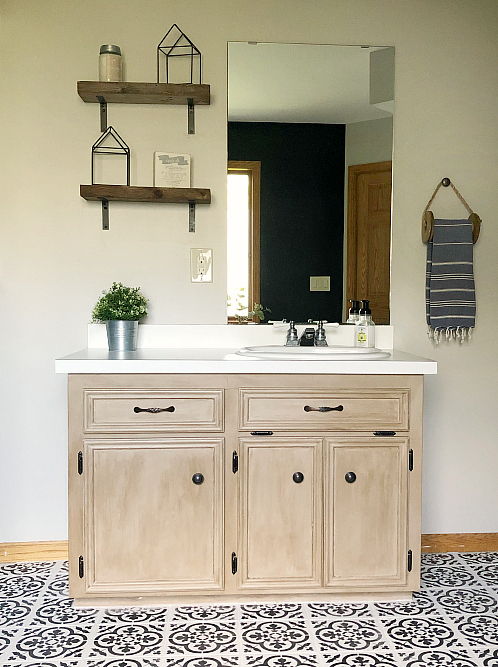
Here is the final result of this vanity makeover!
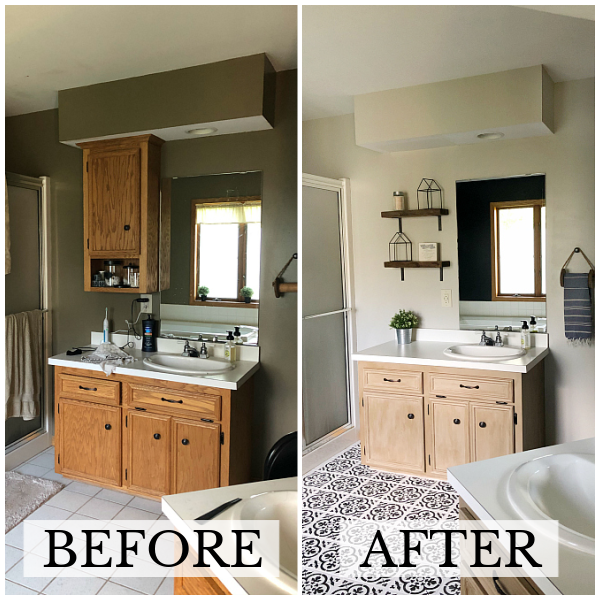
And… as a reminder of where we started vs where we ended up…
There you go. That’s how you hide wood grain when painting oak (or any other wood surface with a deeper grain)!
We think you might also love these ideas!
How to Stencil A Tile Floor | How to Use Milk Paint | How to Paint A Front Door

In Other News…
Not only did I work on the vanities, I also painted my accent wall… Remember, I was debating whether to actually do black or switch to a dark blue? Well… the paint is on the wall, and I’m going to wait until the reveal next week to show you what we ended up with… Ahhh, the suspense.
I feel like I have a million more things to do by next week… Wish me luck!
Budget… So Far
Last week I had spent $5.78. Here’s the total for this week…
Vanity Makeover: $19.98
- Joint Compound- FREE (Already had)
- Chalk Paint- $19.98
- Wax- FREE (Already had)
- Supplies (Sandpaper, Paintbrushes, etc)- FREE (Already had)
Accent Wall: FREE
- Paint (Already had on hand)
Total So Far: $25.76
Wanna Catch Up or Jump Ahead?
Week 1 | Week 2 | Week 3 | Week 4
Love it? Pin it!
Hi Erin,
I fell IN LOVE with the overall look of your finished cabinets and after getting ready to moved into a dated home with similar wood grain cabinets in the kitchen, I decided I would take on this DIY to give it a cozy look. The only item I used that was not exact was the wax (I used the Behr brand instead). It’s been three weeks since I waxed and today I splashed a water droplet on the cabinets and when I went to wipe it with a washcloth, the wax wiped completely off with it. Now I am reading all of these reviews about how it’s only meant to be used for decorative purposes and it cannot be polyurethaned as it will not adhere to the wax. I spent a lot of time on these cabinets and I’m in love with them… but how do I save them?
Oh Kelsey- I am so sorry to hear this. How frustrating! There are two options you could try. If the wax truly washes off easily, you could just wash it off and reapply a different wax (just FYI, I have used Annie Sloan wax on vanities and and tables with NO issues, so while expensive, it may be worth it.) If you cannot wash it easily, unfortunately, you’ll need to sand off the wax and then reapply a different brand. More work to sand it off, but it’ll be worth it to have cabinets that hold up over time.
Hi Erin. I’d like to try this on the picture frame oak paneling that comes half way up the wall in my living room.
I noticed u didn’t sand before applying joint compound. You cleaned then applief. Did ur project have a finish coat? My paneling looks same finish u applied., a bit of a shiny finish, and boy would I like to skip that and just clean and go rt into joint compound!
Also, I’m wanting to match the wall color of my living room. Oak Paneling comes up to chair rail height. Can I tint the behr chalk paint the color of my Sherwin Williams paint on the sheetrock?
Your tutorial looks like something I can tackle!
I was really wondering if using the joint compound hides the wood color coming through? I’m redoing my kitchen cabinets. I washed them, sanded and used Fusion in white paint 3 coats. They looked stripped! Help!
I would suggest using a stain-blocking primer to hide the wood color from coming through. I know that’s probably frustrating if you’ve already done 3 coats of paint, but that’s going to be the best way to get prevent that wood color from coming through.
Erin, your cabinets are going to look amazing! You have me wanting to do something to ours. But I’ll have to wait until after the challenge is over. I’m already too close to the end of my budget!
Thank you for this tutorial!! I am getting ready to paint our oak cabinets in the kitchen and I definitely need to cover the grain!! So excited for reveal week!!!
Wow, that does sounds like a lot of work, but there’s no arguing with the results! It will be so worth it for this space. I can’t wait to see your accent wall!!!
Erin, your cabinet turned out nicely. You have really been busy. Can’t wait to see your accent wall.
Erin the doors are looking great! I love the Behr Chalk paint too, I was all about trying it when I saw it and the colors are amazing! I am so excited to see your full reveal next week!
Erin, this is such a smart idea. Perfect example of where doing an extra step and a little more work really pays off! I think you have found a great solution to a problelm that we have when we are painted over older cabinets.