I received free Milk Paint by Fusion products for this post: “How to Use Milk Paint”. All opinions are my own.
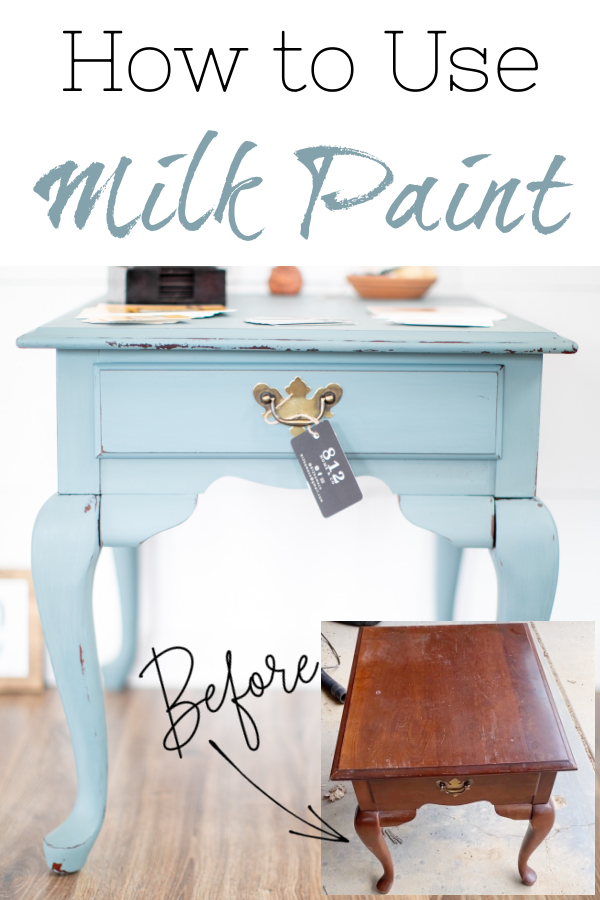
I have heard a lot about milk paint over the years, but had never actually tried it until now. This paint is perfect for creating that “chippy farmhouse” piece of furniture, and the end product is smooth as silk.
This is the piece I started with…
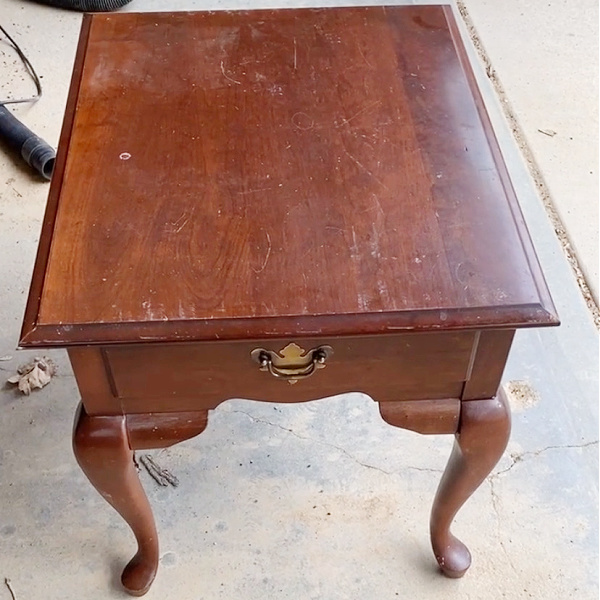
It was pretty worn and outdated… But nothing a little makeover couldn’t cure.
What You Need to Paint with Milk Paint
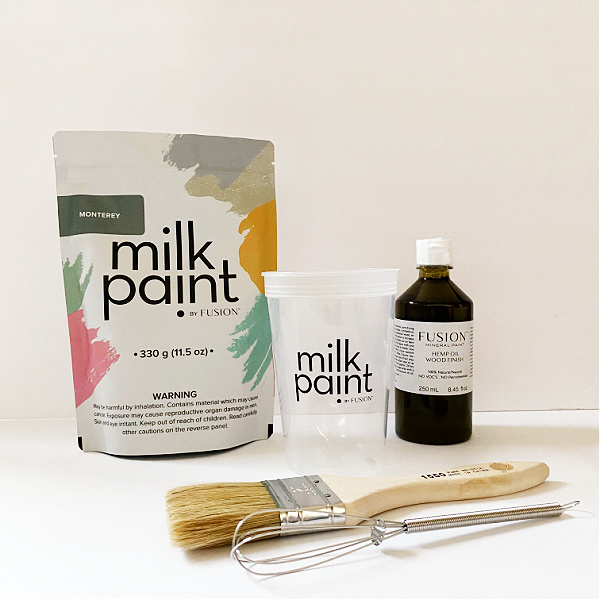
- Milk Paint (Duh 😉 )- I used Milk Paint by Fusion (I wanted to try this brand because I am in love with their Fusion Mineral Paint)
- Sandpaper and/or Sanding Block
- A “Paint Mixing Cup” and Small Whisk
- Chip Brush
- Hemp Oil to seal the paint and bring out its color
How to Paint with Milk Paint
Step One: Disassemble (If Able)
If you are able to disassemble whatever piece you are working on, do it! This makes the painting process so much easier. I was able to get this end table into 6 pieces: 4 legs, a top and a drawer.
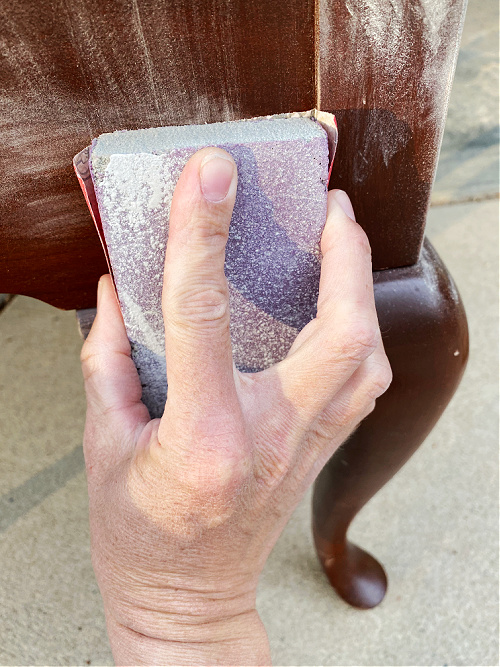
Step 2: Sand & Clean
Prepping your piece for paint is so important. While some products state they don’t require sanding prior to painting, I always give the piece a little scuff all around with a higher grit sandpaper (typically 120-150). This allows the paint to penetrate into the wood and adhere easier.
After the sanding is done, remove the dust with a dusting mitt or damp cleaning cloth, and the give it a good cleaning. I typically use TSP for cleaning, which does require the use of gloves and safety goggles.
Allow the piece to thoroughly dry before applying the paint.
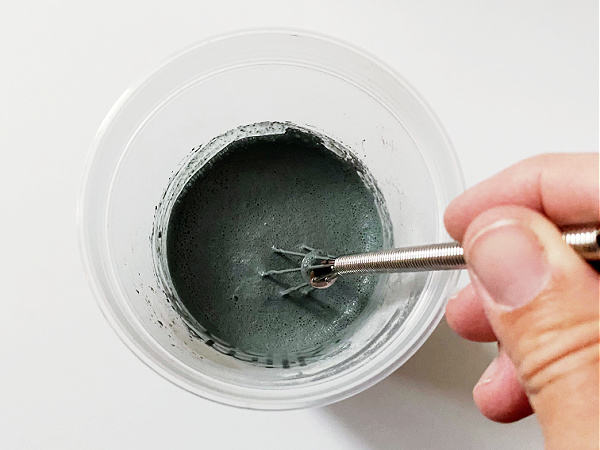
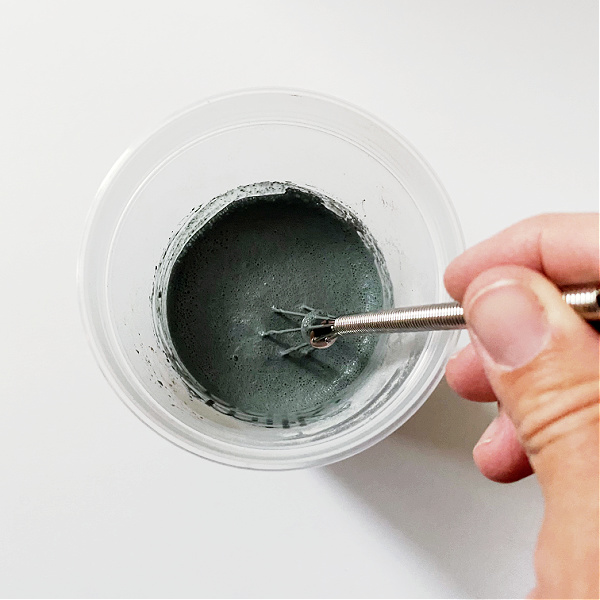
Step 3: Mix Milk Paint
Milk Paint comes as a powder that you mix with water. This is actually a wonderful concept because you don’t waste paint. You can simply mix as much (or as little) as you need and store the rest for later, without fear of it drying up over time.
Each bag of milk paint should have mixing instructions so you get the right consistency for your piece. Mine required mixing together equal parts milk paint and water.
To ensure the powder is thoroughly mixed, I used a small whisk and mixed it in a paint cup (similar).
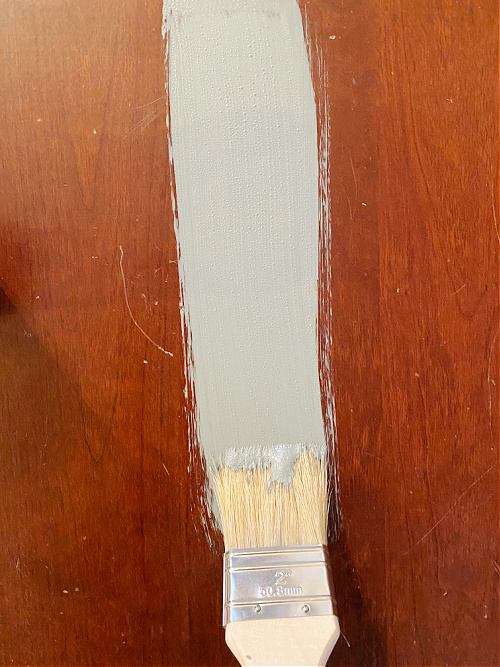
Step 4: Start Painting
Milk paint goes on beautifully with a chip brush. Simply paint your piece and allow it to dry (which only takes 30 minutes!) You can apply as many coats as needed for full coverage, however, I highly suggest going over the piece with a high-grit (220-300+) sandpaper between coats, making sure to remove any dust before applying the next coat. Sanding between coats creates a smooth finish in the end.
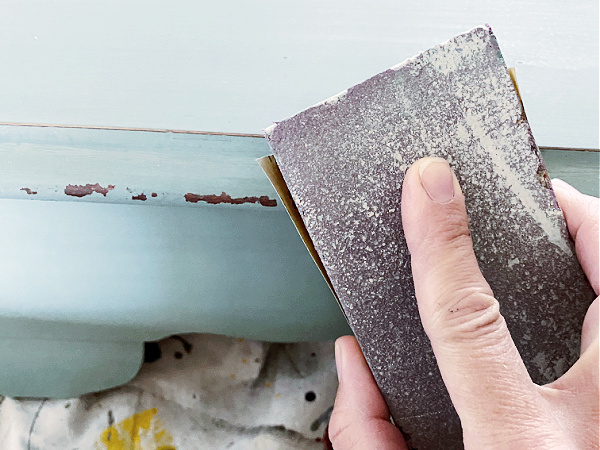
Step 5: Scuff for a Chippy Finish
If you love the farmhouse style (like I do), this paint is perfect for creating that old, chippy look. Simply scuff the areas you want looking worn, and the paint will flake off creating the perfect farmhouse vibe.
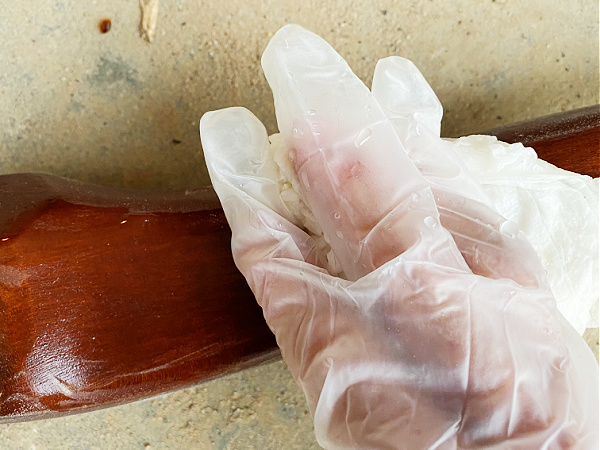
Step 6: Apply Hemp Oil to Seal
To seal milk paint, Hemp Oil is suggested. Not only does this seal the paint, it will add vibrancy to the color of the piece. Simply squirt a bit of Hemp Oil onto a small disposable plate and apply it with a clean cloth (I used a flour sack cloth).
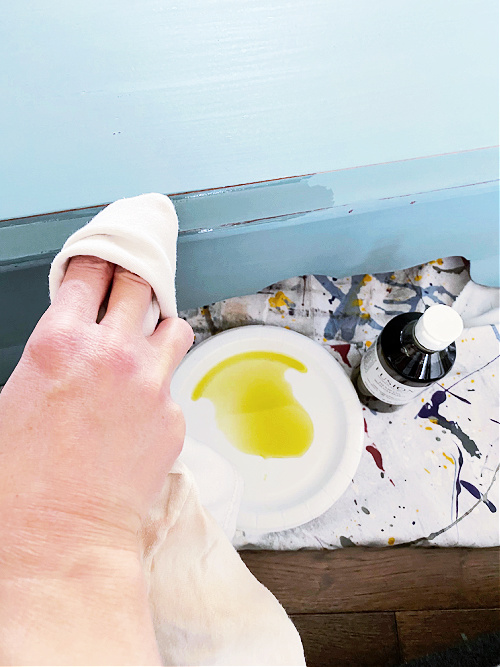
Allow the Hemp Oil to dry and you’re done!
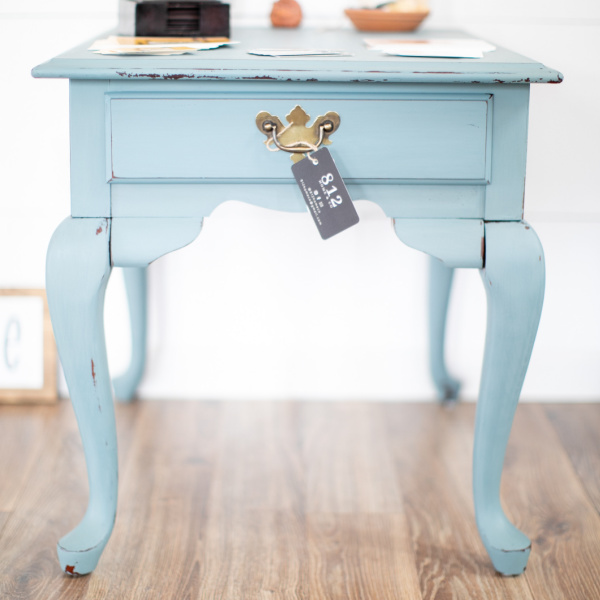
Here’s how the piece turned out! Isn’t it cute?!
For more ways to paint furniture check out this post!
Love it? Pin it!
Can I commission you to revamp my dining room table? 😊
You make it look so easy… and I’m certain my stuff would turn out exactly like when people attempt to make Pinterest-worthy cakes on “Nailed it.”