I think every one of us has a piece of furniture in our home that could use a little love. Maybe it’s an outdated vanity or a worn-out table that’s been passed down through the generations. Whatever the case, there are so many different techniques you can use to create a piece that’s perfect for your home. Here are five different techniques for painting furniture, along with the pros and cons.
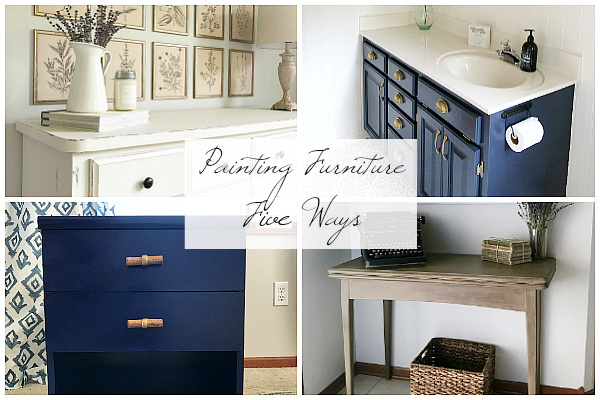
If the idea of painting furniture scares you, this post is definitely for you. Let me remind you that prior to the start of this blog I had never painted anything… not even a wall. So, if I can figure out how to paint a piece of furniture, so can you. I’m going to walk you through five different painting techniques, each with their own advantages (and challenges), but let me assure you that each and every one is easy to do.
Chalk Paint & Wax
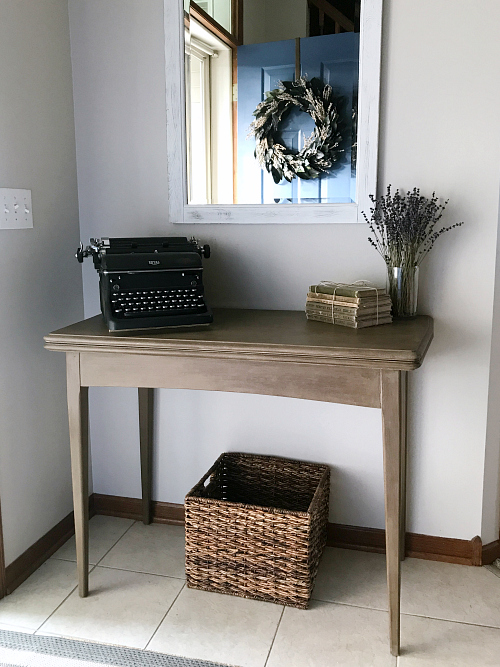
Let’s start with a chalk paint and wax technique. This cherry wood table had been gifted to me after my grandfather passed away and it was in pretty rough shape. For a brief time, I actually painted it white with a bit of distressing, but with kids that often put their muddy shoes on the table (so our new puppy wouldn’t chew them), the white paint was not the best choice.
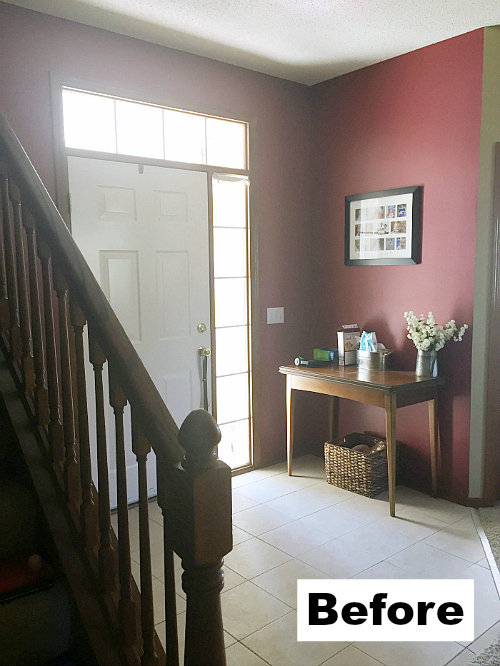
I soon after discovered a chalk paint and wax method that created the look of weathered wood. I decided to give it a go and could not be happier with the end result.
How to Paint Furniture with Chalk Paint & Wax
Pros & Cons of Chalk Paint & Wax
Pros:
- The best thing about using chalk paint is that there is no prep work required other than cleaning the piece of furniture. If you are painting a glossier surface, a light sanding will help the paint adhere better.
- Chalk paint goes on easily and dries quickly.
- If you like a more distressed look, chalk paint is easy to sand.
- Adding the wax to the piece not only seals and protects the paint, it also adds dimension. In the case of this table, I applied a dark wax to create the look of weathered wood, however, if you love the original color of the chalk paint, you can apply a coat of clear wax instead.
Cons:
- Chalk paint is definitely gaining in popularity, but color choices are often limited (in comparison to latex paint). I have heard that you can make your own chalk paint from latex paint so you can expand your color choices, however, I had never tried this method.
- Applying wax requires a bit of a learning curve. The first time I applied wax, I used a wax brush, but it went on so thick, and dried so quickly, that the end result looked blotchy. I actually sanded it off and started over; this time applying the wax with an old shirt so I had more control over how much wax was going on. I also learned to work in small sections, going with the grain of the wood.
You can also see this technique used on the vanities in our bathroom here.
Fusion Mineral Paint
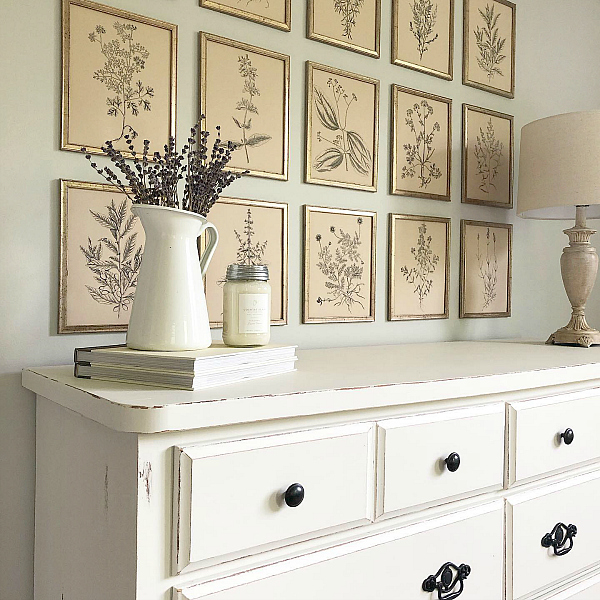
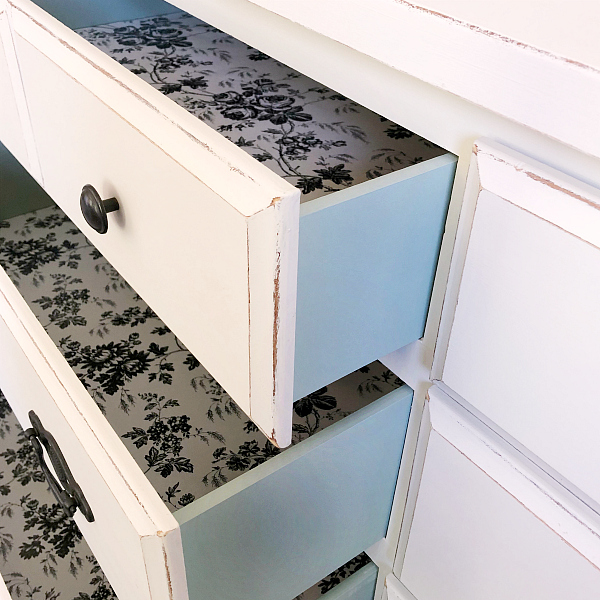
After hearing rave reviews about Fusion Mineral Paint I had to give it a try… and honestly, I think this may be my favorite paint to use on furniture. As you can see, we had an outdated dresser. It had been through many moves across the country and needed something to give it new life.
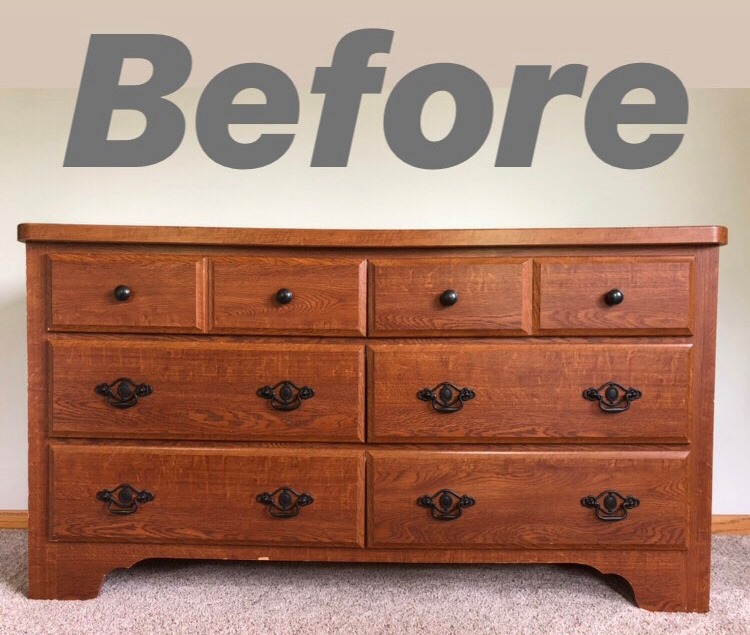
I decided to not only paint and distress the outside, but I also used a different color on the drawers, adding contact paper from the dollar store as drawer liners.
How to Paint Furniture with Fusion Mineral Paint
Pros & Cons of Fusion Mineral Paint
Pros:
- As with chalk paint, Fusion Mineral Paint requires no prep work outside of cleaning the piece. However, a light sanding will help paint adhere better if you are painting a glossy surface.
- Fusion Mineral paint glides on amazingly well, so application is easy.
- If you like a more distressed look, using a wax bar allows for easy sanding after the paint has dried.
- A little goes a long way. While the jars of this paint may seem small, one jar allowed me to do multiple coats on this dresser.
Cons:
- Limited color options, however, more colors are being added to their collection often.
- Because the paint dries to a matte finish, it can scuff a little easier, however, you can seal the paint if you are using it on a heavily used piece of furniture.
Latex Paint
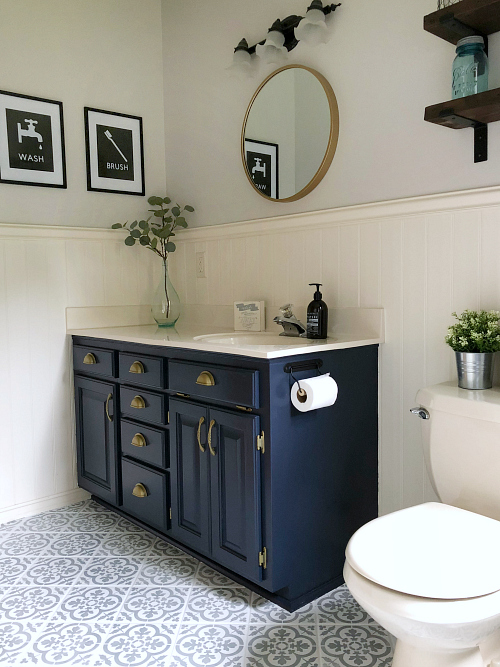
How many of you have a can of paint sitting somewhere in your home right now? Most likely, it is latex paint, which is what is often applied to walls. Latex paint can also be used to update furniture! Check out this vanity…
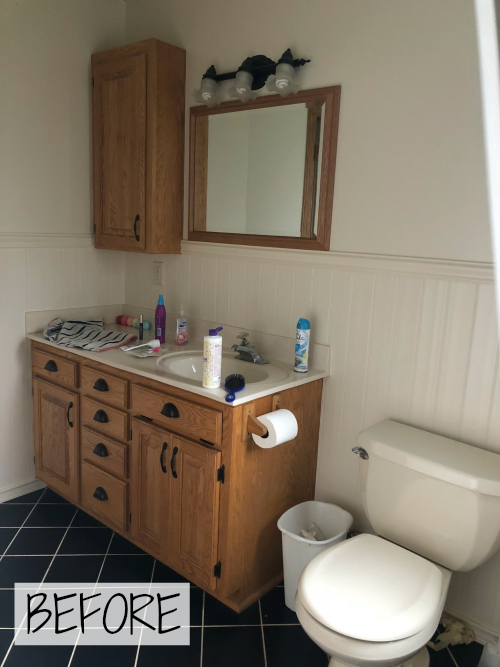
Using a leftover can of Hale Navy paint, it went from outdated oak, so a much more up-to-date look.
How to Paint Furniture with Latex Paint
Pros & Cons of Latex Paint
Pros:
- Latex paint comes in a vast array of colors, so you have (almost) unlimited color options.
- Because furniture doesn’t require a lot of paint, you can buy a quart of paint which makes latex paint a budget-friendly option. (You can also check your local recycle center to see if you can find a good color for free 🙂 )
Cons:
- Latex paint requires a little more prep work than the previous techniques mentioned. Cleaning, a light sanding, and primer are all needed to get the best results.
- If using latex paint on a piece that gets a lot of use (like this vanity), you will want to seal the paint with Polycrylic. (Make sure you use Polycrylic, not Polyurethane! Polycrylic dries clear, Polyurethane dries yellow.)
- Painting glossier surfaces (like laminate… hello IKEA furniture) can require a bit of extra care, but it can be done! Check out my tips for painting laminate furniture with latex paint.
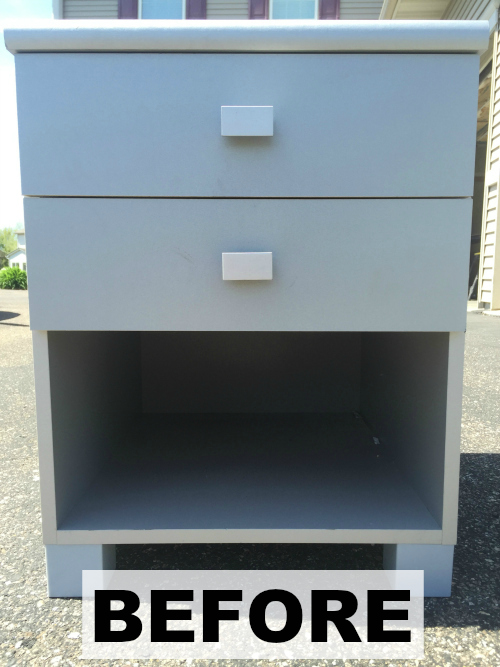
Spray Paint
My son needed a new nightstand, so I headed off to Goodwill and found the one below… not awesome, right? No worries. I removed the plastic feet and knobs, gave it a good cleaning, and grabbed a can of spray paint.
Here’s the end result…
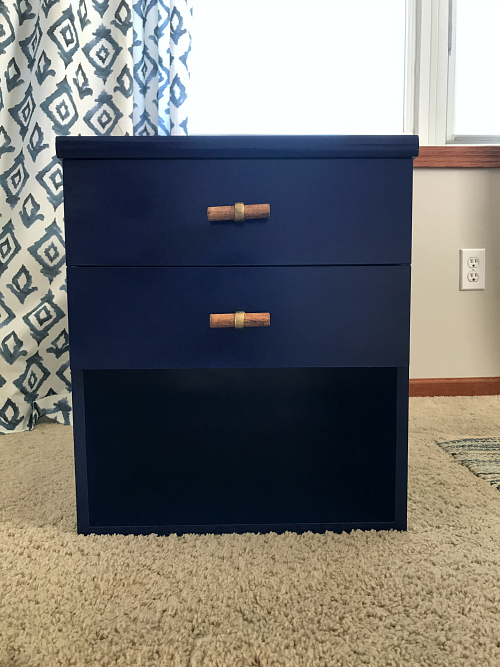
How to Paint Furniture with Spray Paint
Pros & Cons of Spray Paint
Pros:
- Easy to do
- Very budget-friendly
Cons:
- Requires good ventilation (outside)
- Limited color options
- Can chip on certain surfaces
For another spray paint makeover, check out this locker we spray painted for use as a dresser in my son’s room.
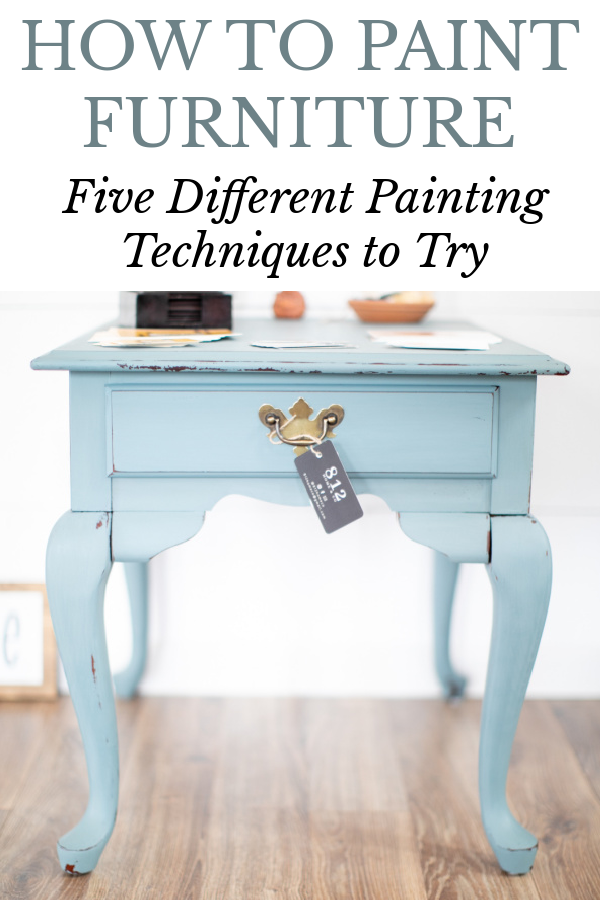
Milk Paint
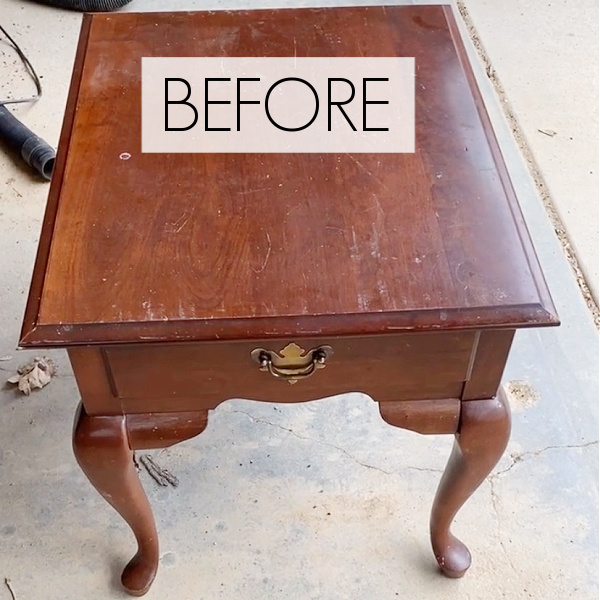
Honestly, I was a bit hesitant to try milk paint, but the results are a buttery smooth finish that is unbeatable. I bought this old end table from Facebook Marketplace and thought I’d try the milk paint method on it. What did I have to lose?
I chose a fun blue color, did some distressing, and here’s the end result…
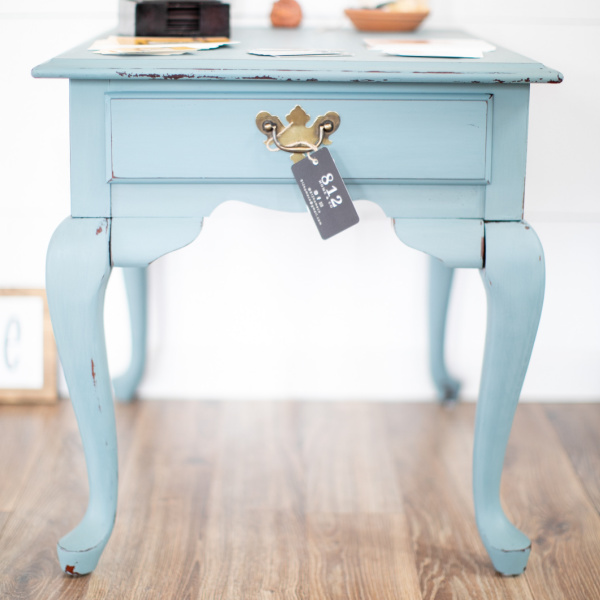
How to Paint Furniture with Milk Paint
Pros & Cons of Milk Paint
Pros:
- Milk Paint comes in powder form so you can mix up as much or as little as you need for your project. This means the milk paint powder stays good for years. No need to worry about it drying up.
- Milk Paint goes on smooth and the finish is buttery soft
- Milk Paint is easy to distress if you are looking for that farmhouse style
Cons:
- Milk paint needs to be thoroughly mixed with water or you can get little clumps of the powder
- You really need to prep your piece well in order for milk paint to adhere properly
- Milk paint needs to be sealed, not only when you paint the piece, but every few years. I use hemp oil for this. Not only does hemp oil seal the paint, it adds a vibrancy to the color.
Hopefully you have found a few ideas to update some furniture you may have lying around your house right now.
We think you might also love these ideas!
How to Hide Wood Grain When Painting Oak | How to Paint Appliances | How to Strip Furniture with Oven Cleaner

Love it? Pin it!
Leave a Reply