Just over a year ago I took a deep breath and tried something that absolutely terrified me: I stenciled our tile floor. I thought (for sure) I was going to mess it up and walk away with a botched up floor, but I couldn’t stand one more day of looking at that outdated navy tile. So, I put on my big girl panties (Anyone else hate that word? 🙂 ), grabbed some floor paint and a stencil, and got to work. The transformation was unbelievable. I was absolutely in love with the look! One question I often get is “How well does a painted tile floor hold up over time?” I wanted to give the floor a good year before answering that question, and the results are both good… and not so good. Let me explain.

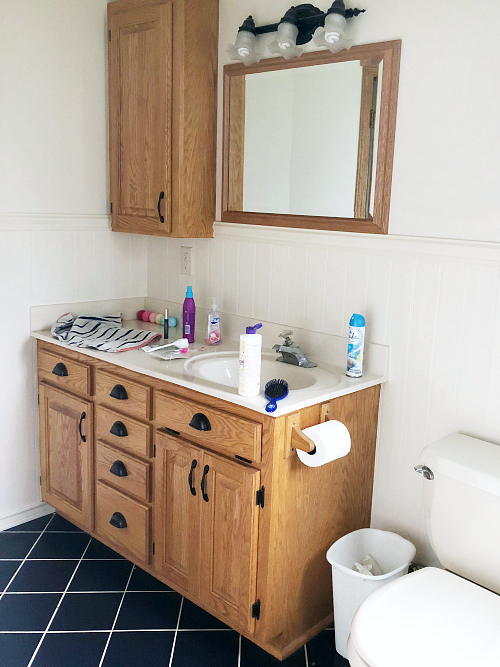
Let’s start by taking a look at the before and after of our basement bathroom floor; just so you can see how a painted floor can completely change the look of a space (you can find the full $100 bathroom reveal here).
Before
After
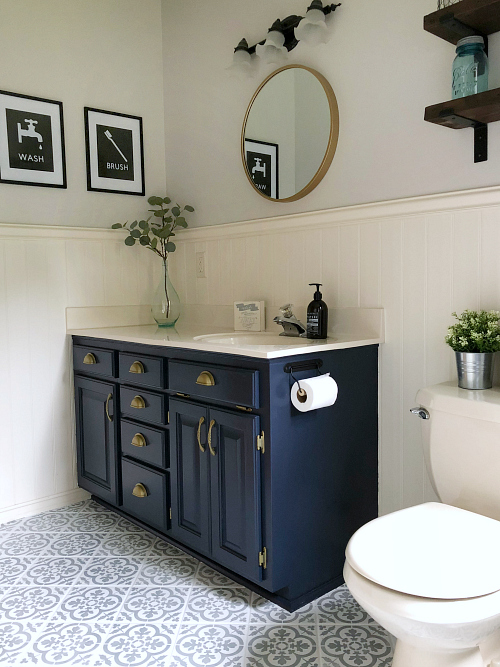
For less than $40, I was able to take an outdated navy floor and completely change its look with a little primer, 2 cans of floor paint, and a stencil. (You can find the full tutorial here). While I loved this look, I had some concerns about how well it would hold up; mainly because I was painting over porcelain tile, and porcelain has an incredibly smooth, high-gloss surface with zero texture. In this particular situation, my fear was that even with primer, the paint wouldn’t actually grip to the floor and I’d end up with chips and peeling paint.
Surprisingly, the painted tile held up really well… for about 10 months.
Ten months after stenciling the floor we had a family reunion at our house: An entire weekend of kiddos swimming in a chlorinated pool. I decided not to say a word about the floor. I didn’t give any instructions on drying up water because the truth is, I really wanted to see how the floor held up to “real life”. About 16 hours into the reunion, my mother-in-law notified me that there were standing puddles of water on the floor, and when she went to wipe them up, some of the paint started to peel.
By the end of the weekend, I had 9 tiles with peeling paint.
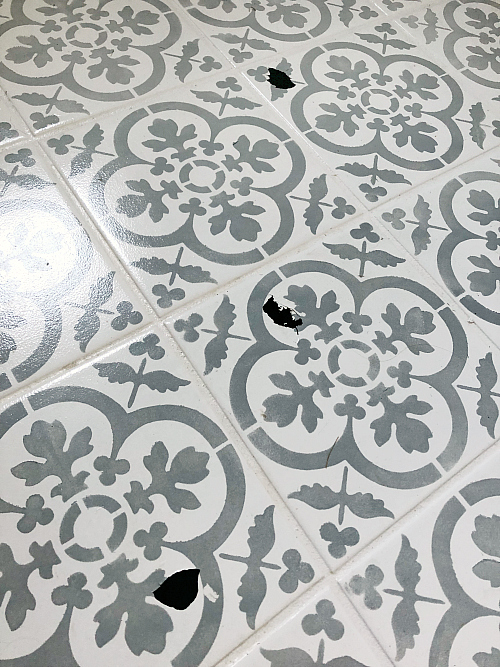
You would think this might make me to feel like the stenciled floor was a flop and advise others to stay away from painting tile floors, but… fast-forward to this September; and I did it again. Yes. I stenciled another bathroom floor, but this time I knew the paint would work so much better. First, let’s take a look at the second stenciled floor and then we’ll discuss two things:
- Lessons Learned When Painting A Tile Floor
- How to Fix a Painted Tile Floor that has Chipped or Peeled
Round 2: Before
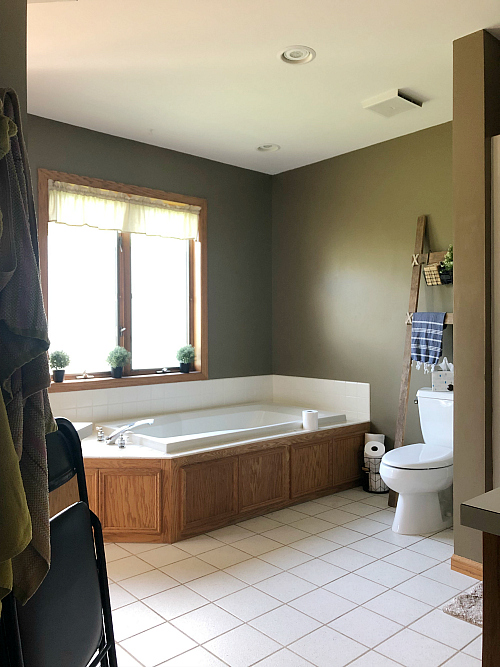
Round 2: After
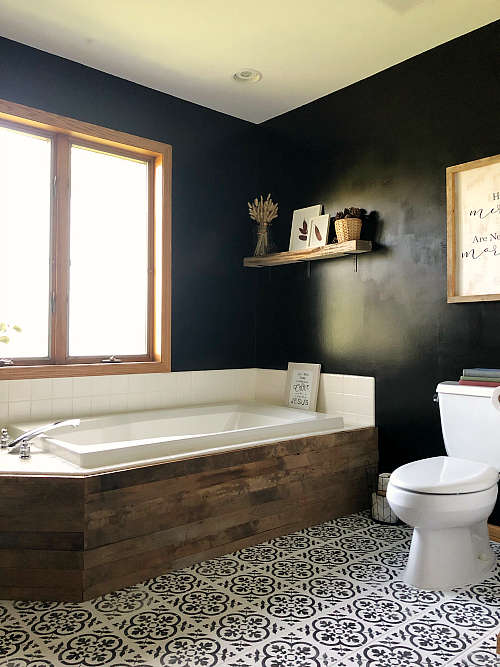
Again, you can find more details on this $100 Bathroom Makeover here.
Lessons Learned When Painting A Tile Floor
So why attempt painting another tile floor when the first one didn’t hold up as expected? Answer: because I knew this time I had a much better chance of success!
Remember how I said the basement floor had porcelain tile? And remember how I said porcelain tile has no grip. (None. Zilch. Nada.) I truly believe this was the sole reason the paint didn’t hold up over time. Even though I used primer, it didn’t grip to the floor very well, despite having ample time to cure***. Because the bathroom was only “gently used”, the paint held up fairly well for the first ten months. However, when puddles of chlorinated water pooled on the floor, the paint peeled.
The floor in our main bathroom (which is shown above) has very different tile. It is heavily textured with lots of “grip”. I was convinced the primer and paint had a much better chance of adhering to this type of tile, so I gave it a go. I realize it’s only been two months, but there is not a single chip or sign of peeling paint anywhere; and this bathroom is heavily used with at 3-4 people using the shower each day… and my youngest leaving lots of puddles on the floor.
My main take-away is this: porcelain tile does not hold up well when painted. While I might paint a porcelain floor in a very low traffic area, I wouldn’t recommend it in a space with high-traffic or any chance of water getting on it. However, if you have a tile floor with some texture, I think a painted floor works wonders, and I can say it’s totally worth your time.
*** IMPORTANT UPDATE: Below you will read about how I fixed the peeling paint on the porcelain tiles, however, it wasn’t until a year later that I realized what a difference oil-based primer makes when doing this project! I recently had someone ask about my stenciled floors and I mentioned that when I fixed the tiles in the first bathroom (with the porcelain tiles) I used an oil-based (vs. water-based) primer, but I had never actually checked to see if this made any difference in how well the paint held up. I was incredibly (and pleasantly) surprised to find that each tile I had redone with the oil-based primer held up beautifully a year later, while those with the water-based primer have continued to chip and peel. If you want to stencil a floor, use oil-based primer!
IMPORTANT: If you decided to stencil in your laundry room, and use an oil-based primer/paint, do not run your dryer while using it and for (at least) 24 after it has dried! The vapors are likely flammable, which is why you certainly don’t want to run it while priming/painting, and running your dryer too soon afterwards will cause your clothes to smell like kerosene. Yuck!
… and one more update– It’s been a year since I painted the second bathroom floor (the one with a little texture to the tile). This painted floor has held up much better than the first. I had to redo one tile right outside the shower door as it was prone to getting wet. I have since told my youngest to please make sure to wipe up any water he gets on the floor after showering, and there has been no problem since.
How to Fix A Painted Tile Floor
So… what did I do about the peeling paint on the porcelain tile? I fixed it. And, honestly, it was an easy project that took about 30 minutes of my time.
First, I used a putty knife and completely scraped the paint off each tile that had peeling paint.
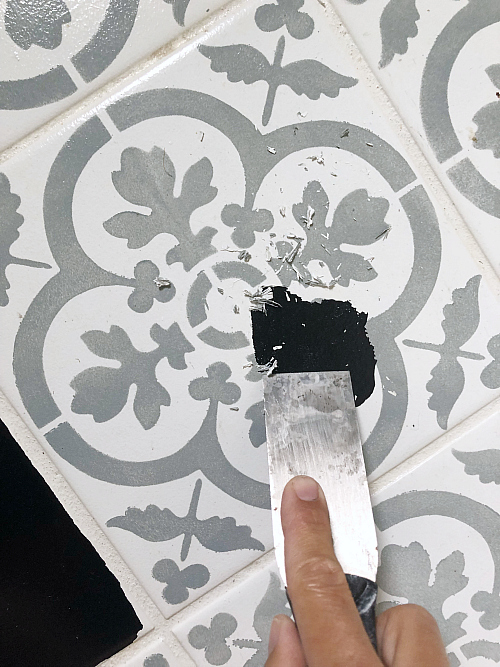
Make sure to remove all the paint from each tile and wipe them with a damp cloth to remove any paint chips. This is very important because you are going to end up redoing each tile.
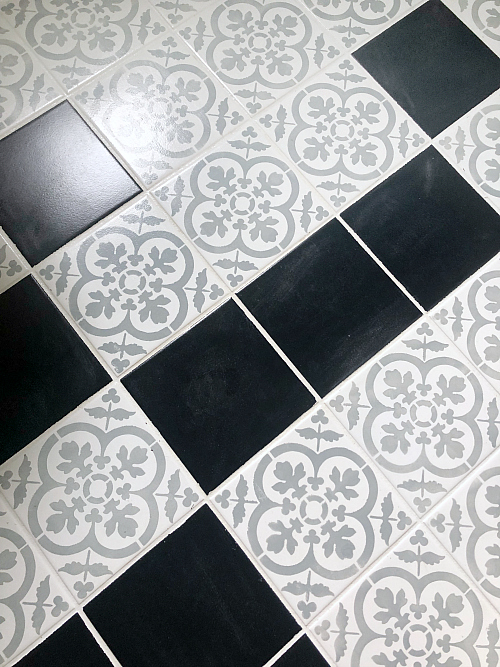
I then followed the same steps I took when I originally stenciled the floor, with one change. I used an oil-based primer instead of a water-based primer. Honestly, I don’t know if this will make a difference, but I thought I’d give it a try. (See the important update above because the oil-based primer made a huge difference!) After the coat of primer was dry, I applied two coats of white floor paint using a 4″ foam roller; allowing the first coat to thoroughly dry before applying the second coat. And then I stenciled each tile.
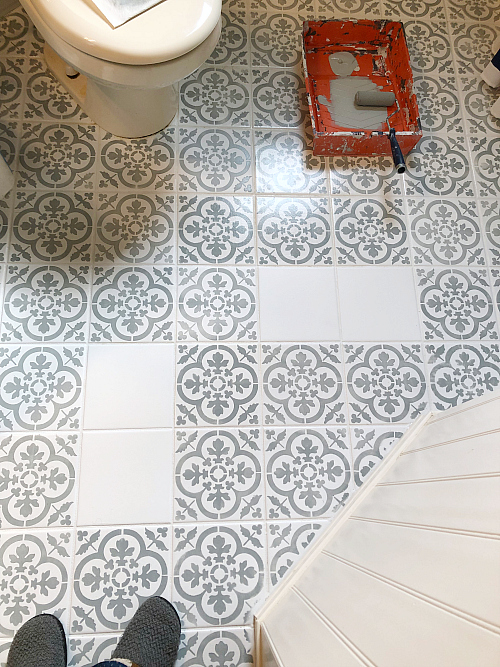
A quick tip: Take a picture of your floor and mark which tiles you stenciled (with a photo editor) so you know which ones will need a coat of polycrylic. While the redone tiles will have a more matte finish, it’s easy to look at a picture in case you have difficulty.
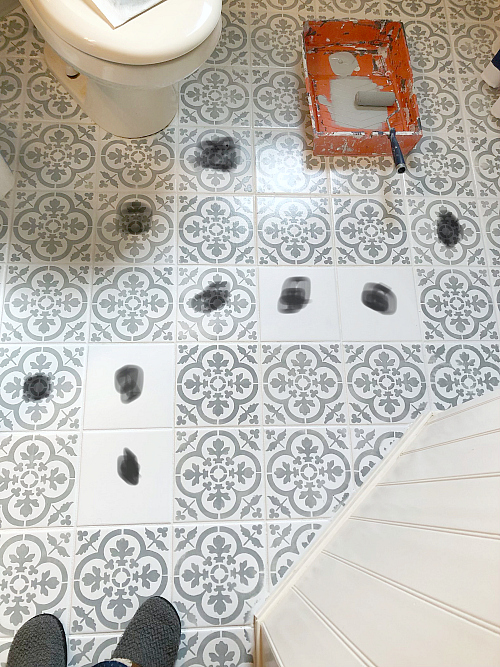
After the stenciling has dried, apply a few coats of polycrylic to seal the paint.
While I was a little bummed about the basement bathroom, I will still say that even if I have to repair a few tiles each year, it was still well worth it. For less than $40, it was a cheap investment until we can afford to completely replace the tile floor.
Love it? Pin it!

Oil-based primer is truly not required. But the proper prep and correct primer/paints/sealer do. Definitely need to clean floor with TSP Substitute (some paints don’t do well with regular TSP cleaning). Then lightly scuff sand the tile, vacuum, wipe up remaining dust with denatured alcohol on microfiber. Use Ben Moore Stix bonding primer (it won’t dry opaque white, that’s ok), 2 coats per timing on instructions. Then use Ben Moore porch & patio paint. Then once fully cured paint, seal it all with 2-3 coats of polyurethane sealer.
All are water-based products. And my painted tile bathroom floor has stood up for nearly 2 years now, heavy traffic, no peeling… nothing will remove this paint. Also, pay attention to the cleaning products you use on the floor. Ideally just water… definitely not any swiffer wet jet products or chemicals. The only exception is a Bona floor cleaner but water is best.
I loved reading about your stenciled floor update! It’s so inspiring to see how well the painted tile floor has held up over time. Your tips on maintenance are super helpful, and I can’t wait to try this in my own home. Thanks for sharing your experience!
I loved reading about your stenciled floor update! It’s always helpful to see real-life examples of how these projects hold up over time. Your tips on maintenance and the actual wear and tear experience are invaluable. Can’t wait to see how it continues to look in the coming months!
Hi! I also have a pool and I’m worried about the floor being slippery. Was yours? What did you use to seal it?
Hi Erin, I have a 500 square foot living room / kitchen open concept room It’s currently plywood, to lay down hardwood or tile is a budget breaker for me. I have access to laminate flooring of all different shades but same thickness, do you think I can put this laminate down , sand , primer , paint then stencil?
Absolutely!
hi, love what you done and how clever it all turned out – quick question as i don’t know if a have seen it anywhere, – was there a sealer, like an clear epoxy water-proof low gloss or matte or high gloss sealer that you placed over the paint once stenciled? I see it on some DYI posts but not all… apparently, sealer is what really raises the longevity of tile with use and in high traffic areas…let me know?
I followed your tutorial and another similar one and my floors turned out super cool! It was definitely a temporary and budget friendly fix for our one bathroom, so I’m realistic about whether or not it will hold up. I am wondering if you have any recommendations on cleaning the painted tile floors after having lived with them for a while? Thanks in advance!
I just found your blog and love it. I’ve painted many floors without sanding and they range from super slick tiles to textured tiles to linoleum. None have ever chipped. I only use Zinsser Cover Stain primer. It sticks to glossy surfaces and it’s oil-based. I use a disposable roller and toss it when I’m finished. It stinks but it’s worth the stink. And it doesn’t stink once you topcoat it with paint of choice. Your floors are beautiful!
Thank you so much for sharing this update! I love the stencils you used on both floors…they both really made the rooms! And…unlike living with a tile you might grow tired of having, just re-stencil and voila! Happy again and still less money than laying new tile!! Anyway, nice job on both of them!
Hi there! Which stencil did you use? How are your floors holding up now?
I’m considering stenciling a few areas, but they are very high traffic areas. Front entryway and kitchen. I do have the tiles with a lot of texture (not the porcelain), so I was hoping that would help.
Just thought I’d ask your opinion if you would stencil floors in those rooms. Thanks!
Smooth porcelain or textured tile, I’d have given both a good sanding first. Surprised you didn’t think of that when repairing the porcelain paint!
If you refer back to my original post with the tutorial on stenciling a floor, you will see that I did sand the porcelain tile prior to applying the primer 🙂
I, for one, am so happy to see a new post from you, but I get it. Kids grow, life demands change, but then one day you look up and find they are grown! Spend all the time you can with them. Enjoy these years. Don’t stress about what you can’t do, just realize all that you do accomplish.
And thanks for sharing the truth about your floor!