My son is one of the biggest football fans of all time. He knows stats from games that took place before he was born. So it seems fitting that he would choose a football theme for his bedroom makeover… and this DIY football field wall has become my favorite feature!
It is week 5 of the One Room Challenge (hosted by Calling It Home). This week I completed the football field wall and I could not be more excited with how it turned out!
I’m admitting right now that I was super nervous about taking this on. I had never used a vinyl cutting machine in my life, and I wasn’t sure I’d have it figured out in time to actually get this wall finished. Luckily, it was incredibly easy to use, and once I got the hang of it, I finished all the vinyl cutting and hanging in just a couple hours.
The very first thing we did was paint the wall green… that was about 3 years ago. I actually found the can of paint we used, so I can share the color (which I think is perfect for a football field). It’s Martha Stewart Bonsai.
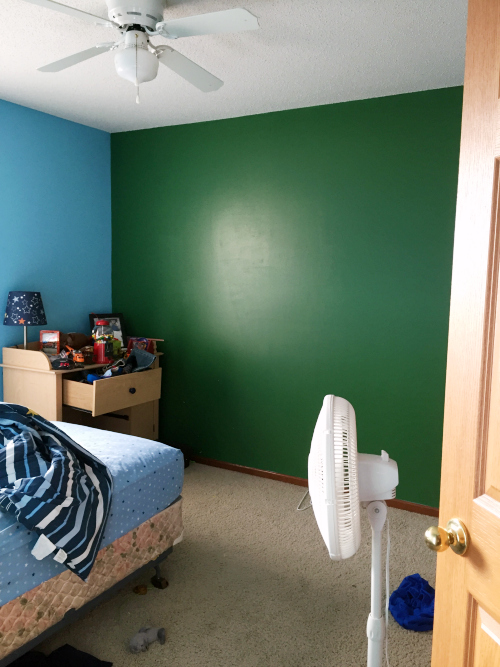
Fast forward 3 years…
I started by taking measurements and sketching out how far apart my lines needed to be for even spacing. The wall was 11 feet across, which meant the half-way point was at 5 1/2 feet. Actual even spacing would have been 10.8 inches, but we went with 10.75 so the end zones would be just a bit bigger.
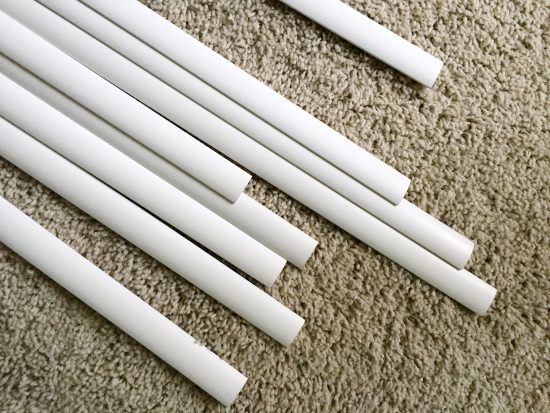
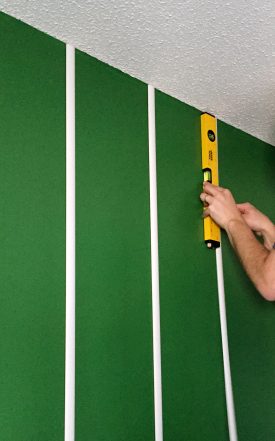
I found some thin white trim strips at Home Depot. They were 8 feet long which was perfect for the room’s 8 foot ceiling. However, we did cut off a bit to account for the baseboards.
We thought a lot about how we wanted to hang these strips because nailing them probably wouldn’t turn out very well. We figured we had two options: liquid nails or doubled-sided foam tape. Since liquid nails would probably do more damage to the walls with removal, we chose the double-sided tape option.
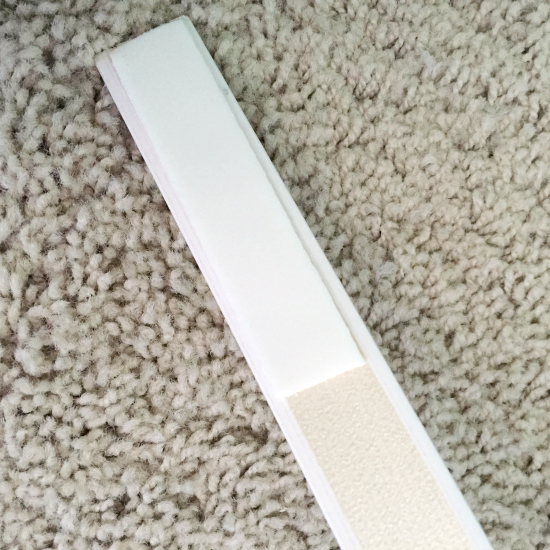
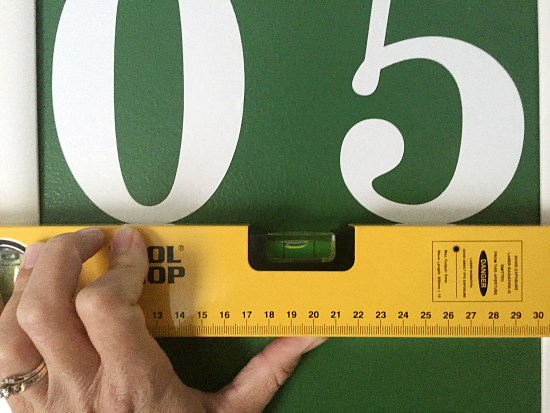
Be sure to use a level as you go down, attaching pieces of tape as you go. If you just adhere it to the wall, it could end up crooked.
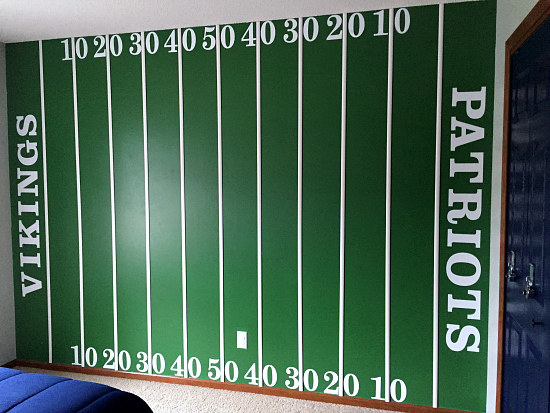
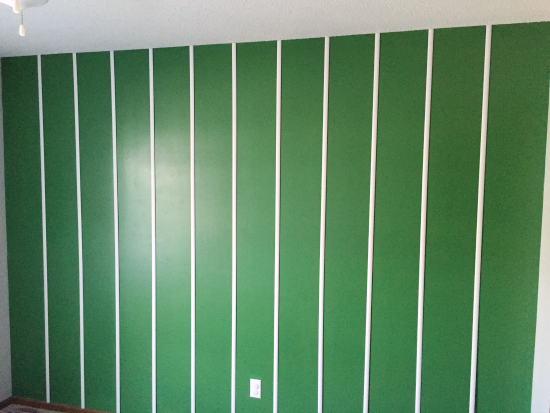
Here is what it looked like once all the yard lines were in place.
Now comes the fun part. I decided to purchase a Cricut machine for cutting the vinyl. I did a little research online and found that the blades on the Cricut last longer than those on the Silhouette, and it’s more user-friendly (which I need!). You can also purchase football field wall decals if you prefer.
I looked up which font was closest to the numbers and lettering on a football field. The answer: Clarendon Bold. Now, remember, I am not super tech-savvy, so I downloaded the font onto my computer, and when I typed into the Cricut design program, I was told the character wasn’t supported. Huh? I later found out that you have to tell the Cricut program to do the font bold. Unfortunately, I didn’t find this out until after I’d done all the numbers (in Century Schoolbook font, which was a close second to the Clarendon Bold). So, my numbers are one font and the letters in the end zones are another. (Don’t tell anyone 🙂 )
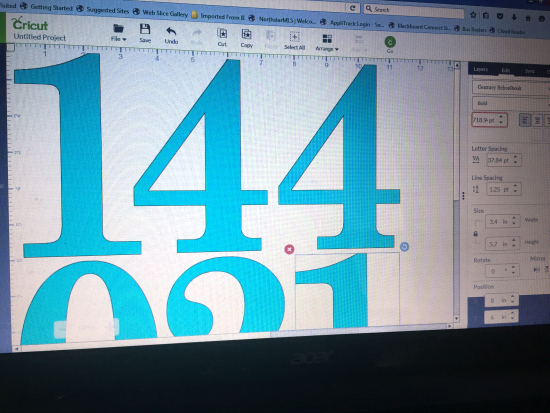
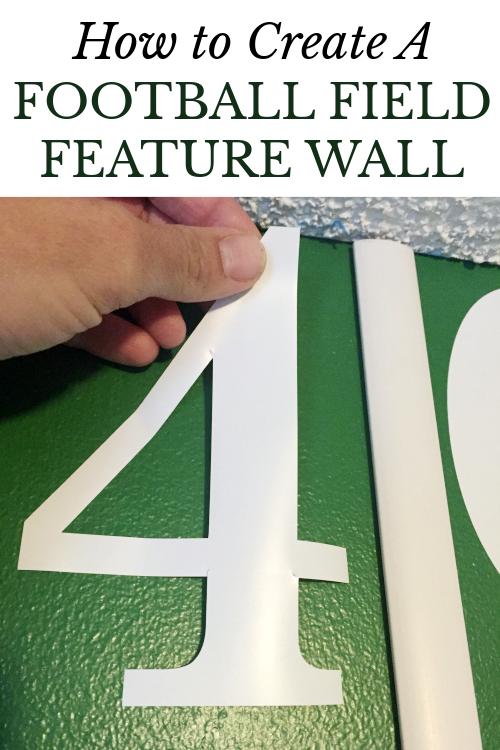
I basically set up my numbers in the design program and was able to get 6 numbers on a 12″ x 12″ sheet of vinyl. I made each number 5.7 inches in height, and allowed the program to adjust the width so the numbers would look balanced on the wall. I found that creating each number individually worked better than creating one text box with all the numbers.
You can purchase individual sheets, or rolls of vinyl. Just make sure it’s removable, not permanent.
After the sheet was cut, I simply removed the numbers and applied them to the wall. Okay, it’s not that simple. It takes a little trial and error to get everything even and spaced correctly. Remember: A level is your friend.
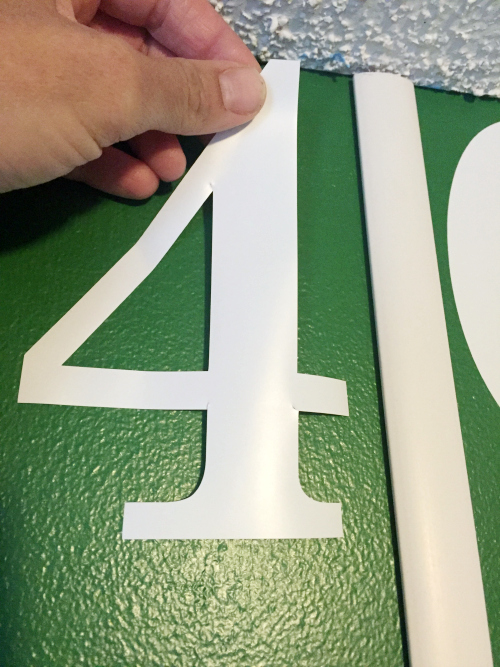
I started by trying to measure distance from the stripes, ceiling, and floor, but I was going crazy trying to be that precise, so I gave up and went the “eyeballing it” approach. As long as the bottoms of the numbers were (close to) level, I called it good.
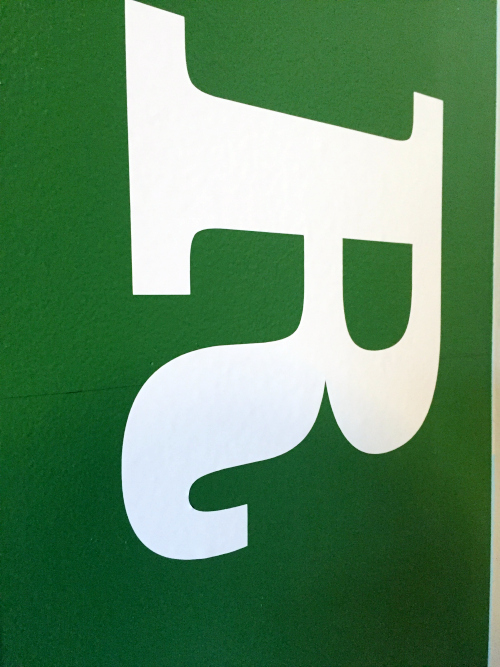
I let my son choose which teams he wanted in the end zones. At this point I figured out how to use the Clarendon Font, and I made the letters 7 inches tall. (Remember, you don’t have to cut the full 12 inches of vinyl from a roll to fit the cutting board, just cut off what you need… for me, I went with 8 inches to allow for error).
I found the letters MUCH easier to work with than the numbers. I, again, found the middle of the wall and marked it with a pencil. Because I had the width measurements from the Cricut program (which I wrote down), I found which letter needed to be in the middle (about 5 inches down on the R). Remember the width of the letters are going to be different depending on which letter you’re using.
In the end, we had a wonderful football field wall.
This project was so fun, and after 3 years in the waiting, I’m happy to say it’s done.
Wanna Catch Up or Jump Ahead?
Week 1 | Week 2 | Week 3 | Week 4 | Week 5 | Week 6
We think you might also love these ideas!
Accent Wall Ideas | Football & Baseball Card Storage | Unique Nightstand Ideas

Love it? Pin it!
Please tell me what department you found the white line. I can’t find those anywhere at Home Depot and asked several employees. TIA
Do you know what section to find the faux wood? Looking to do something similar and that seems like a good option.
If I remember correctly, we found it in the section that has trim, baseboards, quarter-round, etc.
I am knocked out by how good this looks. The three-year-old paint was still perfect, too. I guess next week is the final reveal with all of the details? You and your husband make a great team and your son is so fortunate.
Thanks Jewell! The paint certainly held up well over the years, and I love that it’s such a perfect green for a football field.
What fun! You did a great job finishing up this wall! I’m off to check out the final room reveal. 🙂
Thank Jenny! I have to say, this wall is my favorite part of the room.
Wow!!!!!! Need I say more?
Awww… thanks Anne!