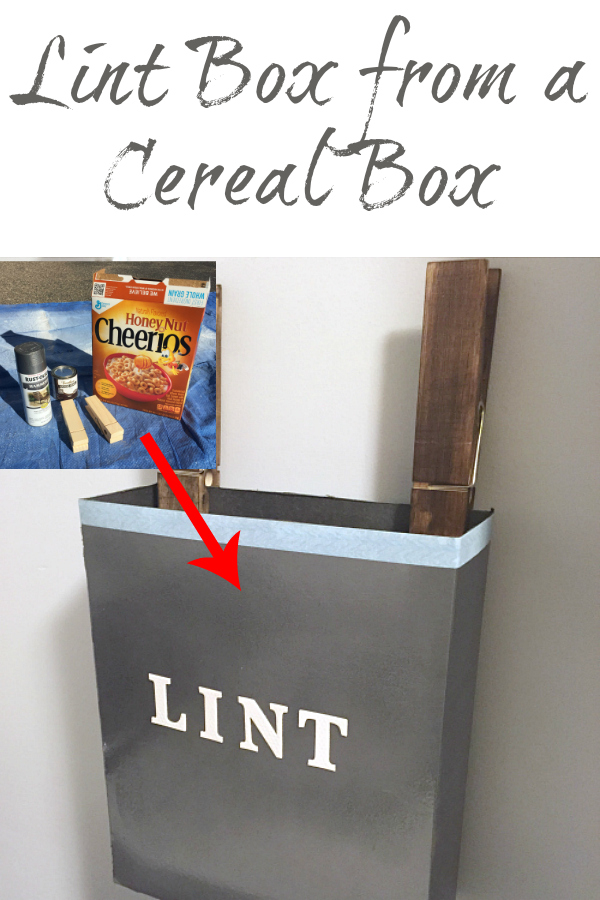
As you may know, our laundry room was in desperate need of some love and attention. I decided to use a cereal box to create a DIY Lint Box. Easy and budget-friendly.
It is week 3 of the One Room Challenge and I have given myself a total of $100 to redo our laundry room. That’s not a whole lot when you’re painting walls, painting the dryer, making a shelf, adding storage, etc.
One thing I really wanted to do, was come up with a solution for our dryer lint. For the past 5+ years, this was my “solution”…
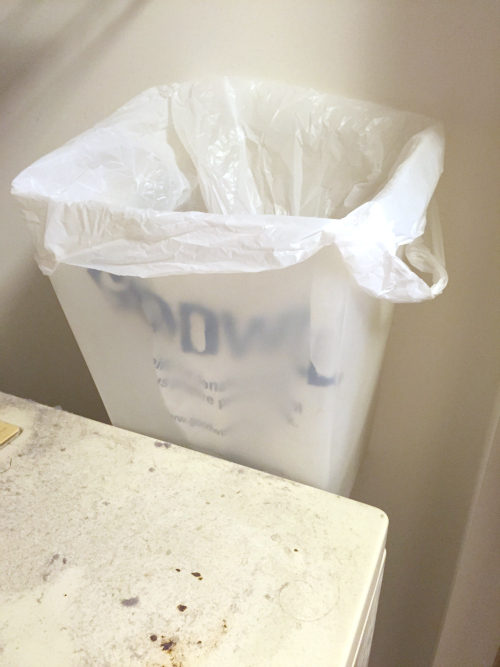
Ummm… yuck! Perhaps I should explain that my laundry “room” is actually a laundry closet, and there is literally no room. This over-sized trash can, shoved between the wall and dryer, is where I tossed all my dryer lint. (According to the above photo, I wasn’t even doing a good job because my dryer is covered in lint… To be fair, this was a before shot of the laundry room and I believe every before shot should include real life photos. No cleaning up. No tidying. Real. Life.)
Because I have such a tight budget, I needed a cheap solution to fix this disaster of a trash can. Enter the cereal box. A Costco-sized Honey Nut Cheerios box to be exact. I headed outside and grabbed some spray paint (similar), two large decorative clothespins I had found at Michael’s, and some dark stain.
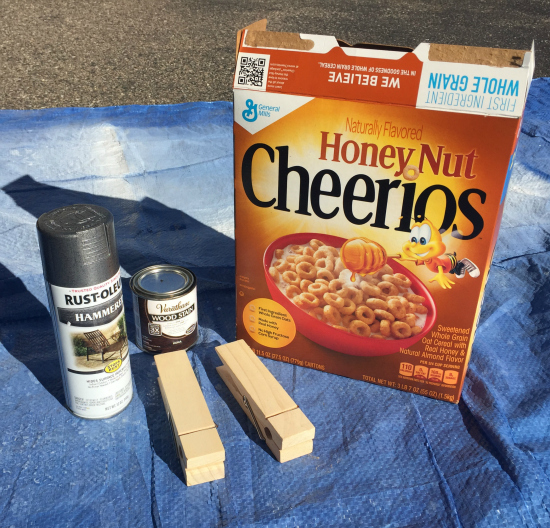
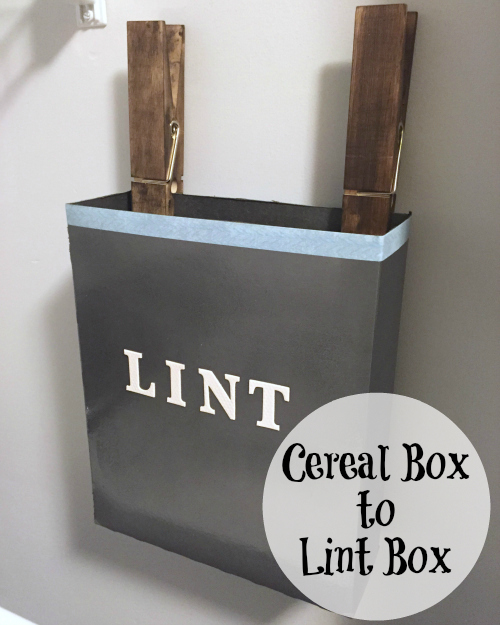
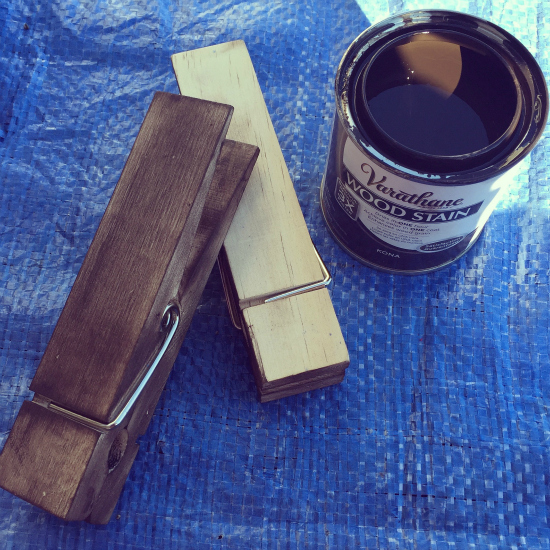
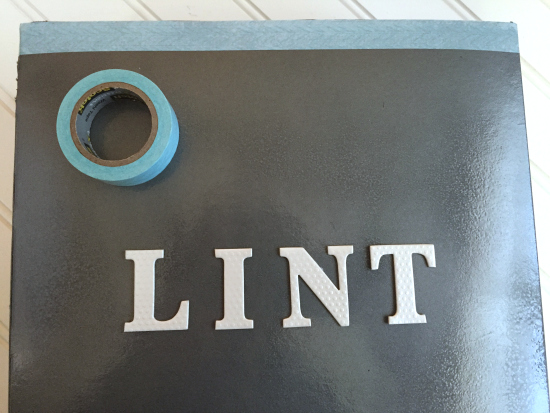
I cut the flaps off the top of the cereal box and painted it with a Hammered Metal Spray Paint. Then, I stained the clothespins in the color Kona.
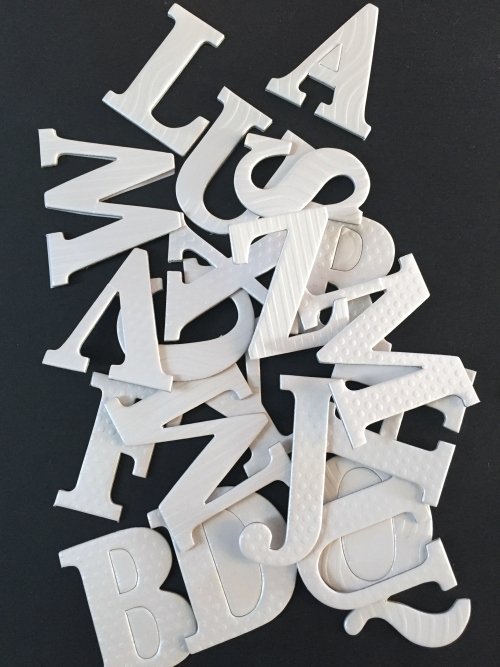
Once everything was dry, I decided I really needed to spruce up the box a bit, so I headed to my craft bin and found some sticker letters I had leftover from a previous project.
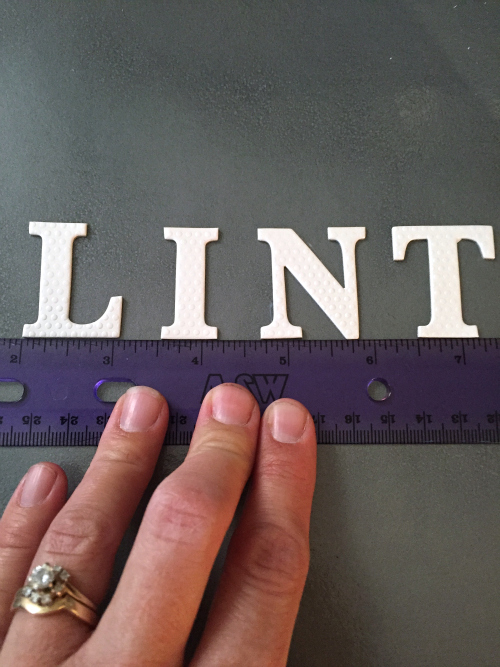
Luckily, I had the letters to spell out L-I-N-T, so I applied them to the box, using a ruler to make sure it was straight and centered.
It still needed something, so I added a strip of washi tape around the top.
Using Command Strips, I secured the clothespins up on the wall. (For some reason, I had a little trouble with the strips sticking to the wood clothespins… I lost the directions to the Command Strips, so maybe they don’t do well on wood? I found that sanding the area where I was going to apply the strip was helpful.)
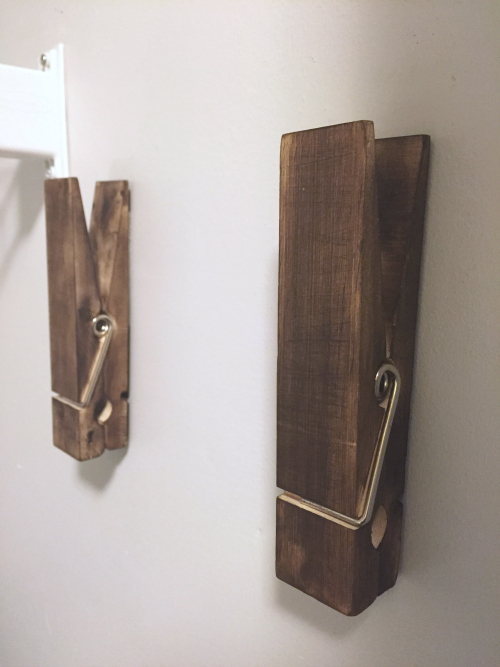
Then I hung the box, using the clothespins.
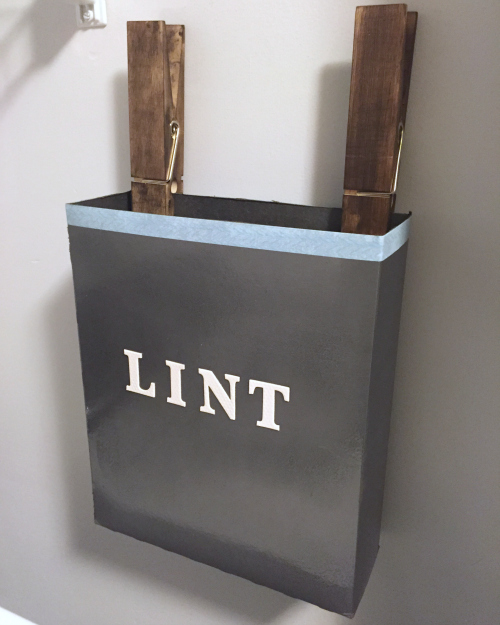
What I love, is that when the box is full of lint, I can unclip it from the clothespins, empty the lint from the box, and clip it back up again. So much better than that trash can!
The Budget So Far
Last week I had spent a total of $9.51. Here’s what I spent on this DIY lint box project.
- Cereal Box- FREE
- Spray Paint- $5.39
- Sticker Letters- FREE (Already had)
- Large Clothes Pins (x2)- $2.38 ($1.19 each)
- Stain- FREE (Already had)
- Command Strips- FREE (Already had)
Total So Far: $17.28
Wanna Catch Up or Jump Ahead?
Week 1 // Week 2 // Week 3 // Week 4 // Week 5 // Week 6
Love it? Pin it!
Loved it! As soon as I saw this I made one. I bought 12″ clothes pins beacause they were so cute not knowing what to do with them. Made your lint box as soon as I saw your post! Thx!
Such a great idea and so simple! I need to copy it!
After the lint box is full, I put the stored lint near the bird feeders in September and October. The birds use it to feather their nests every year.
What size are your clothespins? I got the 12 inchers and they are clearly too big lol
🙂 I just went up and measured mine. They are about 6 inches long and 1 1/2 inches wide. Hopefully that will work a little better for you.
Mine doesn’t look as pretty as yours, but it does the job! I didn’t have spray paint so I used contact paper (the one you cover books with), and I didn’t have nice pegs or Command Strips, so I hot glued some magnets to the back.
I always think of these posts as a base for creating your own ideas. Glad you were able to use supplies you already had on hand and create your own look.
I realize this was posted a long time ago, but gluing magnets to the back is seriously genius. Thought you should know.
Ooooo we just got a Michael’s store in Bismarck. Love those clothes pins.
I live at Michael’s 🙂
Loving this idea! I have a garbage can that is too big for my laundry closet and keeps getting in the way. Maybe after my new washer arrives (mine broke last week), I’ll need to do a mini-makeover to my room. Thanks for the ideas 🙂
Thanks Katie! This was such a simple fix for the lint, and it looks a whole lot better than my trashcan 🙂 Sorry to hear about your washer. Never good to have laundry on hold.
I love this idea, and yes this looks way better than the trashcan. 🙂 Thanks for sharing!
Thanks Viviana! Seriously though, wouldn’t anything look better than that trash can? How embarrassing!