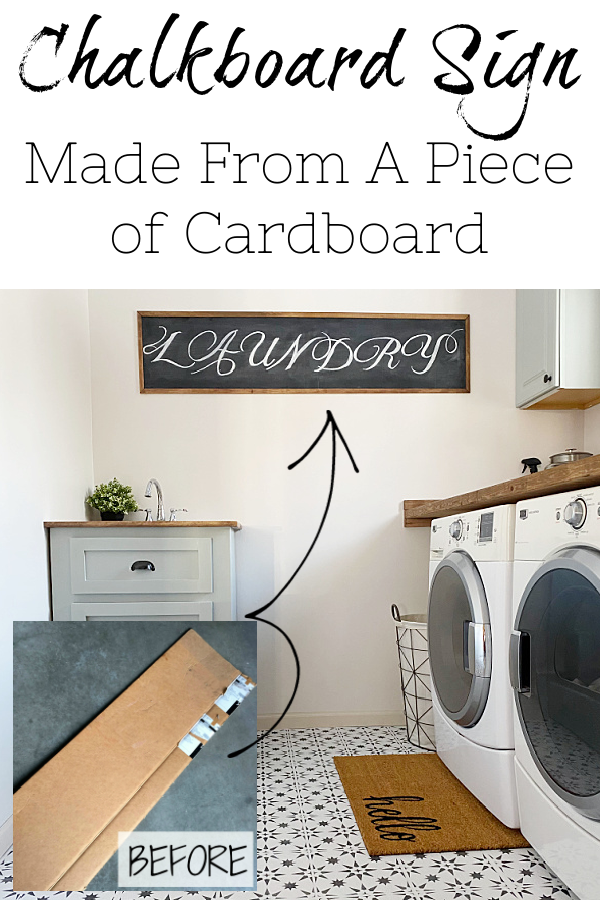
How many of you have seen those cute farmhouse-style chalkboard signs? Since I am always trying to figure out how to do things in a budget-friendly manner, I figured out how to make my own DIY Chalkboard Sign, for free, from a piece of cardboard. Check it out!
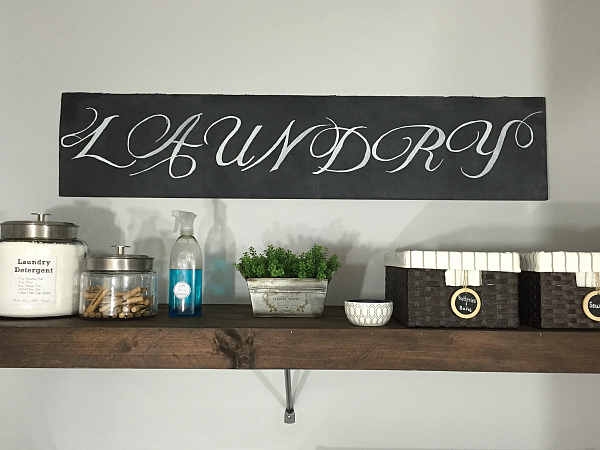
Welcome to week 4 of the One Room Challenge, where I am working on a laundry room makeover… for less than $100!
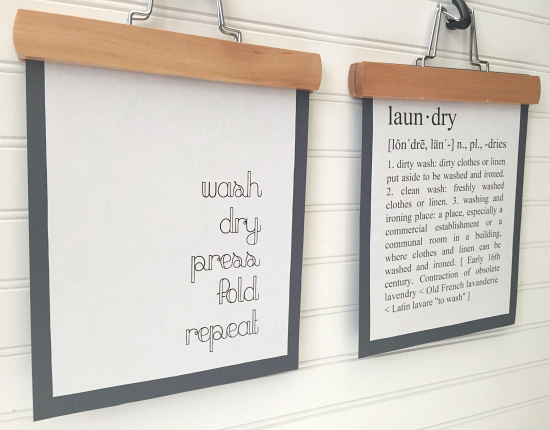
One of my goals for this room makeover was to add something to the walls… I started with these cute printables that I hung using wooden pant hangers…
Then I realized I needed something for the blank space above the shelf, so I headed to Michael’s thinking I could purchase some wood letters that spelled out “LAUNDRY” or “WASH & DRY”. I got there and the letters were going to cost $3 each (and that was with a coupon). I didn’t have enough remaining in the budget, so I turned to leave. Stop. Chalkboards for sale. I thought the idea would work so much better as I wouldn’t have to worry about leveling each individual letter on the wall, but the chalkboards were all pretty small and would look out of place in such a big area. Then creativity struck. I walked out of the store with a vision. I just needed a big piece of cardboard… like this one.
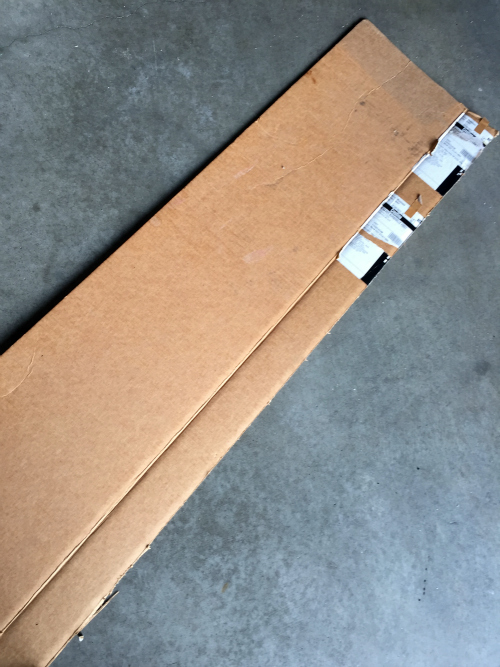
See, procrastinating your trip to the recycle center can pay off.
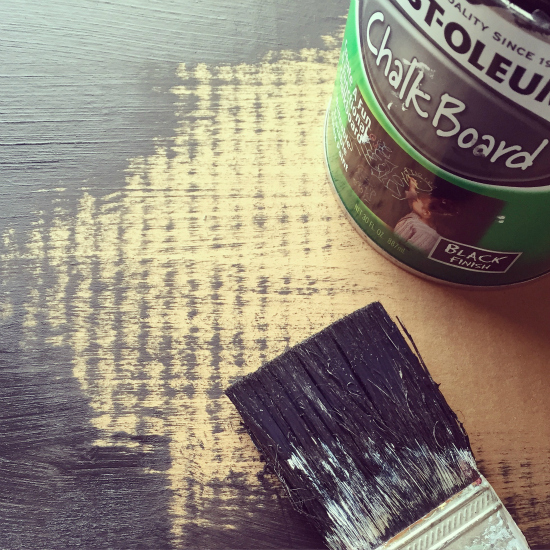
I cut off all the excess cardboard from the box and started painting it with chalkboard paint.
While that was drying, I started working on my lettering for the sign. Luckily, there are truly creative people out there that share tutorials on how to do beautiful chalkboard lettering for those of us not gifted in the penmanship department. Honestly, I’ve seen a number of these tutorials, so I can’t point to one in particular, but I will share what I did.
How to Create A Chalkboard Sign from Cardboard
Step 1: Create Lettering on Your Computer and Print
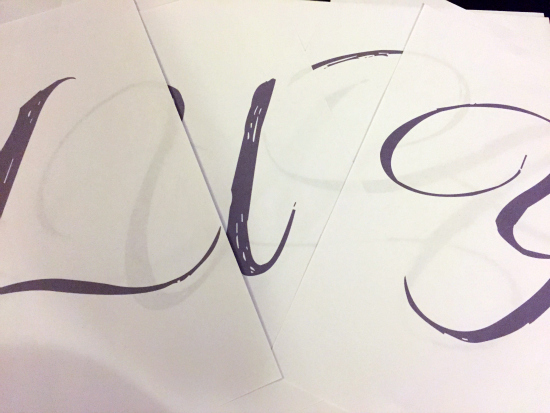
Start by creating your lettering on the computer. I used PicMonkey because I like their font options, but you could just as easily do it in Word. Depending on the size of your chalkboard, you will want to create the letters in the correct font size. I created the letters so I could get one letter on an 8 1/2 by 11 sheet of paper.
Step 2: Season Your Chalkboard Paint
Hopefully at this point your chalkboard paint is dry, so grab your cardboard piece and go over the whole thing with a piece of white chalk. This “seasons” the board. If you don’t do this, your board is so black from the new paint that every smudge and bit of chalk will show up.
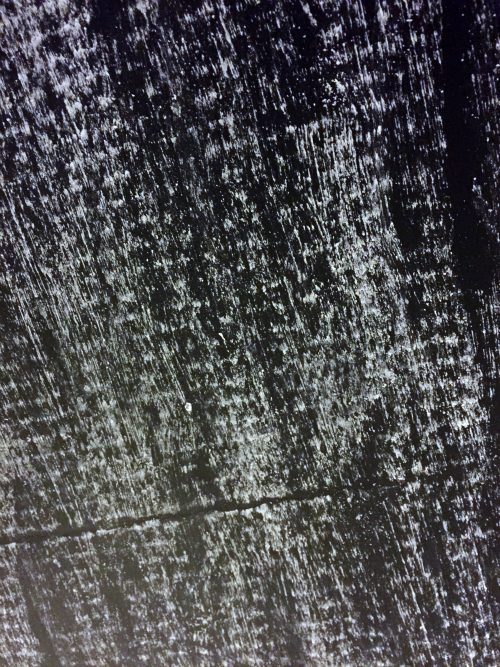
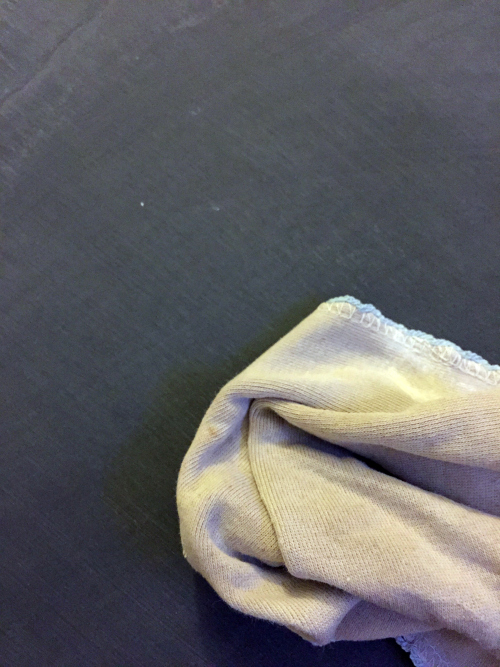
After you’ve covered the whole thing in chalk, wipe it off, and you’ll have a perfect surface for starting your lettering.
Step 3: Adhere Letters to Chalkboard Sign
Arrange your lettering on the board and tape it down, but only on the top. You’ll need to be able to lift the paper to color on the back of it. Of course, this sounds like the most confusing step, and it’s the one thing I don’t have a picture of… Sorry.
Step 4: Chalk the Back of Your Letter Sheets
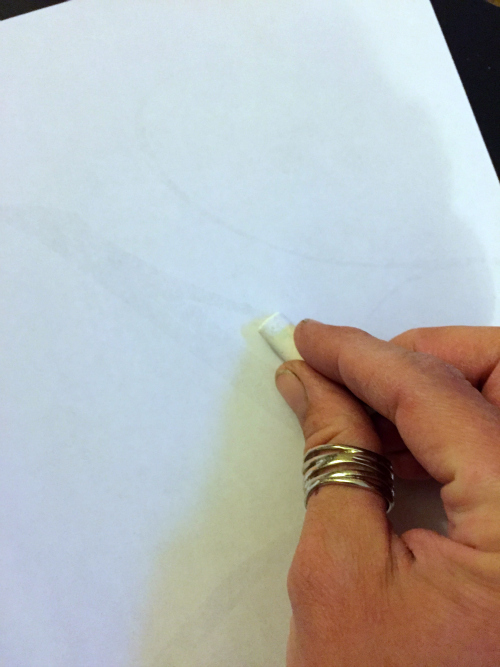
Going one letter at a time, flip your paper up and and cover the backside with chalk.
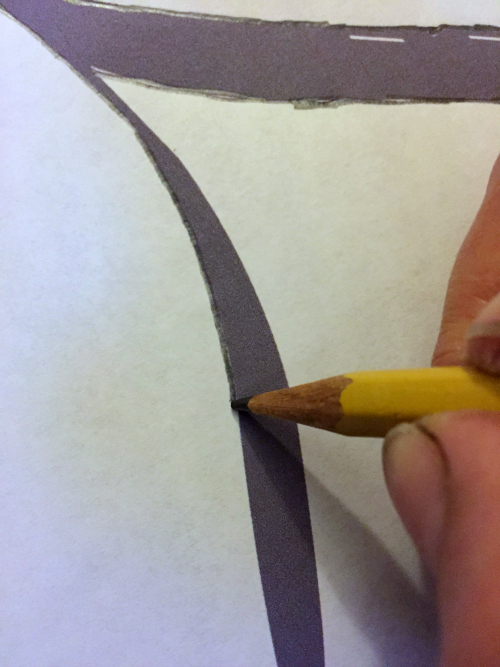
Step 5: Flip Paper Over and Outline Each Letter with A Pencil
Lay the paper back down and go over the outline with a pencil, pressing firmly. Repeat this step for each letter. (Please pardon my dirty fingernails. Cleaning grill grates.)
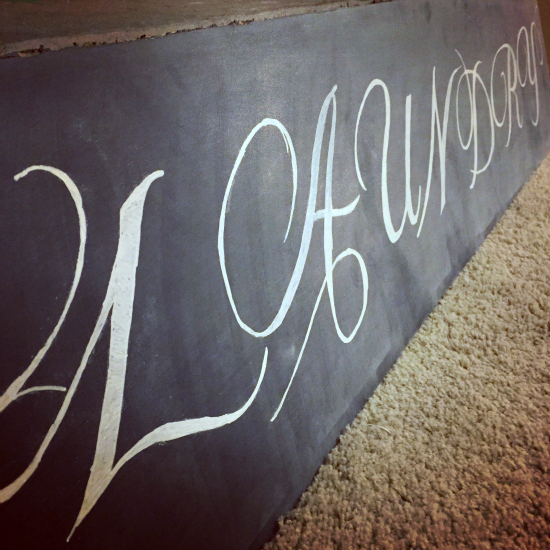
Step 6: Fill in Lettering with Chalk
After you have traced your letters, remove the computer paper and you’ll see outlines for each letter. Color those in with chalk or a chalk marker. Using regular chalk will make it easier to erase if you plan to change the sign often. Because I’m making the laundry sign a permanent fixture, I chose a chalk marker as it’s a bit more permanent (although you can still erase it as well).

Step 7: Mount to Wall
I then adhered Command Strips to the back of the cardboard (now chalkboard), and mounted the sign on my wall.
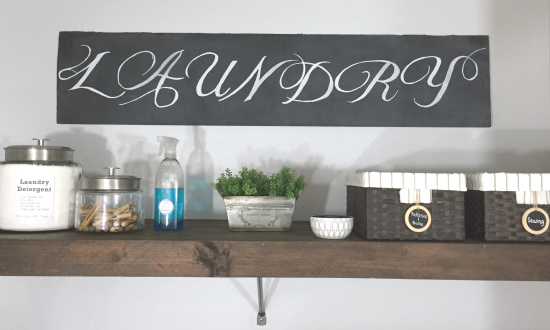
This project was done for FREE, and I couldn’t be happier with how it turned out.
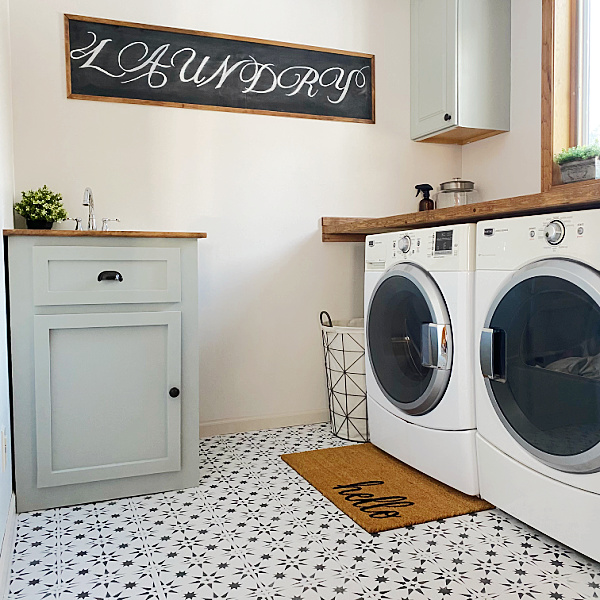
UPDATE: Several years after creating this sign, we moved; and with us came this “piece of cardboard” sign. I ended up making over the laundry room in our new home (for $100!) and added a wood trim border around it. Can you believe this sign is still with us seven years later?!
The Budget So Far
Last week I had spent a total of $17.28 on painting the dryer and making a lint box. Here is the breakdown for this Chalkboard Sign & the Printables.
Chalkboard Sign– FREE
- Cardboard- FREE (Found in my garage)
- Chalkboard Paint– FREE (Already had)
- Chalk Marker– FREE (Already had)
Printables on Pants Hangers– $1.96
- Printables- FREE (Found on Pinterest)
- Wood Pants Hangers– FREE (Already had)
- Gray Cardstock (x2)- $0.78 (39¢ each)
- Knobs– FREE (Already had)
- Hanger Bolts– $1.18
Total So Far: $19.24
Wanna Catch Up or Jump Ahead?
Week 1 // Week 2 // Week 3 // Week 4 // Week 5 // Week 6
Love it? Pin it!
I’m curious if you have tried to erase it and if you can reuse it. I just painted the back of a frame that is essentially cardboard. It works well to write on, but I can’t erase it. So, I was curious your experience.
Erin! What a great, creative and cost effective idea! (didn’t want to say cheap however free is the best) Pinned your idea and excited to make one of these for my laundry room! Hope to share some pic’s!
Awesome! I would love to see pictures of what you come up with.
O My gosh!!! This is exactly what I have been looking into making I would have never thought to paint cardboard with chalkboard paint. Thank You!!!! Love it!
So glad you love it!
Great idea! I am so going to do this, I have the chalkboard paint already sitting in the shed. Thanks for the inspiration.
Great! What kind of sign are you going to make with it?
I love that you made this out of cardboard! Pinning to my chalkboard Board – I am obsessed with chalkboard!
I’m completely obsessed with chalkboard too. I just love the look of it. Thanks for pinning 🙂
Hi, Erin ~ This is such an amazing idea! I’ve been wanting to create several chalkboards but haven’t found just the right one. Now, I’m going to make a few of these for myself. Thanks for sharing!
I feel like using cardboard allows you to be able to create whatever size you need vs. what the store has to offer. Although this version is a little more basic, you could certainly add a frame or something to it.
Very cute!
Thanks!
Love the sign, very creative idea! I need one for my laundry area & this is a fun alternative. Thanks for sharing.
You are so welcome. I’m pretty impressed with how an old piece of cardboard could turn out to be just what I needed.
I really like the fresh clean look! and that shelf is so gorgeous, stain color is perfect.
Thank you so much Nicole!
You made me smile when you said you weren’t creative! This is very creative and a bargain to boot! Nice job!!!
Thank you so much for your kind words. I think there’s a little creativity in everyone, we just have to find the right outlet 🙂
Enjoy your weekend!
Thanks, Erin. Have a nice weekend too!
Seriously can’t go wrong with FREE!!! Awesome!!!! Pinned! xo
Free is always the way to go, right? Thanks for pinning!