I just love the last Wednesday of the month because it marks another completed space… done for $100 or less. As you may recall, during the month of February, I have been working on a coat closet makeover for the $100 Room Challenge. While it didn’t need anything major, I did have a few goals in mind…
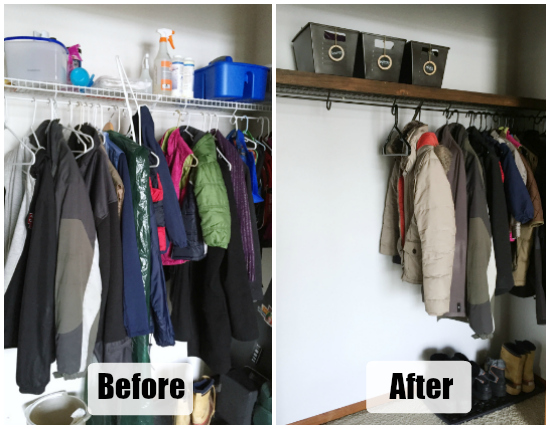
Before we start, let’s go back to the before shot.
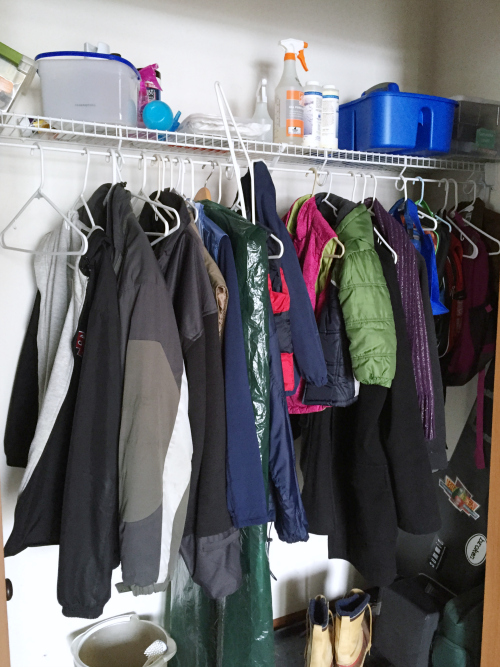
The first thing this closet needed was a good cleaning, and I did that during week four of the 8 Week Cleaning Challenge. So here’s where I started with this project.
Goals For This Coat Closet Makeover
Goal 1: Update the Boot Tray
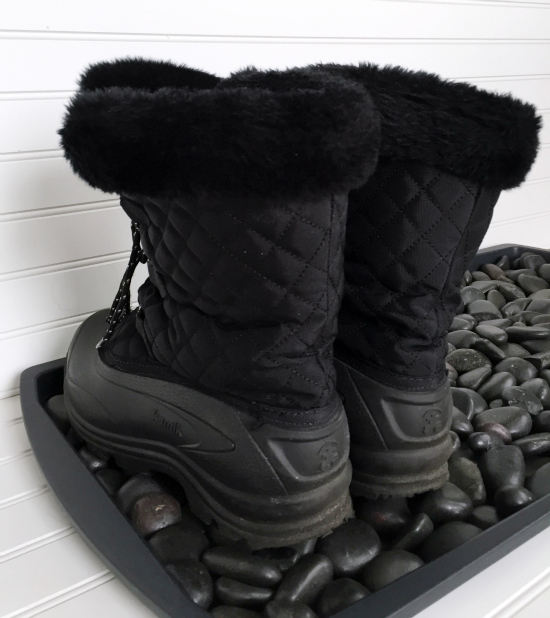
In week 2 of this challenge, I shared my updated boot tray, which was simply the addition of black river rocks to a plastic boot tray we already had. An easy project that took about 30 seconds.
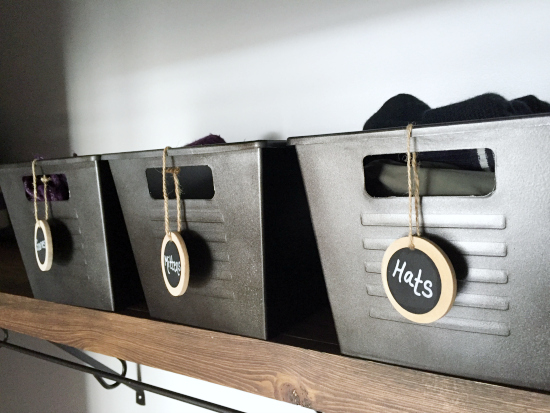
Goal 2: Create Coordinated Coat Closet Storage
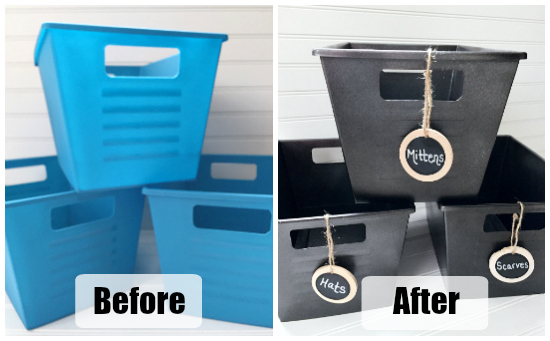
Last week I shared how I turned some blue dollar store bins into faux metal bins which helped create the cohesive storage I was looking for.
Goal 3: Paint the Coat Closet
I painted the closet using the same gallon of paint I used in my kids’ bathroom and the cleaning closet… It’s a never-ending gallon of paint I guess…
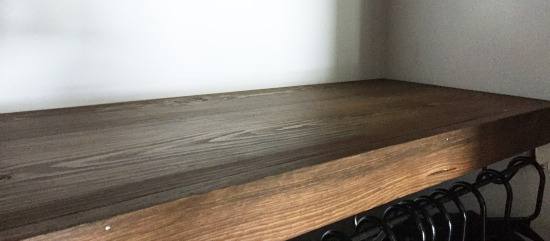
Goal 4: Cover the Wire Shelving With A Wood Overlay
We did another wood overlay for the wire shelving. At first, I thought I’d go with a white overlay because the wire shelving had a piece for hanging coats that couldn’t be covered (and it was white), but the truth is I love the look of stained wood, so I spray painted the wire shelving with Oil Rubbed Bronze spray paint, and then we created the wood overlay to go on top. Unlike the overlay we made for the laundry room, we couldn’t use cedar fence posts because they are too short. We instead bought two 8′ x 8″ x1″ common boards. The remainder of the process was the same.
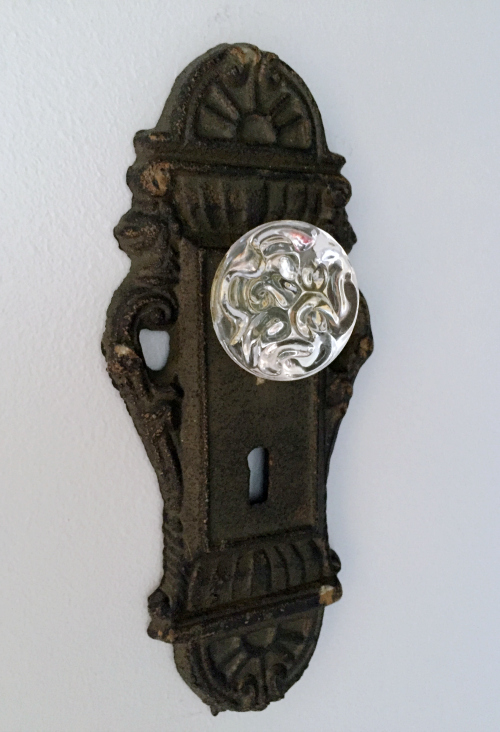
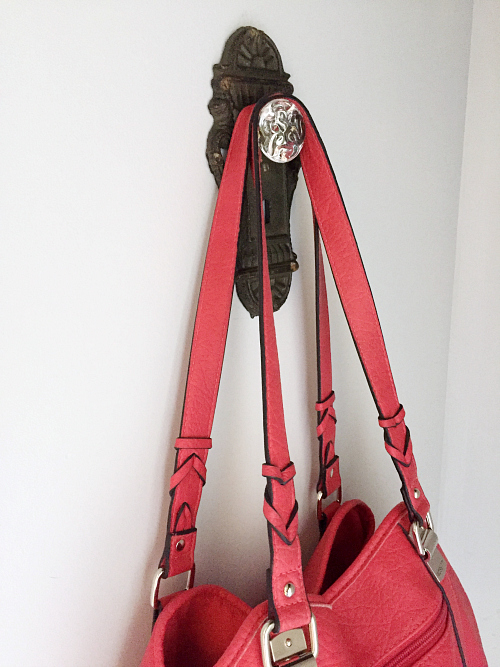
Goal 5: Create A Place to Hang My Purse
The last thing I wanted was a place to hang my purse, and I found this knob at Hobby Lobby. Perfect.
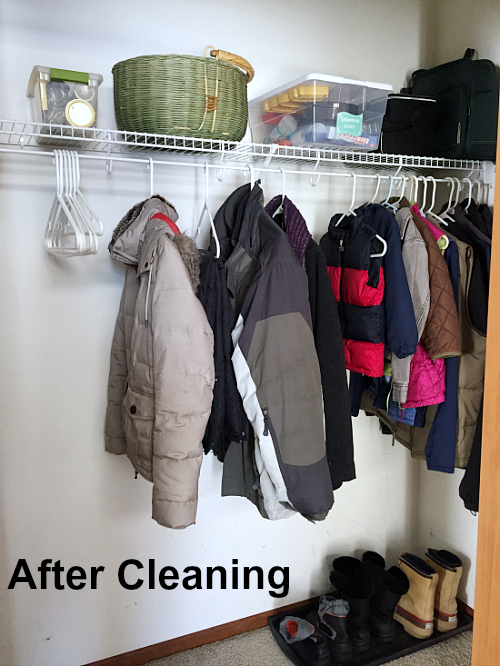
With all goals accomplished, here is the coat closet.
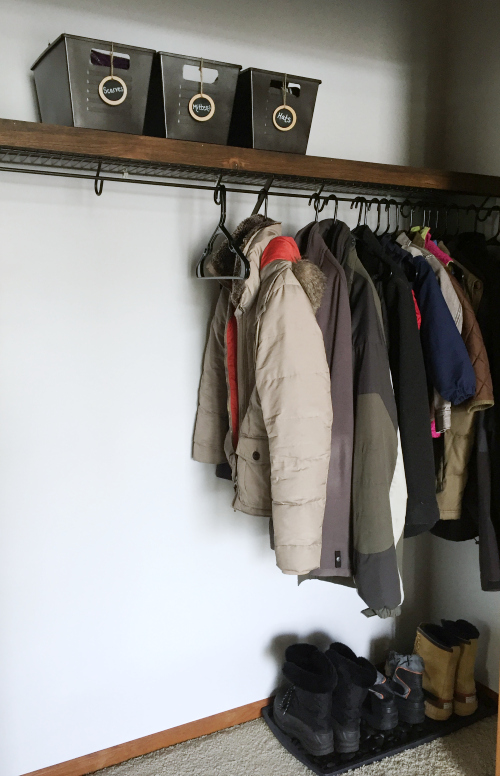
One other thing I bought was black hangers. The white ones that were originally in here looked weird with all the dark metal and shelf.
I almost feel like the closet is too empty now, but I’m sure we’ll find things to fill it with time.
The Budget
Last week I had spent a total of $22.76. Here are the final costs.
Wood Shelf Overlay: $8.86
- 8′ x 8″ x 1″ Common Boards x2: $8.86 ($4.43 each)
- Stain: Free (I already had it)
- All Other Supplies: Free (I already had them)
Paint: $5.63
- Paint: Free (I already had it)
- Painting Supplies: $5.63 (I had everything I needed except I ran out of painting tape)
Hook for My Purse: $5.99 (On sale at 50% off)
Black Hangers: $2.99 for a pack of 18
Total Cost: $46.23. That is $53.77 under budget!!!
Best I’ve ever done. I should totally take myself out to lunch 🙂
Wanna Catch Up?
Week 1 // Week 2 // Week 3 // Week 4
Love it? Pin It!

I just love what you have done. You have inspired me! The wood over the metal shelf is genius!
Hi. Erin, How did you paint the wire shelf underneath?? did you cover your wall to protect it from the spray paint? I have the same white shelf, have made the wood shelf overlay, but dont like the look of the white underneath.. so thinking the oil rubbed bronze.. its in my laundryroom.. or possibly the silver if its a darker shade.. let me know please asap.. I have company coming 🙂 your work is amazing!! Kim
Hey Kim-
I actually removed the wire shelf and brackets from the closet, and then spray painted them with oil-rubbed bronze out in my garage. Once dried, I brought them back in and put them back up in the closet. Hope that helps!
Love the plastic bin makeover. Has the paint worn off on the bottom as you’ve slid them off and on the shelf?
The paint on these bins has held up SO well. I haven’t had any chipping at all. I don’t do a lot of sliding them on and off the shelves since they are storing our winter gear right now, but I think the paint will hold up just fine. These bins had just a bit of texture to them (not that shiny, glossy plastic) so the paint adhered really well.
I did some bins in my pantry that had the glossy plastic, and I definitely experienced more chipping with those, so I applied a coat of mod podge to them and it helped tremendously. (You can see those plastic bins here if you are interested:: https://www.lemonslavenderandlaundry.com/100-room-challenge-mudroompantry-food-storage/
I love, love, love your closet makeover! I will also be organizing my craft room, so selfishly speaking I can hardly wait to borrow your ideas!
Maggie
Borrow away… and thanks for the kind words. Enjoy your weekend!
I love the wire shelf overlays, and am planning to do that to my coat closet! One question – how has the paint held up on the wire shelving? I love that it’s not white anymore, but wonder if it will chip from the hangers being removed/replaced often.
I was concerned about that too, but the paint had held up really well. I do use plastic hangers, which I think help prevent too much scratching. I feel like the wooden hangers with the metal tops, or wire hangers, may pose more of a problem.
Very cleaver and decorative at an outragishly cheap price. kudos to you
Thanks Martie!
I vote for home office, because selfishly I need ideas that won’t break the bank.
Looks great, Erin! The closet overlays are my favorite project of yours because they’ve made such a big difference the two times you’ve used them. My vote is for the master bedroom, if for no other reason than I like that paint color and maybe you have enough paint to cover that room???
Thanks for the vote. I’ve got about 1/4 of a gallon left in that paint color. Not sure that’s quite enough 🙂
Awesome job once again! I cannot even get over your ugly wire shelves turned beauties. That project gets me every time! Of course, I have yet to do it myself. ? I vote home office because I need some ideas for mine. It’s a disaster zone! Crafters gotta craft…but what do I do with all the stuff?!?!?
Seriously! Craft/Office Supplies can be overwhelming. Thanks for the input Stephanie!
Do your master bedroom, that’s the room that should be calm, relaxing & romantic!!