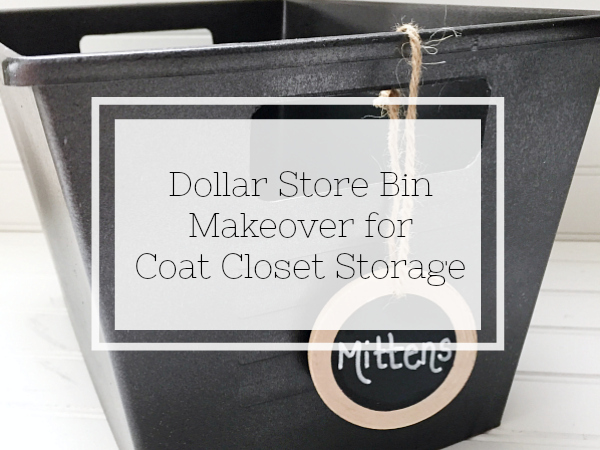
There are so many affordable options for storage at the dollar store, but it often involves bright colors. If that’s not neon pink isn’t your style, you can do a dollar store bin makeover using a little spray paint. Learn how I used dollar store bins for coat closet storage.
It’s Wednesday! You know what that means, right? I’ve got an update on the $100 Room Challenge. This month, I’m working on our coat closet, and this week was all about finding storage. Here’s what I wanted to do…
- Create cohesive storage for our winter gear
- Find something to put my returns in
- Buy a hook for my purse
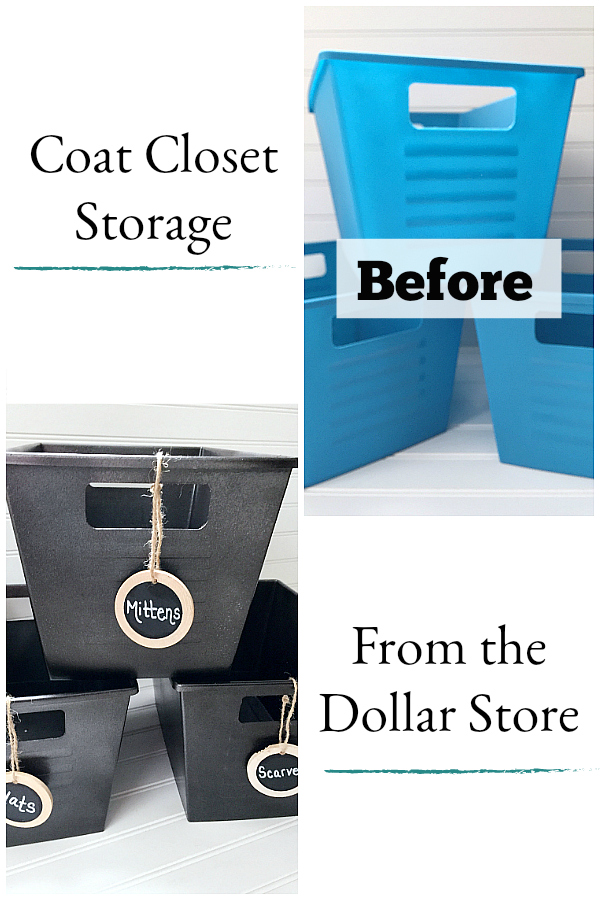
Create Cohesive Storage with Dollar Store Bins
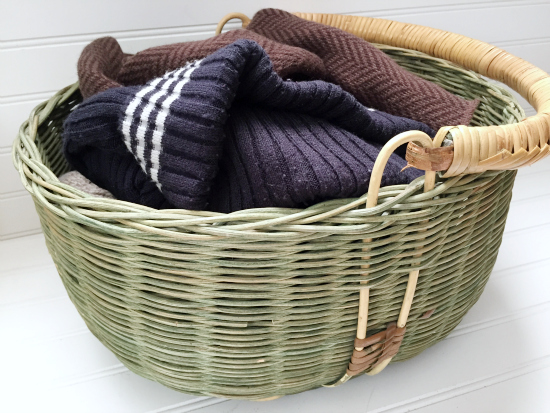
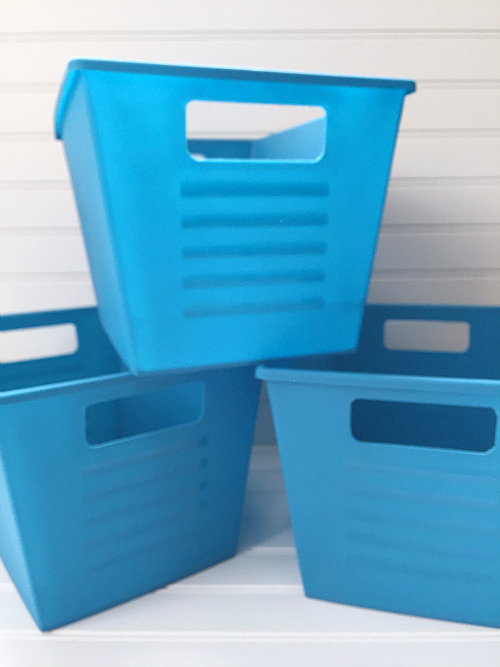
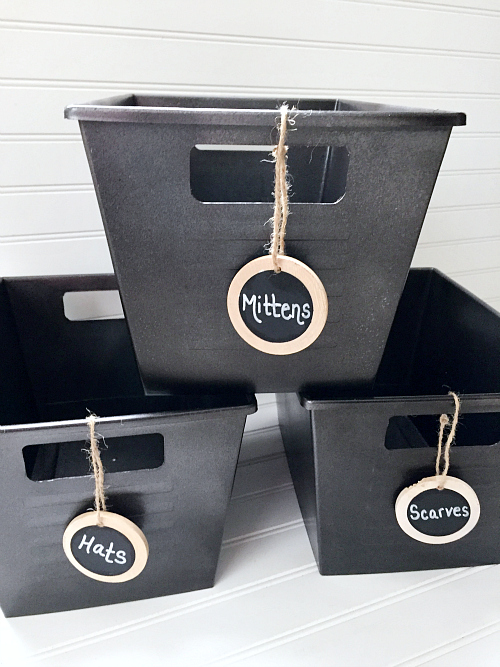
Let’s start with number 1: Cohesive Storage. We received this basket for our wedding (many) years ago, and it has been what we’ve used to hold all our winter gear. It’s overflowing now, and none of my children’s items are even in it. I decided to head over to the dollar store to see what I could find; after all, I love our Dollar Store Pantry Storage. I found these “locker bins” and they were perfect.
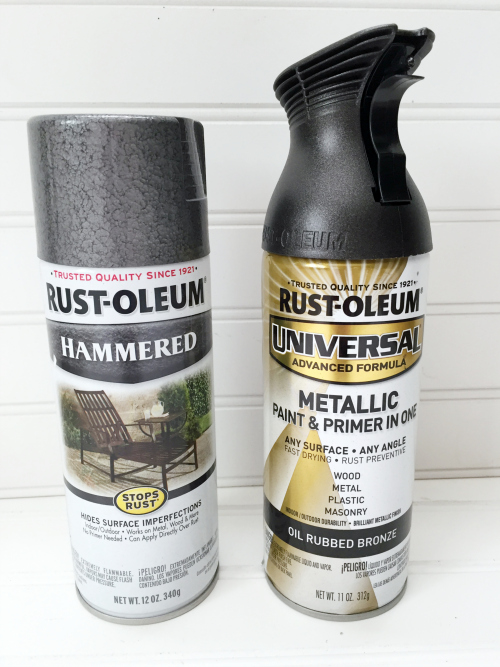
All I needed was a little spray paint. I grabbed some Hammered Metal and Oil Rubbed Bronze spray paint, and applied them in layers to create the look of metal.
After allowing the spray paint to dry, I added a few wooden chalkboard tags I had leftover from the laundry room.
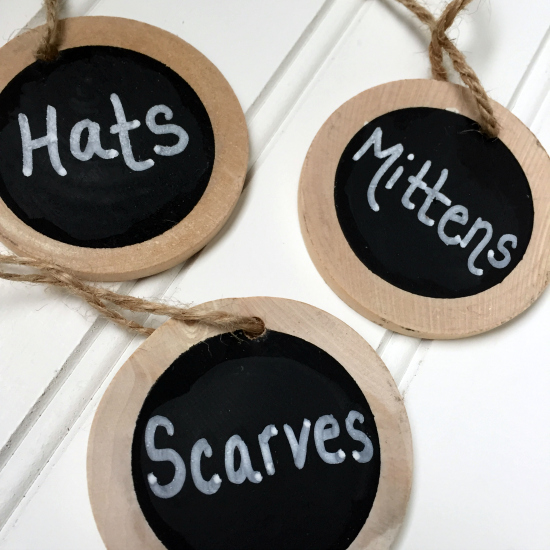
And here’s how they turned out. Love them!
Creating Storage For Returns
I buy things. I bring them home. I realize I don’t like them, or don’t need them, and I return them. I constantly have items that need returning, and here is where I would keep those items:
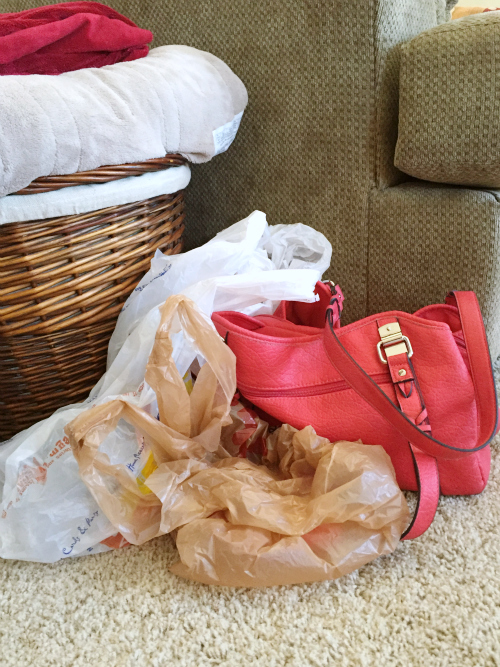
That would be the living room floor. While I don’t consider myself to be up on the latest style, I can pretty much assure you that plastic shopping bags are not the “in thing” in home décor right now. I needed to find something to house my ever-growing pile of returns.
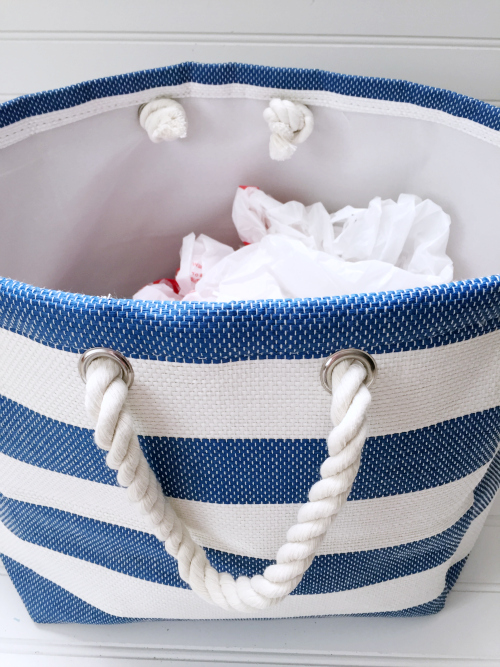
Let’s give a round of applause to the Target Hot Spot, where I found this bag. What I like about it is that it can hold a lot of stuff and I can grab it on my way to the car, bringing my whole stash with me.
Hook for My Purse
You’ll notice in the picture above that my purse it sitting amongst the plastic bags. I own one purse. Yep. I am a minimalist when it comes to handbags, clothes, shoes, make-up… (ummm… I don’t actually wear makeup). I figured I better get the purse off the floor too, and now that the closet has a bit more room, I thought I could hang it in there. Honestly, I haven’t picked out the perfect hook just yet. We have some we removed from the cleaning closet that may work just fine (for free), or I may splurge and buy one. Time will tell.
The Budget… So Far
Last week I had spent a whopping $8.00. Here’s what I bought this week:
Plastic Bins: $9.76
- Plastic Bins x3: $3.00 ($1.00 each)
- Hammered Metal Spray Paint: Free (I already had this)
- Oil Rubbed Bronze Spray Paint: $6.76
- Wooden Chalkboard Tags (similar): Free (I already had them)
Returns Bag: $5.00
Total So Far: $22.76
I’ve been avoiding the painting part of this project, so it’s probably best that the reveal is next week because that means my procrastination can’t last much longer…
Wanna Catch Up or Jump Ahead?
Week 1 // Week 2 // Week 3 // Week 4
I recently spray-painted my book baskets for my classroom. I am having difficulty because the paint is coming off the basket. Do you have any suggestions?
Thanks so much!! 🙂
Hi Angelika-
Could you let me know what type of material the bins are made from? Plastic?
Hi, I am new to spray painting, So can you explain how did u do with both sprays? I mean which one u did first and the next.. Thank you
Hi Neena-
Thanks for the question. What I did for these bins was this: I first applied the oil-rubbed bronze and made sure the bin was fully covered (MUCH better to do several light coats that trying to cover in a heavy coat. If you spray too much at once, you’ll get drips.) I let that oil rubbed bronze dry a bit, and then I just did a very light coat of the hammered metal. This was simply to add a little texture to the bins. I literally did one quick sweep over the whole thing. Hope that answers your question. Feel free to let me know if you have any other questions.
I love this idea! I found similar bins at my local Dollar Tree. I am just curious as to how you painted the inside of the containers. I tried painting one, kind of as my teste, and I’m having a hard time figuring it out. Did you leave the containers upright? Thanks
I always start by turning the bins upside down and spray paint the outside and bottom first. Once that’s dry, I flip it over so it’s upright and spray the inside. I wrote a post on spray painting these bins (not quite answering your particular question, but it might help). Here’s the link: https://www.lemonslavenderandlaundry.com/spray-painting-plastic/
Enjoy your weekend!
when you spray paint the containers, do you have to do anything special to them first, or use special paint? I have a TON of these bins in all different colors and I’d like to paint them all one color, but am worried the paint won’t adhere correctly or will peel off easily. Has that been an issue for you?
I didn’t do anything special to these bins before painting them. However, these particular bins had just a bit of texture to them, so the spray paint adhered really well. I also used a spray paint that specifically said you could use it on plastic. In my mudroom, I did something similar, only the bins were glossy plastic, and I used a spray paint that didn’t say it could be used for plastic. With those I did notice some chipping, so I applied a layer of Mod Podge over it and they have held up well (and it’s been over a year since I did those). You can see the bins I used in the mudroom here if you’re interested: https://www.lemonslavenderandlaundry.com/100-room-challenge-mudroompantry-food-storage/
If you have similar bins to these, I would just recommend using a spray paint that says it can be used on plastic, and if it’s the glossier plastic, you could try using a high-grit sandpaper on it first for better adhesion. Hope that helps. Let me know if you have any further questions.
I need to reorganize my storage room this is a great inspirational post to get me going . Love the painted painted bins
Maria
Thanks Maria!
Love spray painting bins! Cute idea! I always put my returns right in the car so I’ll have them when I’m out and about but it’s so much cuter to have a canvas bag for them!
I think putting returns in the car right away is a great idea. Hoping that keeping the bag near my purse in the closet will help me remember to grab the. We’ll see what happens.
Your bins are VERY creative… you KNOW someone is going to ask you decorate their home soon. You do a wonderful job!! Love reading about all your projects and seeing the pictures. Keep up the good work!
I was actually wondering what I was going to do when I ran out of rooms to redo in my home… maybe I can start working on other people’s spaces???