A can of spray paint can change the look of almost anything. However, many people wonder whether spray painting plastic actually works. Does the paint chip or peel? Today I am answering one of your most frequently asked questions, “Can you really spray paint plastic?”
Before I started this blog, I don’t think I had ever touched a can of spray paint in my life. Now, it’s one of my favorite things. I have spray painted everything from an old locker to closet doors to our clothes dryer, but there is one question I get asked over and over again…
“Does spray paint really work on plastic?”
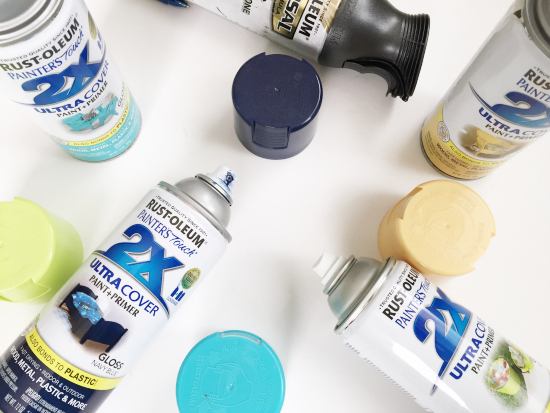
The short answer is “yes”, but there are definitely some tips and tricks you can use to make sure the spray paint properly adheres to plastic. Below, we’ll walk through various types of plastic, from smooth and glossy to matte and textured, and learn the best methods to spray paint it successfully.
How to Spray Paint High Gloss Plastic
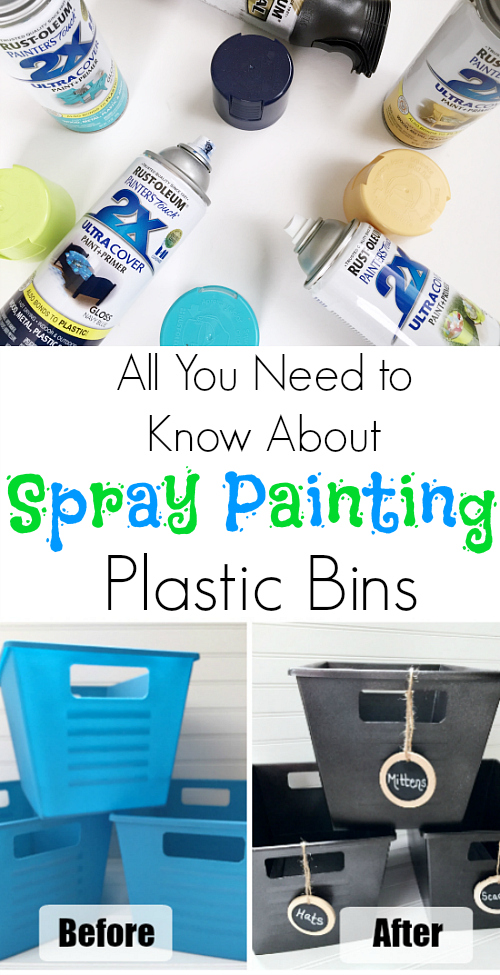
Let’s start with these bins I spray painted for the mudroom. Orange might be a great color choice for Halloween, but not in everyday decor. I decided the best way to upgrade these dollar store finds was to add some spray paint and chalkboard labels.
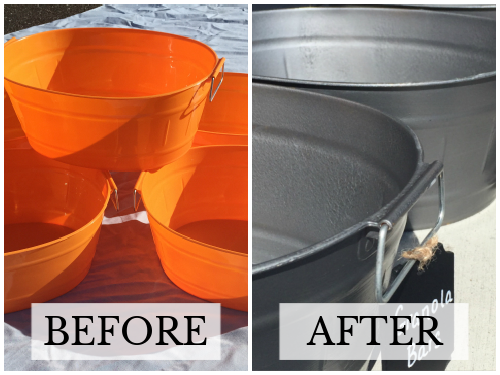
Texture of the Bins: Glossy
Type of Spray Paint Used: Rustoleum Hammered Metal
Lesson Learned: This project was the first time I had ever spray painted plastic, and almost immediately after the spray paint dried, I noticed it starting to chip off. There are two reasons I believe this may have happened: 1.) The texture of the plastic was glossy, which didn’t allow for great adhesion of the paint and 2.) the type of spray paint used didn’t state it could be used on plastic.
Remedy: If you notice the spray paint is starting to chip off your glossy plastic items, apply a coat of Mod Podge to seal the paint. I have had these bins in my pantry/mudroom for over a year now and they are still holding up nicely after applying the Mod Podge.
How to Spray Paint Matte Plastic
In February of this year, I redid our coat closet for the $100 Room Challenge and included these plastic bins for our mittens, hats, and scarves.
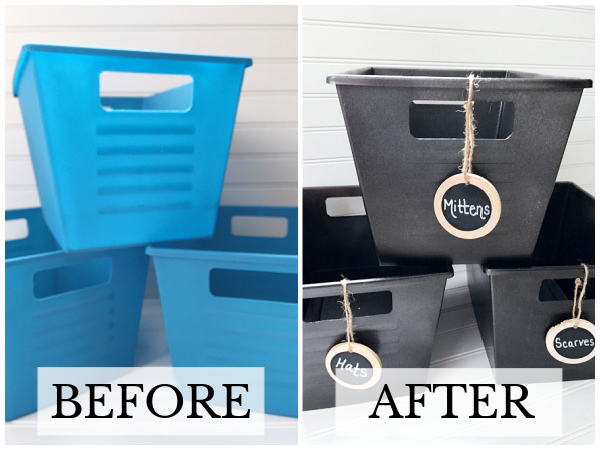
Texture of the Bins: Lightly Textured Matte
Type of Spray Paint Used: Rustoleum Oil Rubbed Bronze & Rustoleum Hammered Metal
Lesson Learned: The second time I spray painted plastic bins, the plastic had a matte finish, and I used a different type of spray paint that could be used on plastic.
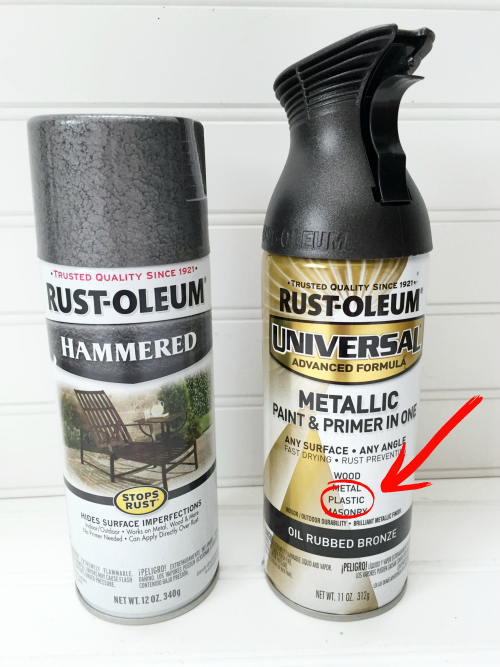
I did a base coat in the Oil Rubbed Bronze (“plastic approved”), and then added a fine mist of the Hammered Metal to create a little texture. The spray paint has adhered to these bins amazingly well. I have not had any chipping or peeling. This may be because the plastic was slightly textured with a matte finish and/or because I used a spray paint that was made for use on plastic.
UPDATE: It’s been a decade since spray painting these plastic bins and they’re still holding up!
How to Spray Paint Glossy Plastic (Round 2)
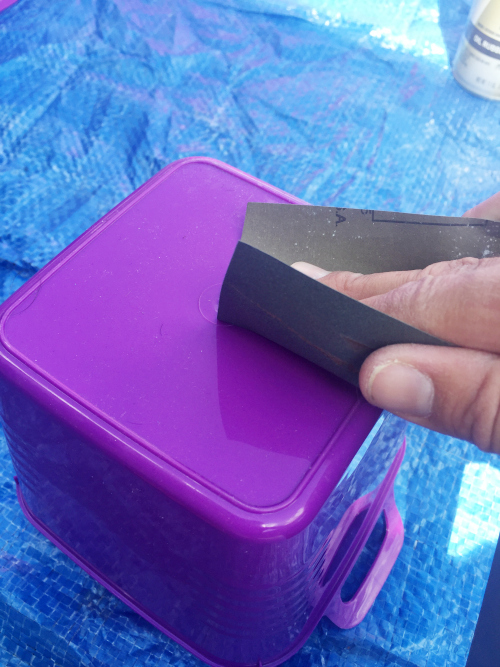
In July, I took on an organization project under our bathroom sink and, once again, spray painted some plastic bins.

Texture of the Bins: Combination. Some Glossy. Some Matte
Type of Spray Paint Used: Rustoleum Oil Rubbed Bronze & Rustoleum Flat Chestnut
Lesson Learned: This time around, I had some items that were glossy and some that were matte. I didn’t want to take a chance on the glossy bins, so I used a high-grit sandpaper to create a little bit of texture for the spray paint to cling to.
I, again, used the Oil Rubbed Bronze (that was “plastic approved”) as the base and then added Flat Chestnut for a bit of texture. Honestly, I’m not sure the sanding was necessary. I think the spray paint would have adhered either way. No Mod Podge was required for the glossier bins this time around. While it’s only been a few months since these were made, everything has held up nicely and I’ve had no issues with chipping.
UPDATE: Again, it’s been almost 10 years since these plastic bins were spray painted, and not only are they still in use, they have all held up with no chipping!
In Summary…
In the end, I would say the best tip is to use a spray paint made to adhere to plastic. If you can’t find a color you like in that variety, you can always lightly sand the plastic first to create texture for better adhesion and seal the paint with Mod Podge once it has dried.
We think you might also love these ideas!
How to Spray Paint Furniture | Cover Wire Shelving for A Dollar | Goodwill Lamp Makeover

Love it? Pin it!
OMG Erin! I just found your site and you have so much great info on here! I will do the paint bins project soon, and use as planters on my deck. And will subscribe to your site. I’m also going to soon do my organize-spice-drawer project, and it looks like you have help for that too! I love your site! Thank you!
EXCELLENT SPRAY PAINTING PLASTIC INFO!! Thank you for including PICS & KEEPING IT SIMPLE & HONEST!!!
I love this idea! Can these painted bins be used to hold ice & cold drinks at a party?
I am honestly not sure how that cold would affect the spray paint on the bins. If it were me, I would spray paint the outside and leave the inside (where placing ice and drinks) the original color. If you decide to try it, please let me know how it goes.
Thank you, I have so many mis-matched plastic bins. This idea helps me immensely.
Thanks for this! I am about to try spray painting some small laundry baskets to use for toy storage. They are smooth so I was nervous about the paint sticking. Sounds like I have nothing to lose though!
Hi there!! I have vintage Tupperware containers that my ex wrote on (sugar, flour etc) and I want to spray them to start fresh. It has a bumpy matte finish. I’m not creative so I have no idea where to start!
Thanks! Katrinka
I did the same thing some years ago. I needed a long box planter to put on the “bar” sperating the kitchen and living area o my new home. All I could find was the basic terra cotta plastic planter. . Since it was a matte finish so I took it out and spayed it lightly with the same brand of paint – black matte. Four years later, still looking as good as the day I finished it, I think it got abor four or five coats of paint. I waited about an hour or more between coats.
Have a question about sequence…what should be painted first — inside of bin or outside? And do you paint the very bottom of the bin (I’m assuming you do but thought I’d ask). Thanks so much for this post. Gave me lots of direction and insight.
It really doesn’t matter it you decided to spray paint the inside or outside first, just make sure you allow the paint to thoroughly dry before flipping it over to paint the opposite side. I decided to spray paint the bottom of the bins, but that’s personal preference. You could leave them unpainted if you choose.
Hello. I am wanting to spray paint all of my classroom bins to match my new theme. I am trying to get an idea of how many cans of spray paint I will need. How many cans of primer and paint did you need for the mudroom bins?
Hi Kelly-
I would say that you could probably do 4-6 bins with one can of spray paint. In my mudroom, I did all 6 with one can, I believe (although I may have needed to start another can… I can’t quite remember. I certainly did not need 2 full cans for them though). Hope that helps as you create your bins.
Hi! Just wanted to check if you were able to paint your classroom bins? I’m thinking of doing this for my classroom book bins. Please let me know if it worked with yours, what you used, and how you did it. Thanks!
Thank you for sharing this! I’m trying to make over my apartment (on a budget, of course) but I was really skeptical about the practicality of spray painting plastic.
Hi! My husband is going to spray paint clear rubber maid plastic bins to hold toys. Should we spray paint the inside or outside of the bins? This is the spray paint we bought: Valspar Color Radiance Nautical Enamel Spray Paint.
Hi Mandy- I would definitely recommend spray painting the outside of the bins. Even with spray paint that is made to adhere to plastic, there can be slight chipping, and if you are using the bins for toys, I would think that having the paint on the inside (where toys are being tossed in and taken out), would increase the likelihood for chipping. Hope that helps 🙂
Hi, I’m wondering if instead of sealing with ModPodge after, would it make sense to “prime” with the ModPodge, and then the spray paint of your choice? Thanks!
Hi Stephanie! Great question. What I would actually recommend is priming the plastic with a spray paint primer (like this one (affiliate link): http://amzn.to/2FwR1Q3). Notice that it actually states that it bonds to plastic 🙂 That should then allow the spray paint to work better (vs. Mod Podge). Hope that helps.
What would you suggest for painting a large Rubbermaid Trash Can? It will be for a wedding so we would like to paint them white. Thanks
Lisa
First, congratulations on the upcoming wedding (whether for you or someone you love 🙂 ). Here would be my ideas on spray painting the Rubbermaid Trash Can. First, I would LIGHTLY sand it and then clean it off well with a damp rag and let it dry. This allows for better adhesion… Then I would spray it with a PRIMER, like this one (affiliate link): http://amzn.to/2FwR1Q3 Notice it states that it BOND TO PLASTIC (that’s super important). After that has thoroughly dried, spray paint with a white spray paint of your choosing. Hope that helps!
Hi, been looking into painting plastic and found your info helpful. Rustoleum makes a plastic primer product, which can and should be painted over with ANY paint. I’m excited to try, though product only available in a two pack @$27. Krylon also sells a paintable paint for plastic, but requires sanding, etc. ?
What’s the best way to clean the outside of the bins without the paint chipping? Is it water safe?
If you are simply dusting them off a bit, I would go over them with a damp sponge (just water). If you sanded down the glossier plastic, or used the bins that already had a bit of texture to begin with, you could add a bit of mild soap to the water, or use something like this DIY cleaning spray: https://www.lemonslavenderandlaundry.com/cleaning-tip-tuesday-diy-all-purpose-cleaner/
Hope that helps 🙂
This post has just saved me soooo much money! I just changed my classroom theme and decor and thought I would have to purchase all new baskets and bins. I’m headed to the hardware store tomorrow!!!!!! THANK YOU SO MUCH!!!!!!
YAY! New bins can cost SO much money, and I don’t think we often think of painting bins that aren’t necessarily our style, but if you think outside the box, it’s amazing how much money you can save. Good luck on designing your new classroom this year!
Brilliant! I found this post via Pinterest as I too have multi-(fun) colored bins from the dollar tree in my kitchen. I’m looking for more cohesion, plus I really like white in a kitchen and these bins are never not produced in a fun color. That does make them perfect fit my kids’ rooms, however. So I want to be able to spray them white and still use them daily without chipping.
I’m curious now about an update from you: have your bins held up well since this post?
Thanks for this info. I’ll be using it soon hopefully!
The ones in our pantry (glossy plastic with spray paint and a Mod Podge “seal”) have chipped a little bit over the past 20 months. However, the ones on our coat closet and bathroom (a slightly textured plastic with a spray paint that stated it could be used on plastic) has held up extremely well. No chipping at all. Hope that helps… and wouldn’t it be great if dollar stores started making neutral colored bins? 🙂
this is BRILLIANT! I had no idea that spraypaint would work on plastic bins!
Thanks Lindsay. While I love fun colors, they aren’t exactly in line with my home’s decor scheme. I love the fact that this project is so simple and makes such a difference when trying to create affordable storage.