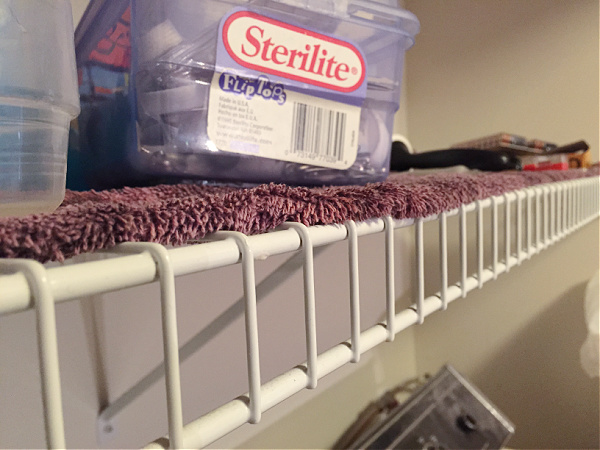
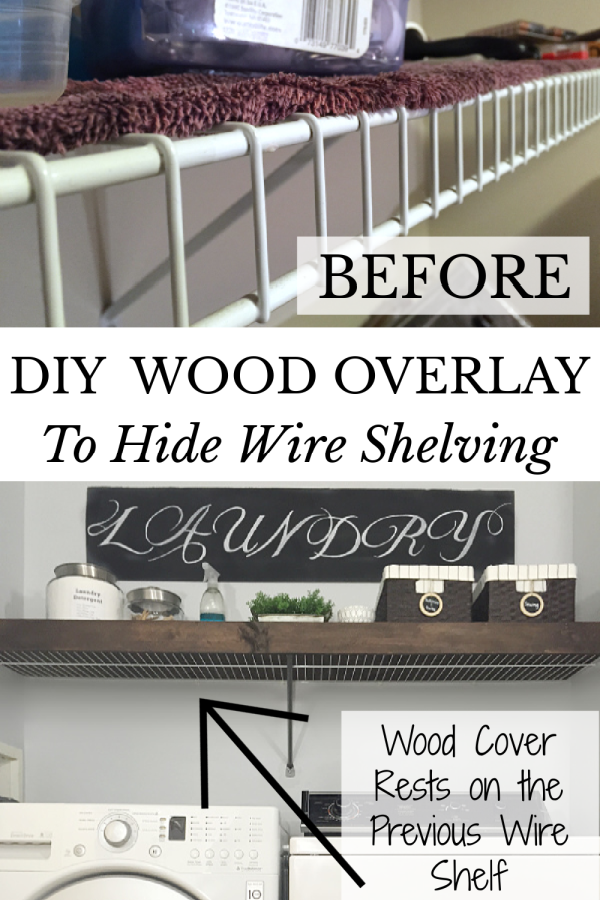
Anyone else hate wire shelving? Things don’t sit quite right and everything falls through the cracks… plus it’s ugly. Instead of putting up with it, we made a wood overlay to hide the wire shelving in our laundry room; and the overlay simply sits on top of the original wire shelf.
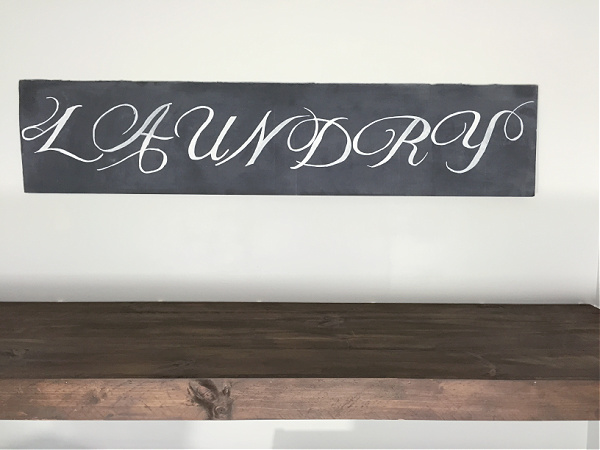
It is week 5 of the One Room Challenge, and we are working on a $100 Laundry Room Makeover. So far I have painted walls, painted the dryer to match the washer, created a lint box from a cereal box, used a piece of cardboard to create a chalkboard laundry sign, and more. But this DIY wood shelf has got to be my favorite thing. This is what our laundry room shelf looked like prior to the start of this project… Yep. That’s a towel I used to prevent things from falling through the cracks.
How to Make A Wood Overlay to Hide Wire Shelving
Affiliate links may be used. Please see our advertising disclosure for more information.
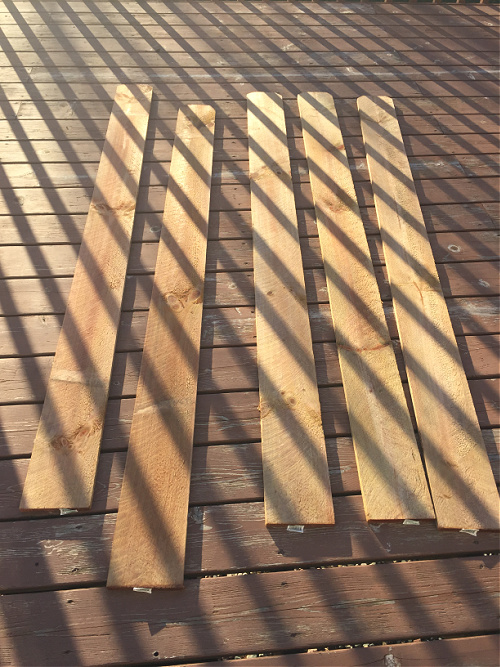
Because I had a limited budget of $100, I knew I wasn’t going to replace the shelf. Instead, I wanted to create an overlay that would mimic a chunky wood shelf. Initially, I thought we’d cut a large piece of plywood down to size, but it was expensive. (You pay for the whole piece, unless you can find something in the scrap pile for 70% off; which I could not). Instead, we found some cedar fence posts; they are lightweight and $2.25 per post (we needed 5). Our shelf was 71″ long, and the posts were 72″ (perfect because there was a 1″ cutout at the top of each post… great for a picket fence, not great for a shelf). When we bought the posts, they were really wet, so we laid them out to dry.
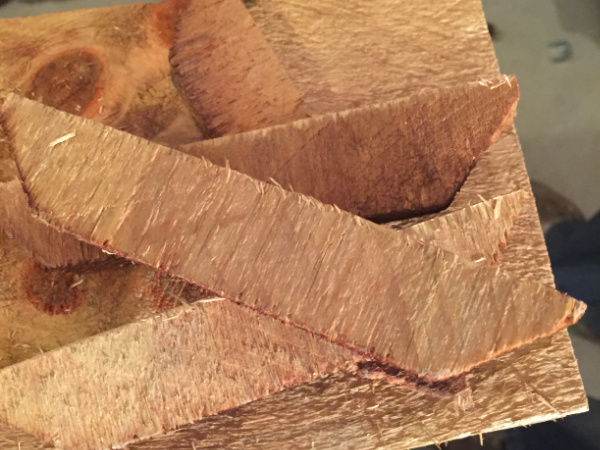
As noted, we cut off one inch from the tops of the posts where they were angled.
Our shelf has a depth of 20″, so we attached four of the fence posts together using 5/16″ dowels and wood glue (the fifth post will be used for the overhang). Please Note: You will need a dowel jig for properly placing the wood dowels, and clamps to hold the wood pieces together while the wood glue dries.
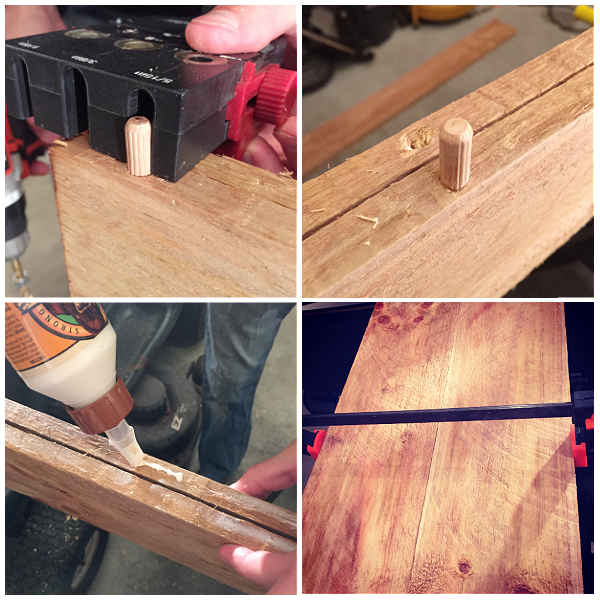
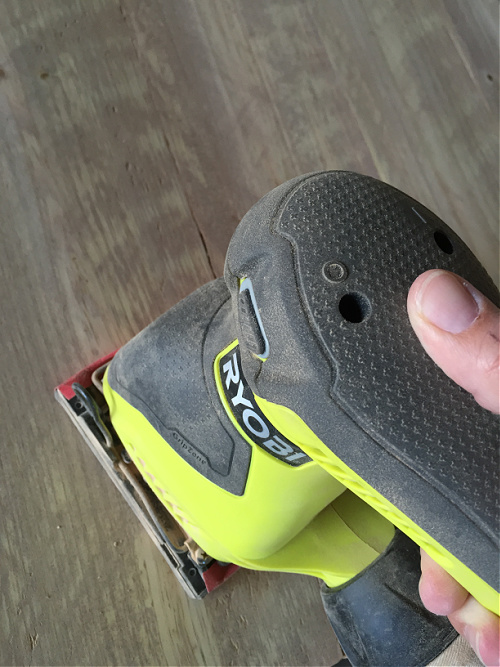
After the glue had completely dried, we sanded the boards with a handheld sander, starting with an 80 grit sandpaper, and working up to a 220 grit.
Because there is an overhang to the wire shelf, we cut the last post to create the front lip of the shelf. After sanding it, we used wood glue, and then clamped the front onto the larger shelf piece. While still clamped, we used a nail gun to secure the overhang to the shelf. (I don’t have a picture of this. Sorry.)
Once everything was good and dry, I stained the shelf in the color Kona.
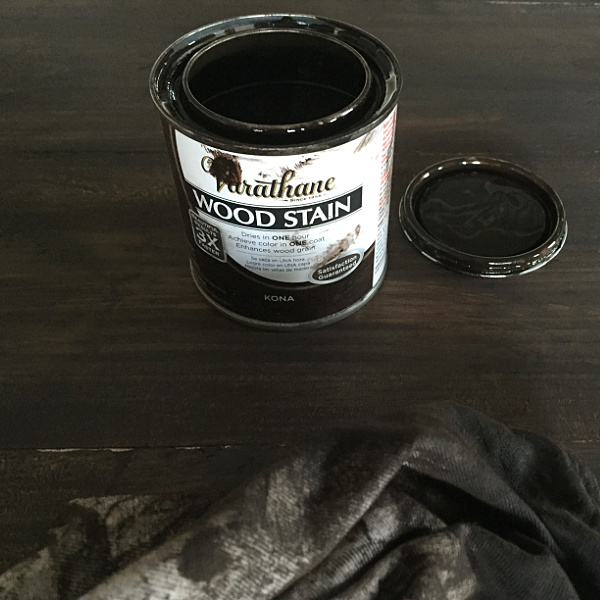
We then allowed the stain to thoroughly dry. Truth-be-told, we never got around to this next step, but you should apply a couple coats of polycrylic to seal and protect your wood.
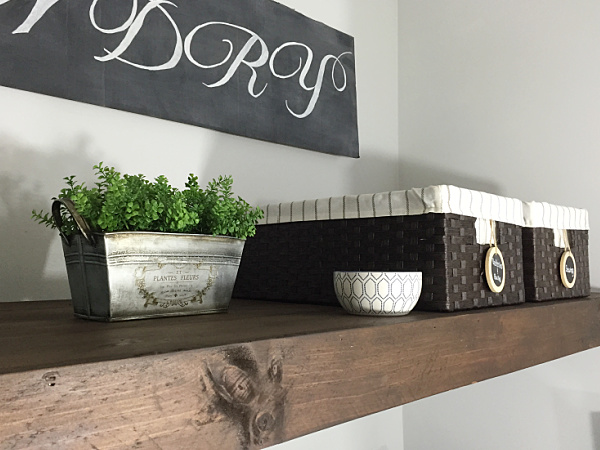
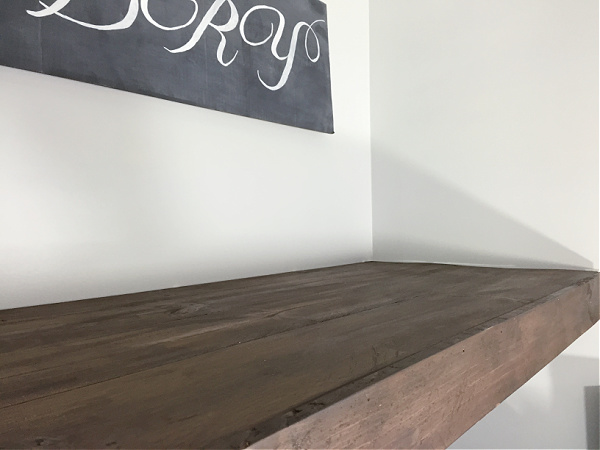
When we brought the shelf upstairs, we simply laid it on top of the existing wire shelf, and that was all there was to it. In the picture below, you can see how the wood overlay sits on the wire shelf.
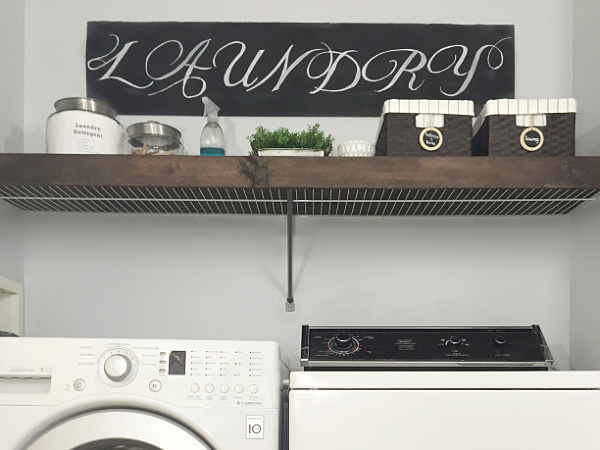
I did spray paint the support, as you can see. I thought the white would look funny, so I removed the support and sprayed it with hammered metal spray paint.
Below are some images of the wood overlay from various angles so you can see how it sits on the wire shelving.
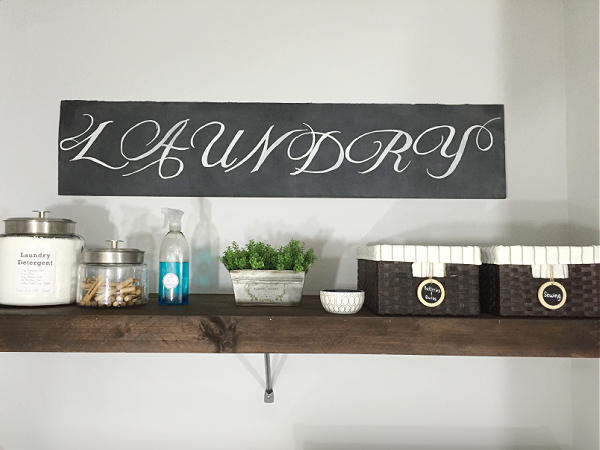
The Before & After
I just love how this turned out!!! Goodbye wire shelving, hello beautiful wood shelf!!!
UPDATE: We ended up loving this project so much, we did the same thing in our coat closet.
The Budget So Far
Last week I had spent a total of $19.24. Let’s breakdown the cost of this DIY Wood Overlay.
- Cedar Picket Fence Posts (x5)- $11.25 ($2.25 each)
- Stain & Supplies- FREE (Already had)
- Polycrylic Spray– $7.78 (While I haven’t used this yet, I am factoring it into the budget)
- Hammered Metal Spray Paint– FREE (Already had)
Total So Far: $38.27
Wanna Catch Up or Jump Ahead?
Week 1 | Week 2 | Week 3 | Week 4 | Week 5 | Week 6
We think you might also love these ideas!
How to Hide Wire Shelving for A Dollar | DIY Barn Door From Bifold Door | How to Update A Tub Surround

Love it? Pin it!
I love this idea!!! Would you explain in more detail how you used the dowels and dowel jig to attach the posts together?
A dowel jig is used to make sure you drill into the wood only so far so your dowel fits. So you end up drilling a hole into the sides of two boards, and use the wood dowel to connect them together (kinda like a puzzle piece). Adding wood glue helps keep everything together. I know that’s a very simple explanation. I wish I could draw out a picture and share it in more detail.
I love this idea! Question = We have two brackets that will be exposed. I was wondering if you have a tip that would help to cover them as well. Perhaps a rod to hang clothes on between the two brackets, that would make them appear as purposeful with the new wood covering? ‘My space is 8 feet long with 2 brackets, in the middle, with about 2 feet of space between them.
This is great! I have seen the closets redone like this but that is over the top in my opinion. However, I have almost the exact set-up in my laundry room and would love to update it! Thanks for the DIY inspiration.
Absolutely love this idea. It will be made for my house for sure.
Wire shelving is the worst. This looks awesome, particularly the detail of painting the white support. I wish I would have thought of that. Instead, we built a shelf with the front lip (I did have some leftover plywood which is only about $32 a sheet) and used two 1.X4 attached to the wall on each side.
This is one of the best, most amazing things I have ever seen. Thank you, thank you, THANK YOU!!!!
You are so welcome Bethany! It’s one of my favorite things in the laundry room… Loved it so much we did the same thing in our coat closet 🙂
Love it!Hate those wire shelves so I am definitely going to do this.thanks for sharing
I just don’t understand wire shelving at all! Glad you enjoyed the post. Good luck making yours 🙂
I have spent hours trying to cover the too expensive wires from container store in our kitchen, laundry area and back work area. (That’s where my husband and I each get a side, but somehow his stuff migrated. He thinks 10 years taxes belong near CF bulbs.). I’ve tried magnets. I like this. How did you get it to stay on? Or I can just ask someone.
This shelf actually isn’t attached to the wire shelving at all, it’s simply set on top and resting on the old shelf.
I absolutely love this idea! So smart! definitely pinning to remember this one!
Thanks for sharing Kristen! Have a wonderful day!
So smart! What else can I say?
Awww… Thanks Merri!
I love this project & would like to give it a try but I have never worked with dowels before. What kind of dowel tool would I need and one that would line up the dowels from one post to the other?
Hi Essie- I am SO sorry it took me so long to answer this question. My husband was the one that did the dowels, and I kept meaning to ask him what the tool was called that helped create the holes for the dowels (and I kept forgetting to ask). I finally did, and he had no idea what it was called either 🙂 I did a little searching, and what you’ll need is a “dowel jig”. Basically, what it does, is allows you to drill the correct size hole for your dowel at the right depth. Here’s a Youtube video I found, just to show you the process: https://www.youtube.com/watch?v=y_CQ-RBT4rc (The guy talks a lot at the beginning, but if you go to minute 6:46, he shows you what to do with it.)
Thank you Erin, We were able to find what we needed. It took a bit before we figured out how to use the dowel jig but we are just finishing up our first project with it. Before the next one I will be sure to check out the video. Thanks again.
Awesome! Glad you were able to figure it out.
Erin I have the exact closet shelf and am doing this today!! can you still hang coat hanger on the rack? maybe add an extra slat so it sticks out farther?
I actually covered the slats where you would hang things, but you can check out what I did in my coat closet, where I did the same overlay concept, but spray painted the wire shelving so it wouldn’t be white against the darker wood (link below). My coat closet does have an extra piece on it for hanging coats, however, so I don’t know if you have that. Here’s the link: https://www.lemonslavenderandlaundry.com/100-room-challenge-coat-closet-reveal/
Wow, it looks great! What a great and economical idea.
Thanks Liz! This was a really fun project that completely changed the look of the space.
Love your whole little room. Hubby and I are getting ready to move laundry to a closet and I love this whole remake. Thank you for sharing. I don’t have any shelf at all yet but have 5 pickup loads of scrap wood we cleaned out of the house so I’m sure I can find something
Thanks Cheri! Sounds like you’ll be able to create something with all that wood. Good luck with the laundry move.
I was glad to come across your website. I have seen your shorter version showing the wood-covered wire shelf and was amazed. I’m surprised the wood is not too heavy for the wire supports. Did you have to add any extra bracing? I also like the fact that when the bottom of the wood was painted the wood color, it made a nice pattern on the bottom. One more question. Where did you put the detergent, fabric softener, bleach, and other necessary stuff? Thanks very much for this article.
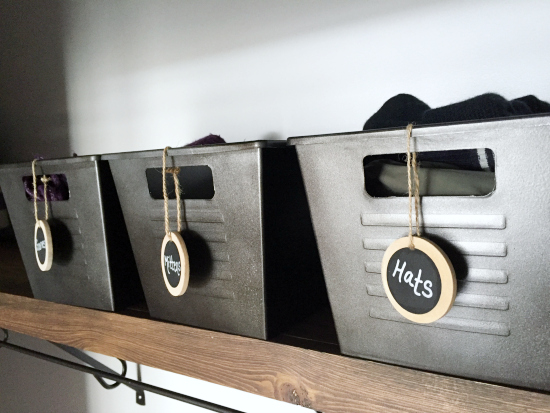
Thanks for your questions. About the wood overlay; we used cedar, which is a very light-weight wood, so it does not add a lot weight to the shelving, and because the weight is evenly distributed across the shelf, we did not add any additional brackets for support. As far as where I put all my stuff… The laundry detergent you see in the befor pictures was almost gone. I decided to DIY my own version (which was powder), so it’s in the big glass jar. Most of the other things that were on that shelf (static guard spray, my sewing kit (that small bluish/purplish tote), dryell, etc.) went into the baskets that are now on the shelves. I moved my bleach down to my cleaning closet because I never actually use it for anything expect cleaning up after the stomach flu. Hope that answers your questions.
Erin, it is such a small detail but it makes such a difference. Really nice idea! Because a finished room is in all of the details.
So true Mary!
Wow, what an improvement over the wire shelving. It looks custom and gotta love free! Pinning!
Thanks Lucy!
Honestly I was searching Pinterest just last week for ideas to make our wire shelves (in our walk in robe!) look and function better. I love this, thank you!
You are so welcome! Glad you like it! Hope it works well for you if you decide to go this route!
Erin, this is amazing! Just…WOW! Why have I never thought of this?!
I ask myself that same question every day when I see how creative other people are. It’s amazing what you can come up with when you have a limited budget. And thankfully I had my hubby with me to point out how well the cedar posts would work.
I would have never thought that started as a wire shelf! I may have to steal this idea!
Steal away! 🙂
What a great idea!!! I have a few places where I would love to do this!!
I know! We have wire shelving in our closet and it always leaves ridges in our clothes, so we’re thinking of doing this in there too.
I LOVE this idea! I need a shelf in my laundry room and this is genius!
Pinning!
Thanks Karen! If you decide to go with this idea (or any idea really), I’d love to see what you come up with.
yes, i was waiting for this post today! I would have never thought of fence posts, but the thickness is perfect! Are you able to share how many dowels you used per post to attach? I was thinking 3, but figured you may have found a different number to be sufficient.
I was SO happy that my husband pointed out how well the fence posts would work, and I think they turned out better than I could have hoped for. In answer to your question, I believe we used 5 dowels in between each post, but you could certainly adjust that number depending on the length of the shelf. Have a great day Lisa!
I love this DIY and may have to copy it! I have been wanting to cover my wire pantry shelves for years. Great job!
Thanks Melanie! It was a pretty easy project and made a world of difference!
Erin I love how you updated your shelf while keeping the previous one there! Amazing job!! I love the dark stain with the rest of your decor!! 🙂
Thanks Ruthie!
Hi, Erin ~ You and I must be on the same wavelength, because I was just sifting through different ideas for how to cover our ugly wire shelving. Your idea is my favorite! It’s so beautiful, and I love anything wood. I’m pinning this to refer to when we redo our messy and ugly hall closet. Thanks for sharing and awesome job!
Thanks Tiffany. Glad you like it! I just don’t understand wire shelving at all. Excited for your hall closet redo 🙂
Hi Erin: re you “not understanding wire shelving”, back in the mid-80’s building boom in Ontario, we bought a new build & wire shelving was a considerable added “extra” cost to the basic house price. Many preferred it over wood as it was felt there was better air circulation in closets – especially linen cupboards. I no longer have “male help” in cutting wood, etc. so I painted clean cardboard with white acrylic (to blend with the wire) and lay that down before stacking clothing on top, thus, no ridges on my clothes. I like your shelves very much, though, and wish I could do that!
That actually makes so much sense, allowing more airflow in closets. Thanks for sharing that. I am actually looking into ideas to cover the wire shelving in our master closet because all my clothes have wire imprints; not sure if I’ll do wood again or try something different.
Yes, it’s funny to see what was so sought after in the 80’s is now considered a nuisance but as I said, it was much desired then and was expensive when buying a new house. Since I’m now a widow, I’ll have to stick with the cardboard idea.
This is SO incredibly clever and crafty Erin! Great work.
Thanks Laura!