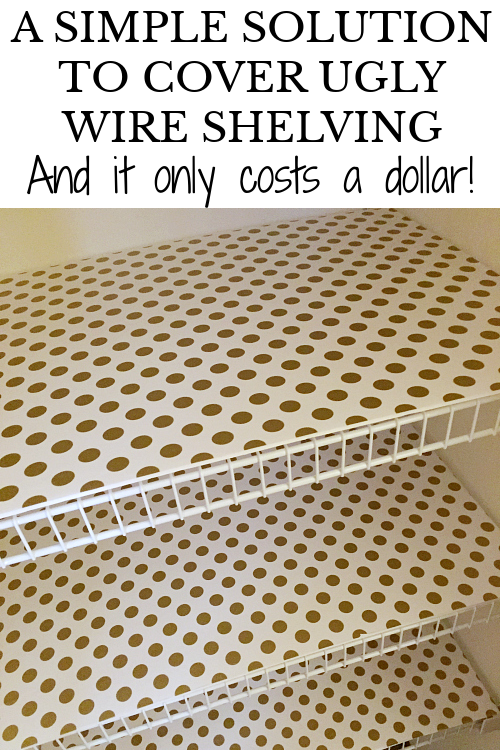
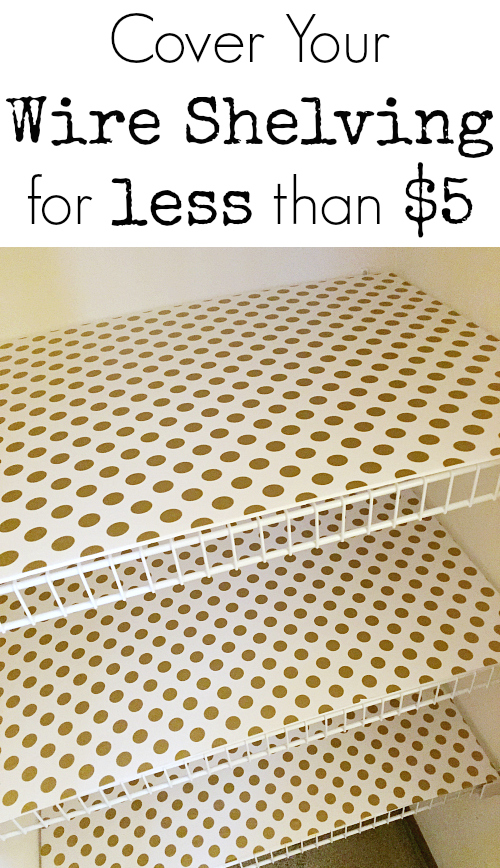
During the month of December, I am working on our linen closet for the $100 Room Challenge. One of the first things I wanted to tackle were the wire shelves. Wire shelving makes me want to scream. Things are always falling through the cracks and tipping over on the uneven surface. In the past, we have made wood overlays to cover the wire shelving in both our laundry room and our coat closet; and while I absolutely love the way these shelves turned out, I decided to try something a little different this time. For less than $5, I was able to cover all the wire shelving with foam board and wrapping paper.

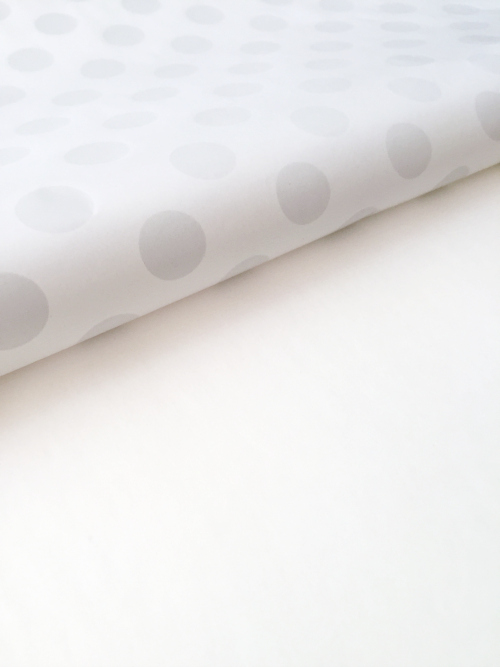
As I mentioned, wood overlays have been our go-to when it comes to covering wire shelving, as you can see in the image below. The overlay simple rests on top of the original wire shelf.
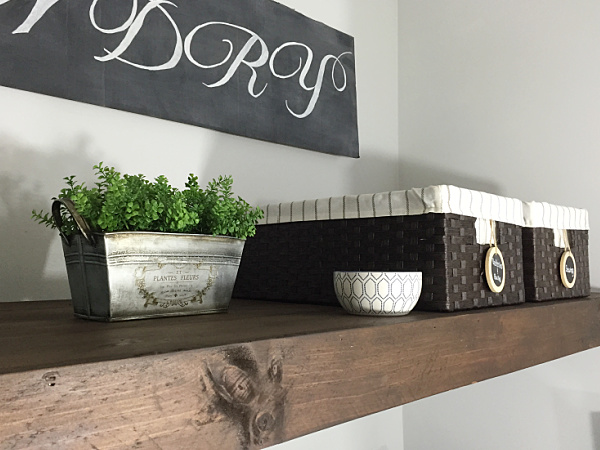
While I have fallen in love with this look, it seemed a bit much to put them in a linen closet. After all, it’s a tiny closet that only gets opened when someone needs a clean towel or more toilet paper. Still, I wanted to cover the wire shelving with something. Enter foam board. Yes. You heard me right. I’m making foam board shelves in the linen closet. Let’s go.
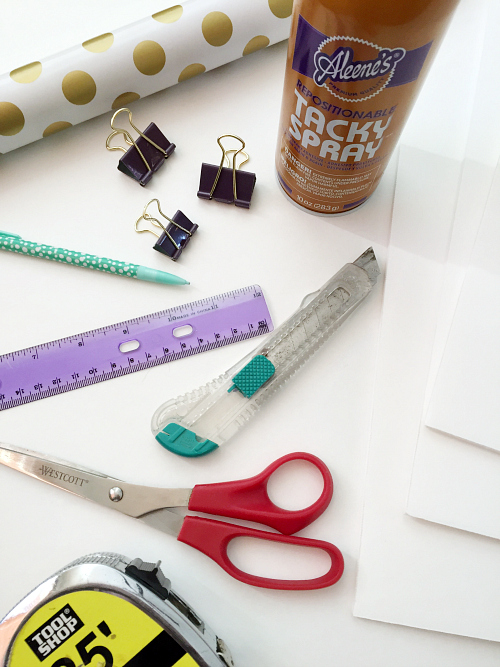
What You Need to Make Foam Board Shelves
Affiliate links may be used. Please see our advertising disclosure for more information.
- Tape Measure
- Foam Board (One for each shelf)
- Ruler
- Pencil
- Utility Knife (If you need to cut the foam board to size)
- Wrapping Paper (Optional)- Others options (that would be stronger than wrapping paper) is contact paper or fabric. You could also paint the foam board.
- Adhesive Spray (If applying wrapping paper)
- Binder Clips (If applying wrapping paper)
How to Cover Wire Shelving with Foam Board
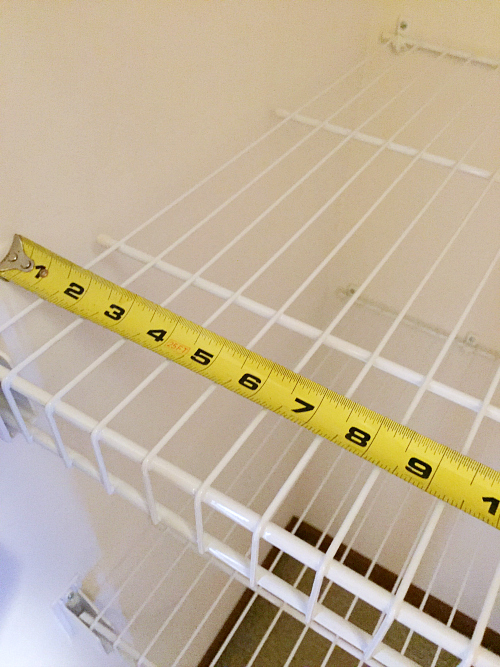
Start by measuring the current wire shelves with a tape measure. Mine measured 20″ x 30 1/2″ and I could not even believe it when the foam board measured 20″x 30″. What?! I didn’t even have to cut the board to size?! Hallelujah! If you happen to have a smaller shelf size, cut the foam board to the appropriate size with a utility knife. Make sure to check the measurements for accuracy.
Truthfully, you could just lay the foam boards on your wire shelves and call it a day, but I wasn’t super excited about plain, white foam board shelves, so I decided to cover them with wrapping paper.
Other ideas would be to paint the foam board or cover it in fabric or patterned contact paper (which was my original idea, but contact paper is 2 inches shorter than what I needed. Bummer.)
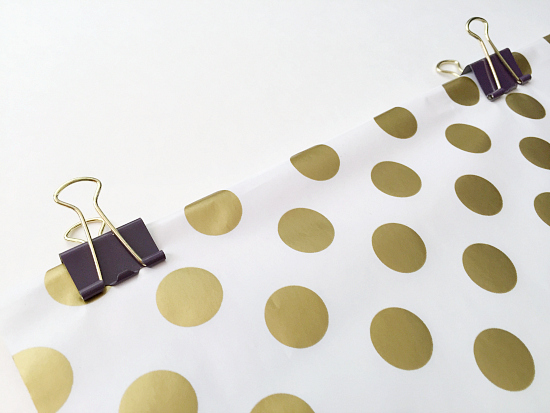
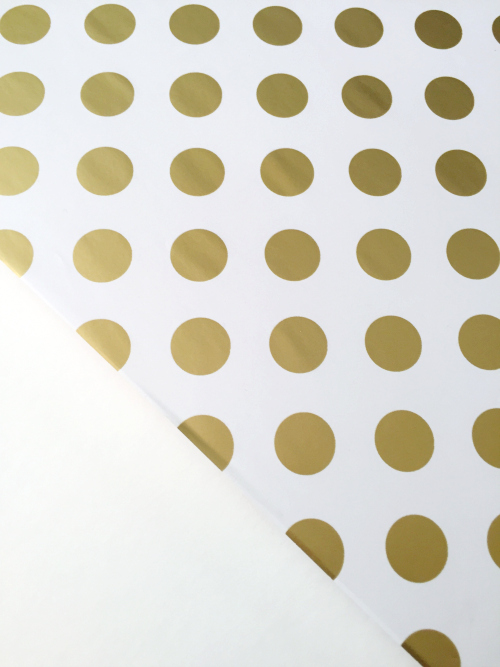
Cut the wrapping paper to the size of your foam board, adding an extra 1/2 inch on each side. So, for my 20 x 30 inch foam board, I cut 21 x 31 inches of wrapping paper. This allows for wrapping the paper around the sides. (The width of my wrapping paper did not allow for a wrap-around, so I just wrapped the length.)
Using binder clips, adhere the wrapping paper to the foam board. The reason for this is so you can get the pattern straight, and lined up appropriately.
Lift the wrapping paper up over the clips…
… and spray the foam board with some adhesive spray. (FYI, adhesive spray should be used in a well-ventilated area. Make sure to read the instructions for proper use.)
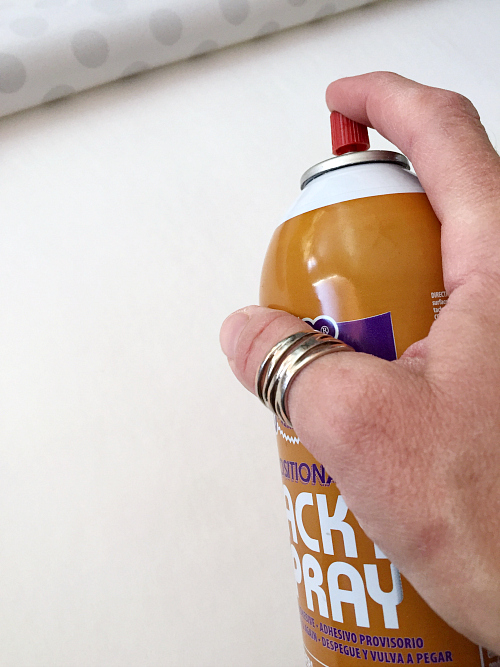
Then smooth your wrapping paper onto the foam board (I used a ruler to help smooth it down), wrapping that extra 1/2 inch around the edges. Then unclip the wrapping paper and spray underneath the part where the clips were holding it.
Lay your wrapping-paper-covered foam boards onto the shelves, and you’re done!
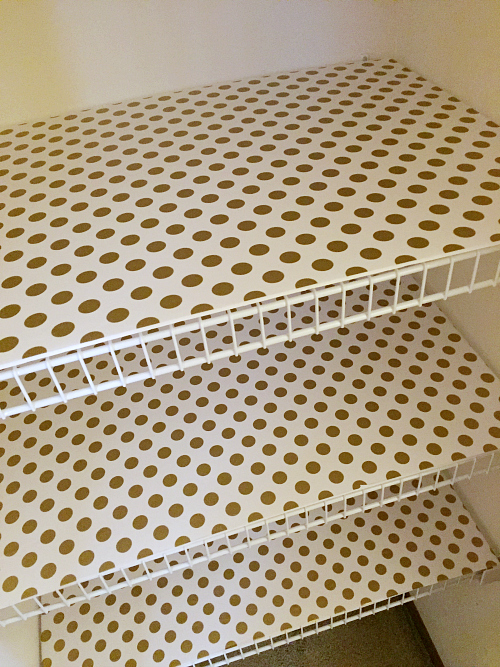
What an easy way to add a little color and pattern while covering up the ugly wire shelving!
Budget… So Far
Being that this is a $100 Room Challenge, I like to keep you up to date on how much money I’ve spent. Here’s this week’s budget:
- Foam Board x4 (Similar)- $4.00 ($1.00 each)
- Wrapping Paper (Similar)- FREE (I already had it on hand)
- Adhesive Spray– FREE (I already had it on hand)
Total Spent So Far= $4.00 (Not bad!)
Wanna Catch Up or Jump Ahead?
Week 1 // Week 2 // No Week 3 // Week 4
We think you might also love these ideas!
How to Update Plastic Dollar Store Bins | Dollar Store DIY: Vintage Clipboard Gallery Wall | Goodwill Lamp Makeover

Love it? Pin it!
I’m also using cardboard like some others did. I bought some peel & stick to put around the cardboard. I should be able to do 4 closets for about $10. I am the same as you. I detest wire shelves. The most impractical product put in homes. Normally I take them out and put wood shelves in but right now I need a cheap solution. This should work.
Hello,
I do love this idea.. would you be able to just use peel and stick wallpaper on the foam board instead of wrapping paper?
This a great idea for my greenhouse/she-shed shelving as well with vinyl contact waterproof paper as well. Tks
I just finished part of my laundry room wire shelves with this method, but I cut my foam board long enough to cover the front. Love it so far.
Hi, I love your idea about covering the front of the wire shelf. Did you cut the foam board and glue the front? Not sure if my question make sense. Because thats what I really want to cover is the front of the wire shelf. Thank you.
I have done this when we moved into this house except I did not sue foam board. As we had just moved we had lots and lots of cardboard boxes. I just used them. I covered some in pretty paper and some in fabric. I too used modpodge on some and spray glue on others. I have covered the cardboard too and used it in dresser drawers to line them
I LOVE UR IDEAS!!!
Great idea! Any concern about the wrapping paper ripping is easily solved with a coat or two of mod podge. I covered bookcase shelves with fabric using it as both a glue and sealant and 5 years later they’re in perfect condition and a damp rag wipes off dust and sticky kid fingerprints. I love the stuff!
Totally agree about wire shelving, which we have in every closet. Its only saving grace is that when we bought this place, an estate sale house much in need of TLC, the shelving was filthy. You can take wire shelves out and clean them with relative ease. It’s still not fun, I’m just glad we had enough head start on renovations before moving in or those shelves would probably still be filthy four years later, wire or no wire.
I’ve definitely bookmarked this idea for future use. I’m not 100% convinced about the gift wrap paper part; wrapping paper tears when you look at it. But the covered foam board part is good. Maybe the same tablecloth fabric from Joann’s that I’ve used to line drawers and cabinets; it comes in 54 inch wide yardage and is very cost effective when you (of course) use your coupon.
FYI: Dollar stores (Dollar Tree, Dollar General, etc) can be good places to buy foam board without breaking the bank. The price for foam board at craft stores is even more brutal than for Styrofoam.
Yes! Always buy foam board at the Dollar Store! (Only place I’ve ever bought it 🙂 ). As for the wrapping paper, I have had one piece rip a bit (since I completed this makeover in December) and it’s the one that holds the large bins. I definitely think covering the foam board in fabric would be great, and would probably hold up better than the wrapping paper over time. Thanks for your sharing your thoughts 🙂
I love it! But how do you keep the foam boards from sliding off the shelf? do you have them attached somewhere?
I didn’t need to attach the foam boards to anything. Since there are objects sitting on them, they stay in place, and there are slight indents with the wall on either side of the door, so the shelves would never fully slide out of the closet. Hope that makes sense.
Love, love, love this idea!
As much as I love the wood overlays, this project was perfect in the linen closet… and you just can’t beat $4!
Cheap and looks great. Who could ask for more!
You did good Erin.